Black & Decker 12-Cup Coffee Maker Manual: Comprehensive Guide
This guide offers detailed instructions for Black & Decker 12-cup coffee makers (CM2046, CM0915BKD-FD, DCM100B, CM2035SM, CM1070B),
covering setup, operation, cleaning, and troubleshooting for optimal brewing.
Welcome to the world of convenient coffee brewing! This Black & Decker 12-cup coffee maker is designed for ease of use and consistent performance. Whether you prefer a quick morning brew or a larger pot for gatherings, this appliance aims to deliver a satisfying coffee experience.
This manual provides comprehensive guidance for models like the CM2046, CM0915BKD-FD, DCM100B, and CM2035SM. Understanding your specific model’s features is key to maximizing its potential. Expect to find details on programmable functions, cleaning procedures, and troubleshooting tips. A standard cup is approximately 5oz, though this can vary based on brewing preferences.
We’ll cover everything from initial setup to maintaining peak performance, ensuring years of flavorful coffee enjoyment.
Understanding Different Models (CM2046, CM0915BKD-FD, DCM100B, CM2035SM)
Black & Decker offers several 12-cup coffee maker variations, each with unique features. The CM2046 is a thermal programmable model, boasting an Auto Clean function lasting 45-60 minutes. The CM0915BKD-FD is a standard 12-cup coffeemaker, documented in converted PDF format.
The DCM100B, and its variant DCM100W, is a programmable model detailed in its use and care book. The CM2035SM is a thermal programmable option, with a manual outlining important safeguards and control panel functions. While core functionality remains consistent across models – brewing delicious coffee – specific features like auto-clean or programmable settings differ.
Refer to your model number for precise instructions, as this guide covers commonalities and variations.
Setting Up Your Coffee Maker
Proper setup ensures optimal performance. Begin with initial cleaning, understanding water reservoir markings (10/12-cup), and utilizing compatible paper filters within the brew basket.
Initial Setup and Cleaning
Before your first brew, thoroughly clean your Black & Decker 12-cup coffee maker. Remove all packaging materials and wipe down the exterior with a damp cloth. Wash the carafe, lid, and filter basket with warm, soapy water; rinse completely.
To initiate the cleaning cycle on the CM2046 model, add cold water to the 10-cup mark. Insert a basket-shaped paper filter, close the lid, and place the empty carafe on the warming plate. Press and hold the POWER button for five seconds to activate the Auto Clean function.
This automated process takes approximately 45-60 minutes to complete, effectively removing any manufacturing residue. Always ensure the coffee maker is unplugged during manual cleaning. Regular cleaning maintains optimal flavor and extends the lifespan of your appliance.
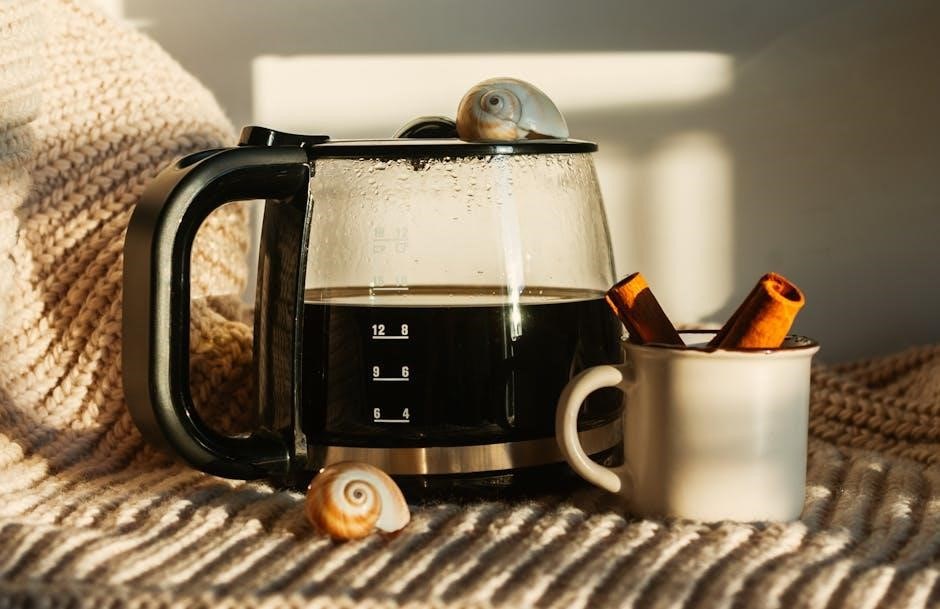
Water Reservoir Capacity and Markings (12-Cup/10-Cup Mark)
The Black & Decker 12-cup coffee maker features a clearly marked water reservoir, crucial for accurate brewing. The reservoir indicates both a “12-Cup” and a “10-Cup” maximum fill line. Remember that one cup is generally approximated as 5 ounces, though this can vary slightly depending on your brewing preferences.
When utilizing the Auto Clean function (specifically on the CM2046 model), it’s essential to fill the reservoir only to the 10-cup mark. Exceeding this level during the cleaning cycle may cause overflow. For standard brewing, you can fill up to the 12-cup mark for a full pot.
Accurate water measurement ensures the correct coffee-to-water ratio, resulting in a consistently flavorful brew. Always refer to the markings on your specific model for precise measurements.
Paper Filter Requirements & Brew Basket
Your Black & Decker 12-cup coffee maker requires the use of standard basket-shaped paper filters for optimal brewing performance. These filters effectively trap coffee grounds, ensuring a clean and sediment-free pot of coffee. Ensure the filter fits snugly within the brew basket to prevent grounds from overflowing during the brewing process.
The brew basket is designed to accommodate standard #4 cone filters, readily available in most grocery stores. Before adding coffee grounds, always place a fresh filter into the brew basket. After brewing, carefully remove the used filter and grounds for disposal.
Regularly cleaning the brew basket itself is also important to maintain coffee quality and prevent residue buildup.

Operating Instructions
To brew coffee, fill the reservoir, insert a filter with grounds, place the carafe on the plate, and press the POWER button. Programmable features enhance convenience!
Powering On and Off
Initiating the brewing process is straightforward: simply press the POWER button. For models like the CM2046, a sustained press and hold – approximately 5 seconds – is required to activate functions such as the Auto Clean cycle. To deactivate the coffee maker, press the POWER button again. This ensures the unit is safely switched off after brewing is complete.
Note that some models may feature an automatic shut-off function, activating after a period of inactivity. This safety feature conserves energy and prevents overheating. Always ensure the coffee maker is completely powered off before attempting any cleaning or maintenance procedures. Refer to your specific model’s instructions for detailed power operation guidance.
Brewing Coffee: Step-by-Step Guide
Begin by filling the water reservoir to the desired level, utilizing the cup markings – typically up to the 10-cup mark for optimal results. Insert a basket-shaped paper filter into the brew basket, ensuring it’s properly seated. Add your preferred ground coffee to the filter. Place the empty carafe securely onto the carafe plate.
Press the POWER button to initiate the brewing cycle. For programmable models, ensure the timer is set correctly if you wish to delay brewing. The coffee maker will automatically heat the water and brew the coffee, dispensing it into the carafe. Once brewing is complete, the unit may automatically switch to a warming cycle.
Using the Programmable Features
Black & Decker coffee makers, like the CM2046 and CM2035SM, often include programmable features for convenient brewing. To set the timer, first, press the “PROG” or “PROGRAM” button. Use the “HOUR” and “MINUTE” buttons to set the desired start time. Ensure the coffee maker is plugged in and the current time is correctly displayed.
Next, add water and coffee grounds as you normally would. Press the “PROG” button again to confirm the programmed time; The indicator light will illuminate, signifying the timer is active. The coffee maker will automatically begin brewing at the set time. Refer to your specific model’s manual for detailed instructions, as button labels may vary.
Adjusting Brew Strength (If Applicable)
Certain Black & Decker 12-cup coffee maker models, though not all (like the DCM100B), may offer brew strength adjustment options. This feature allows you to customize the coffee’s boldness to your preference. Typically, this is achieved through a “STRONG” or “BOLD” button on the control panel. Pressing this button initiates a slower brewing process, extracting more flavor from the coffee grounds.
For a milder brew, simply do not press the “STRONG” button, resulting in a faster brewing cycle. Experiment with both settings to determine your ideal coffee strength. Remember to adjust the amount of coffee grounds used accordingly; more grounds for a stronger brew, and fewer for a milder one. Consult your model’s specific manual for confirmation of this feature.

Cleaning and Maintenance
Regular cleaning ensures optimal performance and longevity. Utilize the Auto Clean function (CM2046), and routinely clean the carafe, filter basket, and descale the appliance.
Auto Clean Function (CM2046) ー Duration & Process
The CM2046 model features a convenient Auto Clean function designed to remove mineral buildup. To initiate, add cold water to the reservoir up to the 10-cup mark. Ensure the carafe is securely placed on the carafe plate.
Press and hold the POWER button for approximately 5 seconds. This activates the cleaning cycle. The entire process typically takes between 45 to 60 minutes to complete. During this time, the coffee maker will heat and circulate the water, effectively dissolving mineral deposits.
Avoid interrupting the Auto Clean cycle. Once finished, discard the water from the carafe and rinse thoroughly. This function should be used periodically to maintain peak performance.
Regular Cleaning of Carafe and Filter Basket
Maintaining cleanliness is crucial for optimal coffee flavor. After each use, wash the carafe with warm, soapy water. Rinse thoroughly to remove any residue. The filter basket should also be washed after every brewing cycle. Remove any remaining coffee grounds and clean with soap and water.
For stubborn stains in the carafe, a solution of baking soda and water can be effective. Allow it to soak before scrubbing gently. The filter basket is often dishwasher safe, but check your model’s specific instructions.
Regular cleaning prevents the buildup of oils and minerals, ensuring your coffee always tastes fresh and flavorful. A clean coffee maker is a happy coffee maker!
Descaling the Coffee Maker
Descaling removes mineral buildup, vital for performance. For the CM2046 model, fill the water reservoir with water to the 10-cup mark and add a small amount of white vinegar. Initiate the Auto Clean function, allowing it to run for 45-60 minutes. Afterward, run two full brewing cycles with fresh water to rinse thoroughly.
For other models, a similar process applies: combine equal parts white vinegar and water in the reservoir. Brew halfway, then turn off and let sit for 30-60 minutes. Complete the brew cycle, then run several cycles with fresh water.
Regular descaling (every 3-6 months) extends the life of your coffee maker and maintains optimal brewing temperature.
Exterior Cleaning Instructions
To maintain your Black & Decker coffee maker’s appearance, unplug it and allow it to cool completely before cleaning. The exterior surfaces can be wiped down with a damp cloth and mild dish soap. Avoid abrasive cleaners, as they can damage the finish.
Do not immerse the coffee maker base in water or any other liquid. Ensure no water enters the control panel area. For stubborn stains, a slightly dampened cloth with a mild cleaning solution can be used, followed by a clean, damp wipe.
Regularly wipe the carafe plate to prevent mineral buildup. A clean exterior contributes to the longevity and hygiene of your appliance.

Troubleshooting Common Issues
This section addresses typical problems like the coffee maker not powering on, slow brewing, taste issues, or leaks, offering solutions for a perfect brew.
Coffee Maker Not Turning On
If your Black & Decker coffee maker fails to power on, first ensure the unit is securely plugged into a functioning electrical outlet. Verify the outlet is delivering power by testing it with another device. Check the power cord for any visible damage, such as cuts or fraying, and replace it if necessary.
Confirm that the coffee maker’s on/off switch is fully engaged. Some models require a firm press. Consider if a tripped circuit breaker or blown fuse might be the cause; reset the breaker or replace the fuse accordingly. If the issue persists, it could indicate an internal malfunction requiring professional repair or replacement of the unit; Always prioritize electrical safety when troubleshooting.
Coffee Brewing Too Slowly
If your Black & Decker coffee maker is brewing exceptionally slowly, the primary culprit is often mineral buildup. Descaling the unit is crucial; follow the Auto Clean function instructions (CM2046) or a manual descaling process using vinegar and water. Ensure the brew basket isn’t overfilled with coffee grounds, as this can restrict water flow.
Verify that a properly sized paper filter is correctly placed in the brew basket. Inspect the spray head for any blockages and carefully clean it. Consider the water hardness in your area; hard water accelerates mineral buildup. Regular cleaning and descaling will prevent slow brewing and maintain optimal performance. If the problem continues, contact customer support.
Coffee Taste Issues (Weak or Bitter)
Experiencing weak coffee? Use a finer coffee grind or increase the amount of coffee grounds used per cup. Remember one cup approximates 5oz, but adjust to your preference. For bitter coffee, try a coarser grind or reduce the amount of coffee grounds. Ensure fresh, quality coffee beans are used, as stale beans contribute to off-flavors.
Regular cleaning is vital; old coffee oils cause bitterness. Descale the coffee maker to remove mineral buildup, which can also affect taste; Check the water quality – filtered water is recommended. If your model has brew strength adjustment, experiment with different settings. Proper maintenance and coffee-to-water ratios are key to a delicious brew.
Water Leaking from the Coffee Maker
If water leaks, first ensure the carafe is correctly positioned on the carafe plate. Incorrect placement prevents proper valve closure. Check the water reservoir isn’t overfilled beyond the 12-cup or 10-cup mark. Inspect the brew basket for proper seating and that the filter is correctly inserted.
Mineral buildup can cause leaks; descale your coffee maker regularly. Examine the water reservoir for cracks or damage. If the issue persists, avoid using the appliance and contact customer support. Never disassemble the coffee maker yourself. Ensure all parts are dry before reassembling. Proper maintenance prevents leaks and extends the lifespan.

Safety Precautions
Always follow important safeguards, electrical safety guidelines, and proper carafe usage. Avoid operating a damaged appliance and unplug it when not in use for safety.
Important Safeguards
Before using your Black & Decker 12-cup coffee maker, carefully read all instructions. To reduce the risk of fire, electric shock, or injury, always adhere to these safety precautions. Do not immerse the appliance in water or other liquids. Avoid operating the coffee maker with a damaged cord or plug.
Ensure the voltage of your outlet matches the appliance’s specifications. Never leave the coffee maker unattended while in operation. Keep the appliance out of reach of children; Use caution when handling the hot carafe and brewed coffee. Allow the coffee maker to cool completely before cleaning. Do not use outdoors. Always unplug before cleaning or storing.

This appliance is for household use only. Do not use it for commercial purposes. Regularly inspect the appliance for any signs of damage.
Electrical Safety Guidelines
To ensure safe operation, always plug your Black & Decker coffee maker into a grounded electrical outlet. Never operate the appliance with a damaged cord or plug; if damaged, it must be replaced by a qualified technician. Avoid using extension cords, but if necessary, choose one with an amperage rating equal to or greater than the coffee maker’s.
Do not pull or carry the appliance by the cord. Unplug the coffee maker from the outlet when not in use and before cleaning. Keep the cord away from hot surfaces. Never insert objects into the appliance’s openings. Avoid operating the coffee maker in damp or wet environments.
If the coffee maker malfunctions or exhibits any electrical issues, immediately unplug it and seek professional assistance. Ensure the outlet is easily accessible for quick disconnection in emergencies.
Proper Usage of the Carafe
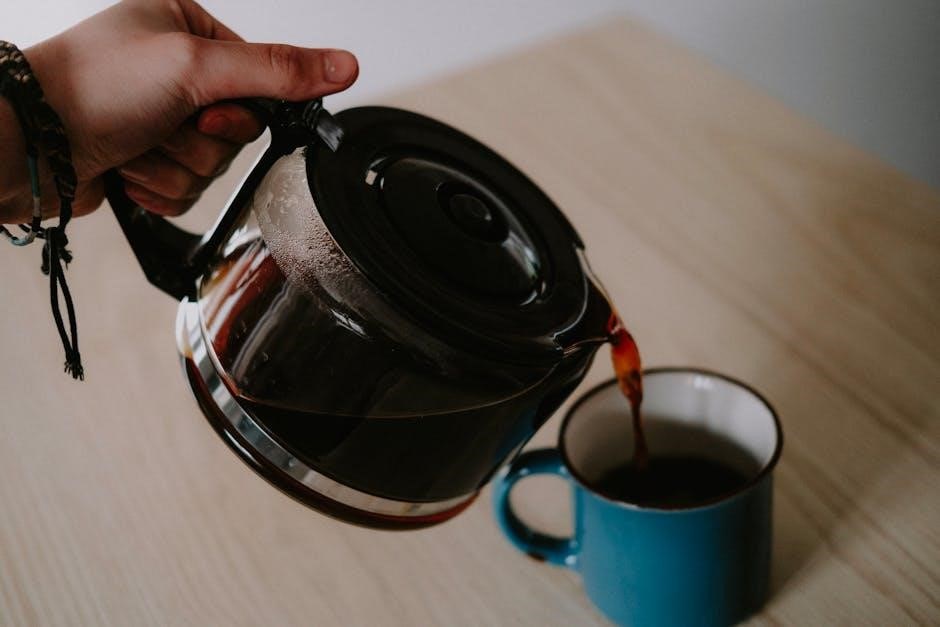
Always handle the carafe with care, as it may become hot during brewing. Use the handle when pouring to avoid burns. Ensure the carafe is properly seated on the carafe plate before starting the brewing cycle. Do not use the carafe on a hot stove or in a microwave oven, as this could cause damage.
Avoid sudden temperature changes, such as pouring cold water into a hot carafe, as this may cause it to crack. Inspect the carafe regularly for any cracks or damage, and replace it if necessary. Clean the carafe thoroughly after each use to prevent coffee residue buildup.
When removing the carafe during brewing, briefly pause the brewing process if your model has that feature. Never fill the carafe beyond its maximum capacity.

Parts and Components
Key components include the control panel, brew basket, carafe, carafe plate, water reservoir, and filter basket – essential for operation and maintenance.
Identifying Key Components (Control Panel, Carafe Plate)
The Control Panel is the central hub for operating your Black & Decker coffee maker. It typically features the Power button, and potentially programmable function buttons depending on the model (CM2046, CM0915BKD-FD, DCM100B, CM2035SM, CM1070B). Understanding these buttons is crucial for setting brew times and utilizing features.
The Carafe Plate is a heated surface designed to keep the brewed coffee warm after the brewing cycle is complete. It’s vital to ensure the carafe is correctly positioned on the plate for optimal warming. The plate automatically activates when brewing begins and maintains temperature for a set period. Always use a compatible carafe to avoid damage.
Additional components include the water reservoir, brew basket, and filter basket, all working together for a perfect brew.
Understanding the Control Panel Features
The Power Button initiates and terminates the brewing process on models like the CM2046, CM0915BKD-FD, DCM100B, CM2035SM, and CM1070B. Holding it down for a specified duration (e.g., 5 seconds on the CM2046) activates the Auto Clean function.
Programmable Features, if available, allow you to set a delayed brew time, ensuring coffee is ready when you wake up. The control panel displays the current time and programmed settings.
Brew Strength Adjustment (if equipped) lets you customize the coffee’s intensity. Some models may lack this feature. Refer to your specific model’s manual for detailed instructions on utilizing these control panel functions for a personalized brewing experience.
Replacement Parts Information
Genuine Black & Decker replacement parts are crucial for maintaining your CM2046, CM0915BKD-FD, DCM100B, CM2035SM, or CM1070B coffee maker’s performance. Common replacements include carafes, filter baskets, and potentially, the water reservoir.
To locate parts, visit the official Black & Decker website or authorized retailers. Have your model number readily available for accurate part identification. Third-party retailers may also offer compatible parts, but ensure quality and compatibility.
Always prioritize genuine parts to avoid damaging your appliance or voiding any warranty. Regularly inspect components for wear and tear, proactively replacing them to ensure consistent brewing and extend the coffee maker’s lifespan.

Technical Specifications
Black & Decker 12-cup coffee makers typically operate at 120V/60Hz with varying wattage. One cup is approximately 5oz, differing by brewing style.
Voltage and Wattage
Black & Decker 12-cup coffee makers are generally designed for standard North American electrical systems, operating at a voltage of 120 volts (V) and a frequency of 60 Hertz (Hz). While specific wattage can vary slightly between different models – such as the CM2046, CM0915BKD-FD, DCM100B, and CM2035SM – most fall within the range of 900 to 1200 watts.
This wattage is sufficient to quickly heat the water to the optimal brewing temperature. It’s crucial to verify the voltage requirements on the appliance itself before use, especially if traveling or using a different power source. Using an incorrect voltage can damage the coffee maker and void the warranty. Always ensure the appliance is properly grounded for safety.
Cup Size Approximation (5oz per cup)
Black & Decker consistently defines a “cup” as approximately 5 fluid ounces (oz) when indicating the capacity of their 12-cup coffee makers, including models CM2046, CM0915BKD-FD, DCM100B, and CM2035SM. However, it’s important to note that actual cup sizes can vary depending on individual brewing preferences and techniques.
This 5oz standard is a common industry measurement, but a typical mug often holds 8-12 ounces. Therefore, a fully brewed 12-cup coffee maker will yield roughly 60 ounces of coffee. Users should adjust the amount of coffee grounds used based on their desired strength and typical mug size to achieve the perfect brew. This ensures a satisfying coffee experience tailored to individual tastes.
Model Number Specifics (DCM100B, CM1070B)
The Black & Decker DCM100B is a 12-cup programmable coffeemaker, with a downloadable use and care manual available on ManualsLib. It features programmable brewing and a keep-warm function. The CM1070B, while less extensively documented online, shares similar functionality as a 12-cup programmable model.
Both models prioritize ease of use, offering straightforward controls for brewing. While specific feature details may vary slightly, core operations like water filling, filter placement, and carafe positioning remain consistent. Users should refer to their specific model’s manual for detailed instructions and safety precautions. Finding the correct manual ensures optimal performance and longevity of the coffee maker.