steel-line garage doors manual

Welcome to the Steel-Line Garage Doors Manual, your comprehensive guide for installing, maintaining, and operating Steel-Line garage doors. This manual ensures safe and efficient use, covering essential safety precautions, installation steps, and maintenance tips to prolong door longevity. Designed for both manual and automatic models, it provides detailed instructions for optimal functionality. Refer to this manual regularly for troubleshooting and customization options, ensuring your garage door operates smoothly and securely. Always follow safety guidelines to avoid accidents and maintain warranty validity. Proper usage and regular servicing will enhance performance and durability, making your Steel-Line garage door a reliable and long-lasting investment;

Overview of Steel-Line Garage Doors

Steel-Line garage doors are renowned for their durability, versatility, and aesthetic appeal, offering a wide range of styles to suit various architectural designs. From sectional doors to roller shutter models, these doors are crafted with high-quality materials, ensuring longevity and security. Designed to provide excellent insulation, Steel-Line doors are ideal for both residential and industrial settings, offering solutions for different climates and energy efficiency needs. Available in manual and automatic operation modes, they cater to diverse user preferences. The doors come in various sizes, colors, and finishes, allowing homeowners to customize their garage entrances. This overview highlights the key features and benefits of Steel-Line garage doors, emphasizing their reliability and adaptability to modern lifestyle demands.

Importance of the Manual for Proper Usage

This manual is essential for the safe and efficient operation of your Steel-Line garage door; It provides detailed instructions for installation, maintenance, and troubleshooting, ensuring optimal performance and longevity. By following the guidelines, users can prevent accidents and avoid costly repairs. The manual highlights safety precautions, such as keeping the area clear during operation and avoiding modifications without professional assistance. Regular maintenance routines, like lubricating hinges and checking sensors, are also outlined to maintain functionality. Adhering to the manual’s recommendations ensures compliance with warranty terms and enhances user experience. Proper usage extends the door’s lifespan and maintains its energy efficiency, making it a crucial resource for homeowners and professionals alike.

Safety Precautions and Warnings

Always operate your Steel-Line garage door in full view, ensuring people, pets, and objects are clear. Avoid modifications without professional assistance and keep power cords out of reach to prevent accidents. Never place items on or near moving parts, and ensure proper installation to maintain safety features. Failure to follow guidelines may void the warranty or cause injury. Regularly inspect sensors and components for damage or wear. Keep children away from remote controls and door mechanisms. Adhere to all warnings to ensure safe and reliable operation of your garage door system. Proper precautions protect both users and the door’s functionality. Always follow manufacturer instructions strictly. Ensure all safety mechanisms are functioning correctly before use. Never attempt repairs without disconnecting power. Maintain a clean and obstacle-free area around the door to prevent malfunctions. Be aware of potential pinch points and moving components during operation. Always test the door’s safety reversal feature after installation or adjustments. Keep emergency release handles accessible in case of power failure. Never allow children to play with the door or its controls. Ensure proper lighting in the garage to monitor door movement. Avoid overloading the door with additional weight. Regularly check and replace worn-out parts to prevent unexpected failures. Keep the manual handy for quick reference during emergencies. Always prioritize safety when operating or maintaining your Steel-Line garage door. Follow all local safety regulations and standards. Ensure all users are familiar with the door’s operation and safety features. Never bypass safety sensors or disable alarm systems. Be cautious of hot or moving parts during maintenance. Always wear protective gear when performing repairs or adjustments. Keep the garage door closed when not in use to prevent unauthorized access. Regularly update software or firmware for automatic door openers to ensure optimal safety performance. Familiarize yourself with emergency procedures, such as manual operation during power outages. Never leave the garage door partially open, as it may cause structural stress or security risks. Always secure the door before leaving the premises. Be mindful of weather conditions that may affect door operation, such as strong winds or ice buildup. Ensure proper ventilation in the garage to prevent harmful fumes from accumulating. Never operate the door if it is damaged or malfunctioning. Always follow the manufacturer’s guidelines for load capacity and usage limitations. Keep the door’s tracks and rollers clean and well-lubricated to ensure smooth operation. Regularly inspect the door’s springs for tension and wear, as they can pose a safety hazard if they fail. Always unplug the door opener before performing any maintenance or repairs. Keep the remote control out of reach of children to prevent accidental operation. Never operate the door if the safety sensors are obstructed or not functioning properly. Be aware of the door’s weight and potential damage it can cause if it falls or malfunctions. Always test the door’s balance after installation or adjustments to ensure it operates smoothly. Keep the garage door properly aligned to avoid uneven wear and potential accidents. Never attempt to force the door open or closed if it is stuck or jammed. Always contact a professional if you notice any unusual behavior or noise during operation. Ensure all safety features are tested and functioning correctly after any repairs or adjustments. Regularly review and update your knowledge of the door’s safety features and operation guidelines. Always prioritize caution when working with electrical or mechanical components of the door. Keep the garage well-lit to ensure visibility during door operation and maintenance. Never operate the door if you are unsure about its proper function or safety. Always follow local building codes and regulations regarding garage door installation and maintenance. Ensure all users understand the importance of safety precautions and adhere to them. Regularly check for recalls or updates on your specific garage door model. Be prepared for emergencies by knowing how to manually operate the door if needed. Always keep the garage door closed and secured when not in use to maintain home security. Never ignore warning signs or alarms from the door opener system. Familiarize yourself with the door’s emergency release mechanism in case of entrapment. Always ensure that the door’s sensors are clean and free from obstructions. Keep the garage door’s tracks and rollers properly aligned to prevent derailment. Never operate the door if the opener is damaged or malfunctioning. Always follow the manufacturer’s instructions for part replacements and upgrades. Regularly inspect the door’s cable and pulley system for signs of wear or damage. Be cautious of sharp edges or protruding parts when handling door components. Always use the correct tools and equipment when performing maintenance or repairs. Keep the garage door’s manual in an accessible location for quick reference. Never operate the door if you suspect it is not functioning correctly. Always contact a professional if you are unsure about any aspect of the door’s operation or maintenance; Ensure all safety features are enabled and functioning properly at all times. Regularly review the manual to stay informed about safety guidelines and best practices. Always prioritize safety when dealing with your Steel-Line garage door to protect yourself, others, and your property. Follow all safety precautions diligently to ensure the door operates safely and efficiently for years to come. By adhering to these guidelines, you can enjoy reliable and secure garage door operation while minimizing potential risks. Always remember that safety should never be compromised when it comes to your garage door system. Stay informed, stay safe, and ensure your Steel-Line garage door remains a trusted and durable part of your home.

General Safety Guidelines for Garage Door Operation

Always operate your Steel-Line garage door in full view, ensuring people, pets, and objects are clear. Avoid modifications without professional assistance and keep power cords out of reach to prevent accidents. Never place items on or near moving parts, and ensure proper installation to maintain safety features. Failure to follow guidelines may void the warranty or cause injury. Regularly inspect sensors and components for damage or wear. Keep children away from remote controls and door mechanisms; Adhere to all warnings to ensure safe and reliable operation of your garage door system. Proper precautions protect both users and the door’s functionality. Always follow manufacturer instructions strictly.

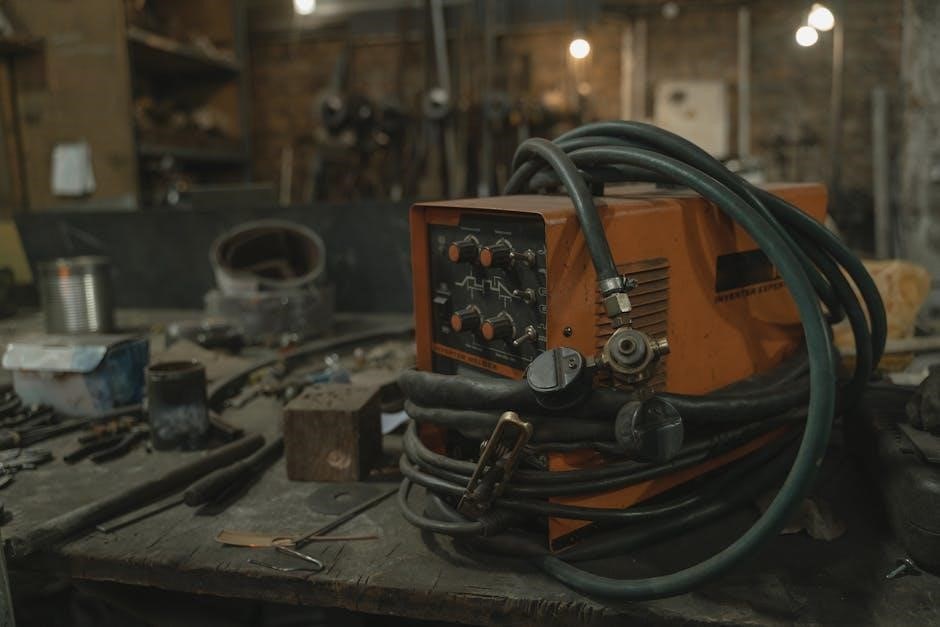
Handling Heavy Components and Tools Safely

When handling heavy components or tools for your Steel-Line garage door, always prioritize safety. Use mechanical aids like pulleys or lifts for heavy parts, and ensure a clear workspace to avoid tripping. Wear protective gear such as gloves and safety glasses to prevent injury. Never overload lifting equipment, and always follow the manufacturer’s weight guidelines. Ensure proper grip and balance when lifting to avoid dropping components. Keep tools in good condition, and avoid using damaged or worn-out equipment. Store tools and components securely to prevent accidents. Always maintain a safe distance from moving parts and avoid overreaching. By adhering to these guidelines, you can minimize risks and ensure safe handling of heavy components and tools during installation or maintenance.

Installation Requirements and Preparation

Ensure accurate measurements, structural integrity, and necessary tools are ready. Clear workspace and check for obstructions. Proper preparation guarantees a smooth installation process and prevents future issues.

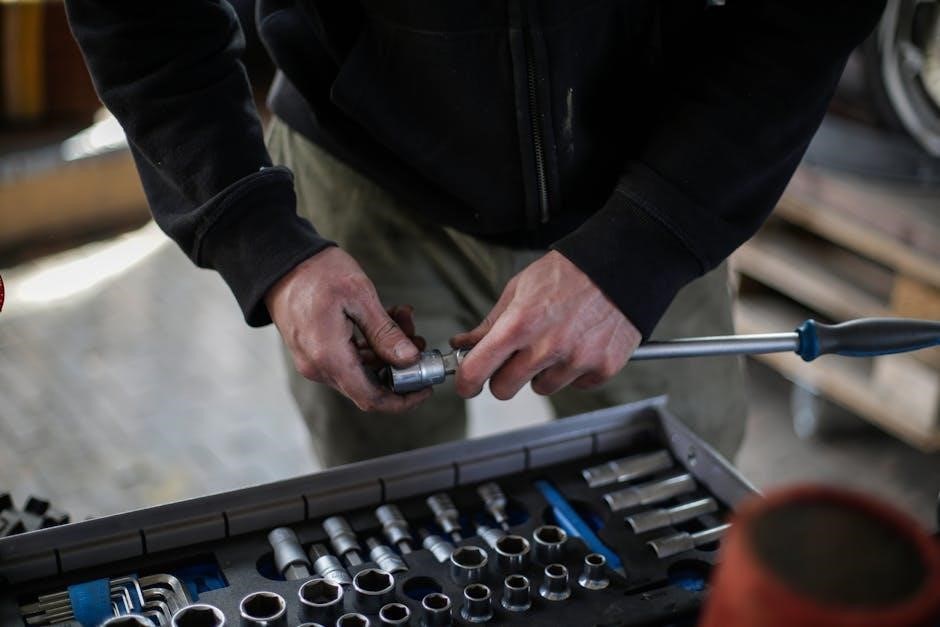
Tools and Materials Needed for Installation

To ensure a successful installation, gather essential tools and materials. Required tools include screwdrivers, wrenches, drills, levels, and measuring tapes. Materials needed are lag bolts, hinges, rollers, tracks, springs, and weatherstripping. Safety equipment like gloves and safety glasses is crucial. Additional items may include concrete anchors, door stops, and insulation kits. Check the manual for specific hardware requirements. Organize all components and tools beforehand to streamline the process. Proper preparation prevents delays and ensures a secure, professional-grade installation. Always refer to the manufacturer’s list for exact specifications. Missing items can lead to installation issues, so double-check before starting.

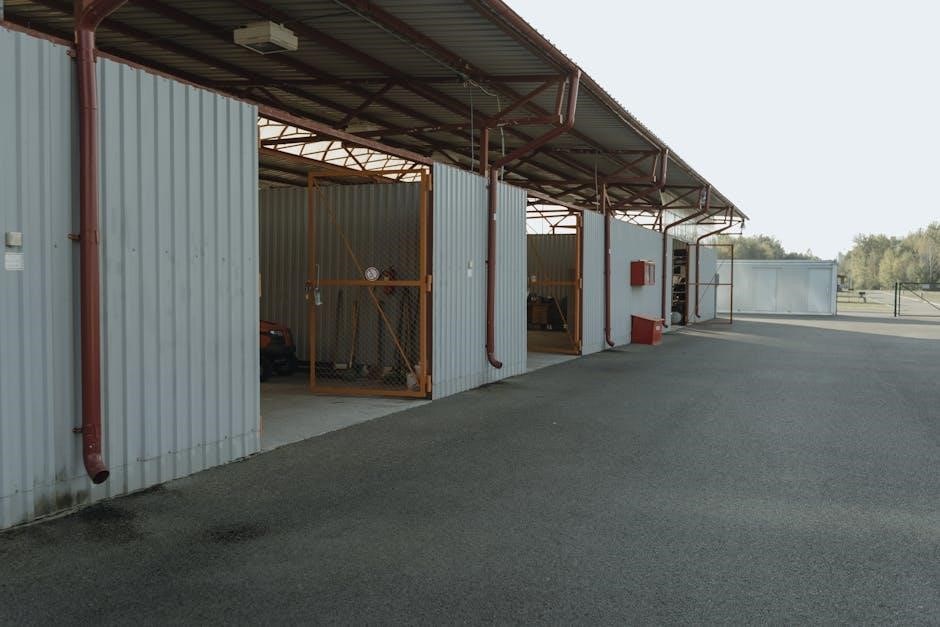
Preparing the Garage for Door Installation

Before installation, ensure the garage is properly prepared. Clear the area of obstacles, including vehicles, tools, and storage items. Measure the garage opening to confirm the door size compatibility. Check the floor and surrounding walls for levelness and structural integrity. Disconnect and remove the old door, springs, and opener if applicable. Cover the floor and walls with drop cloths or plastic sheets to protect against damage. Ensure the ceiling height and side clearance meet the installation requirements. Verify that electrical power is available for the opener system. Address any cracks or uneven surfaces on the garage floor and framing. Proper preparation ensures a smooth and safe installation process.

Step-by-Step Installation Guide

Begin by assembling all components and hardware according to the manufacturer’s instructions. Attach the horizontal and vertical tracks to the garage ceiling and walls, ensuring they are level and securely fastened. Install the door panels starting from the bottom, connecting each section with hinges and rollers. Mount the springs and cables, taking care to tighten them properly to avoid tension issues. Attach the door opener to the ceiling and connect it to the door using the provided brackets and chains. Install safety sensors at the bottom of the tracks, ensuring they are aligned and functional. Test the door’s operation by opening and closing it manually and with the opener. Finally, tighten all bolts and screws, and perform a safety check to ensure smooth and safe operation.

Maintenance and Servicing Tips

Regularly clean and lubricate moving parts to ensure smooth operation. Inspect rollers, springs, and cables for wear. Schedule professional servicing annually for optimal performance.

Regular Cleaning and Lubrication of Door Parts

Regular cleaning and lubrication are essential for maintaining the smooth operation of your Steel-Line garage door. Start by wiping down the door panels, tracks, and rollers with a soft cloth to remove dirt and debris. Use a mild detergent if necessary, but avoid harsh chemicals that could damage the finish. Lubricate the rollers, hinges, and springs with a silicone-based spray lubricant every 3-6 months. This reduces friction and prevents wear. Avoid using grease, as it can attract dust and dirt. Clean the door’s weather seal with a damp cloth to maintain its flexibility and sealing effectiveness. Regular maintenance ensures longevity and reliable performance.

Inspecting Door Components for Wear and Tear

Regularly inspecting your Steel-Line garage door components is crucial for ensuring safe and efficient operation. Check the springs for tension, cables for fraying, and rollers for wear. Look for dents or misalignment in the tracks and ensure hinges are securely fastened. Examine the door panels for cracks or damage and inspect the weather seal for cracks or gaps. If you notice any wear or damage, address it promptly to prevent further issues. Lubricate moving parts if necessary, but avoid over-lubrication. Replace worn components to maintain optimal performance and safety. Regular inspections help extend the lifespan of your garage door and prevent costly repairs.

Scheduling Professional Maintenance

Scheduling professional maintenance for your Steel-Line garage door ensures optimal performance and safety. It is recommended to have your door serviced annually by a certified technician. During maintenance, professionals will inspect and tighten hardware, balance the door, and check the opener system. They will also lubricate moving parts and ensure all safety features are functioning correctly. Regular professional maintenance helps prevent unexpected breakdowns and extends the lifespan of your door. Contact Steel-Line authorized service providers to schedule an appointment. DIY repairs can be risky, so relying on experts ensures the job is done safely and efficiently. Keep maintenance records for warranty purposes and to track the condition of your garage door over time.

Troubleshooting Common Issues

This section helps identify and resolve common issues with Steel-Line garage doors, such as the door not opening or closing properly. It provides step-by-step solutions for troubleshooting, including checking power sources, aligning sensors, and lubricating moving parts. If issues persist, consulting the manual or contacting professional support is recommended.

Identifying and Resolving Common Door Malfunctions

Steel-Line garage doors are reliable, but occasional malfunctions can occur. Common issues include the door not opening or closing fully, uneven movement, or excessive noise. To identify the problem, start by checking the power supply and ensuring the door is properly aligned. If the door is manual, inspect the spring tension and roller alignment. For automatic doors, verify that the opener is functioning and sensors are clear of obstructions. Lubricate moving parts regularly to prevent friction-related issues. If the door jerks or stops suddenly, check for worn or damaged cables, tracks, or rollers. Addressing these issues promptly can prevent further damage and ensure smooth operation. Always refer to the manual for specific troubleshooting steps.

Understanding Error Codes and Alarms

Steel-Line garage doors are equipped with advanced features that display error codes and trigger alarms to indicate malfunctions. These codes help diagnose issues quickly. Common errors include faulty sensors, misaligned tracks, or opener system failures. When an alarm sounds or a code appears, refer to the manual for specific meanings. For example, flashing lights or beeps may signal obstructed sensors or power issues. Resetting the system often resolves minor glitches. If codes persist, inspect components like rollers, springs, or cables for damage. Ensure all safety sensors are clean and properly aligned. For complex issues, consult the troubleshooting guide or contact professional support to avoid further complications and ensure safe operation.

Resetting the Door Opener System

Resetting your Steel-Line garage door opener system is a straightforward process to restore normal operation after a malfunction. Start by disconnecting the power supply to the opener and allowing the system to reset for 30 seconds. Locate the reset button, typically found on the motor unit or control panel, and press it firmly for 3-5 seconds. Reconnect the power and test the door by using the remote or wall switch. If the issue persists, ensure all sensors are clear and aligned properly. For automatic doors, recalibrate the open/close limits after resetting. Always refer to the manual for specific model instructions to avoid further complications and ensure safe operation.

Programming and Customization

Programming your Steel-Line garage door allows personalized settings for remote controls, wall switches, and automatic operation. Customize open/close limits, sensitivity, and synchronization for seamless functionality and enhanced convenience;

Setting Up Open and Close Limits

Setting up open and close limits ensures your Steel-Line garage door operates smoothly and safely. Use the control panel to adjust the fully open and fully closed positions. Start by manually moving the door to the desired open position and press the “Set Open Limit” button. Repeat for the closed position. Ensure the door aligns properly with the floor and header when setting limits. Testing the door after adjustments is crucial to confirm accurate settings. If the door reverses or stops unexpectedly, check and fine-tune the limits. Properly set limits prevent damage and ensure consistent operation, enhancing both safety and convenience for users.

Programming Remote Controls and Wall Switches

Programming your Steel-Line garage door remote control and wall switch ensures seamless operation. Start by locating the “Learn” button on the door opener, usually found near the antenna. Press and release it, then immediately press the remote control button. The opener will beep or flash to confirm syncing. For wall switches, ensure proper wiring connections to the opener. Test the remote and wall switch to verify they control the door correctly. Additional remotes can be synced using the same process. Always refer to your opener’s manual for specific instructions. Proper programming ensures reliable performance and convenience for daily use.

Customizing Door Operation Settings

Customizing Steel-Line garage door operation settings allows for personalized functionality. Adjust the opening and closing speed based on preference or noise concerns. Modify sensitivity of safety sensors to balance safety and functionality. Set automatic closing timers for security and convenience, ensuring the timer aligns with household activity. Explore energy-efficient settings to optimize power usage. Programming typically involves specific button sequences on the remote or wall switch. Consider compatibility with smart home devices for enhanced control. Always test settings post-adjustment to ensure safety and functionality. Document changes for future reference and troubleshoot effectively. Be aware of customization limits and seek professional help if needed. Thoroughly test all adjustments to confirm proper operation.

Understanding Door Anatomy and Components

Steel-Line garage doors consist of essential parts like panels, tracks, rollers, springs, and cables. Each component plays a vital role in smooth operation and durability.

Key Parts of the Sectional Garage Door

A sectional garage door is made up of several essential components. The panels are the visible sections that form the door’s face, providing insulation and security. Tracks guide the door’s movement, while rollers attached to the panels ensure smooth operation. Springs, either torsion or extension, counterbalance the door’s weight, making it easier to open and close. Cables connect the springs to the bottom brackets, ensuring proper lifting. Hinges allow the panels to bend as the door moves, and seals or weatherstripping prevent gaps for better insulation. These parts work together to ensure reliable and efficient door functionality. Regular inspection of these components is crucial for maintaining optimal performance.

Components of the Door Opener System

The door opener system consists of several key components. The motor is the central power unit that drives the door’s movement; A gearbox transmits the motor’s power to the drive system, which includes a chain, belt, or screw mechanism. The rail or trolley connects the motor to the door, guiding it along its path. Sensors, such as photo eyes, detect obstacles to ensure safety. A control board manages the system’s operations, including remote and wall switch inputs. Additional features like a backup battery and quiet operation modes enhance functionality. Understanding these components is essential for troubleshooting and maintenance, ensuring reliable and safe door operation.

Role of Sensors and Safety Features

Sensors and safety features are critical for ensuring safe and reliable garage door operation. Photo eyes, located near the floor on both sides of the door, detect obstacles or people in the door’s path, automatically reversing the door if an obstruction is detected. These sensors are essential for preventing accidents, especially for children and pets. Additional safety features include emergency stop mechanisms and manual release systems, which allow the door to be opened or closed manually during power outages or malfunctions. These safety components work together to provide enhanced protection and peace of mind for homeowners. Regular testing of these features is recommended to ensure optimal performance and safety.

Energy Efficiency and Insulation

Steel-Line garage doors offer excellent energy efficiency with insulated panels, reducing heat transfer and noise. This helps lower energy bills and maintain a consistent garage temperature year-round.

Understanding U-Factor and Insulation Ratings

The U-Factor measures a material’s heat transfer efficiency, with lower values indicating better insulation. Steel-Line garage doors feature insulated panels with low U-Factors, reducing heat loss and energy consumption. Insulation ratings, often expressed as R-Values, indicate thermal resistance. Higher R-Values mean better insulation. These ratings help homeowners understand how well their garage door retains heat in winter and stays cool in summer. Proper insulation not only cuts energy bills but also enhances comfort and noise reduction. Understanding these metrics ensures you make informed decisions for energy-efficient garage door solutions. Always check the U-Factor and R-Value when selecting or upgrading your Steel-Line garage door for optimal performance.

Benefits of Energy-Efficient Garage Doors

Energy-efficient garage doors offer numerous benefits, starting with reduced energy consumption and lower utility bills; They help maintain consistent temperatures in the garage, preventing heat loss in winter and heat gain in summer. This creates a more comfortable workspace or storage area. Additionally, energy-efficient doors reduce noise pollution by insulating against external sounds. They also contribute to a smaller environmental footprint by minimizing energy usage. Over time, these doors can increase your home’s value and appeal. Furthermore, they often require less maintenance as they are designed to withstand weather conditions and reduce moisture buildup. Investing in an energy-efficient Steel-Line garage door is a practical choice for both functionality and long-term savings.

Sealing Gaps for Improved Energy Efficiency

Sealing gaps around your Steel-Line garage door is essential for maximizing energy efficiency and reducing heat transfer. Start by inspecting the door frame, edges, and bottom seal for any cracks or openings. Use weatherstripping or spray foam to fill gaps between the door and the frame. Additionally, install a threshold seal at the bottom of the door to prevent air leaks and moisture intrusion. Regularly check and replace worn-out seals to maintain their effectiveness. By sealing gaps, you can reduce drafts, prevent pest entry, and keep your garage at a consistent temperature. This simple step significantly enhances energy efficiency and prolongs the door’s lifespan while reducing energy costs.

Warranty and Support Information

Steel-Line garage doors come with a comprehensive warranty program, ensuring coverage for parts and labor. Dedicated customer support is available for inquiries, repairs, and maintenance assistance, enhancing user satisfaction and product longevity.

Understanding the Steel-Line Warranty Program

The Steel-Line warranty program provides comprehensive coverage for garage door components, ensuring protection against manufacturing defects. The warranty typically covers parts and labor for a specified period, varying by product type. Registration is often required to activate the warranty, and terms may exclude damage caused by improper installation or misuse. Customers can review warranty details in the manual or on the Steel-Line website. The program aims to offer peace of mind, ensuring reliable performance and longevity of the garage door system. Proper maintenance, as outlined in the manual, helps maintain warranty validity and ensures optimal functionality over time.

Contacting Customer Support

For any inquiries or assistance regarding your Steel-Line garage door, contacting customer support is straightforward. You can reach support via phone, email, or through the official Steel-Line website. The website typically features a dedicated support section with contact forms, FAQs, and troubleshooting guides. Phone support is available during business hours, while email inquiries usually receive a response within 24-48 hours. Additionally, live chat options may be available for immediate assistance. Ensure to have your product details and serial number ready for faster resolution. Steel-Line’s customer support team is trained to address installation, maintenance, and warranty-related concerns, providing tailored solutions to ensure customer satisfaction and seamless door operation.

Filing a Warranty Claim

Filing a warranty claim for your Steel-Line garage door is a structured process to ensure timely resolution. First, review the warranty terms to confirm eligibility, as coverage varies by product and component. Gather required documents, such as proof of purchase, serial number, and detailed photos of the issue. Submit your claim through Steel-Line’s official website or by contacting customer support directly via phone or email. Provide clear descriptions of the problem and any relevant evidence. Once submitted, a confirmation email will be sent, and a specialist will review your claim within 5-7 business days. If approved, repairs or replacements will be arranged. Ensure all criteria are met to avoid delays.

Upgrading and Modifying Your Garage Door

Enhance functionality and aesthetics by upgrading components or adding features like insulation, security systems, or smart technology. Consult professionals for compatibility and safety ensurements.

Upgrading to Automatic Operation

Upgrading to an automatic garage door opener enhances convenience and security. Choose a motor unit compatible with your Steel-Line door model for seamless integration. Remote controls and wall switches provide easy operation. Ensure the opener is installed by a professional to maintain safety and functionality. Automatic operation reduces manual effort and adds modern convenience. Always follow the manufacturer’s instructions for compatibility and proper installation. This upgrade not only improves user experience but also adds value to your home with advanced features like timer closing and battery backup options. Regular maintenance of the opener ensures long-term performance and reliability.

Adding Security Features

Enhancing your Steel-Line garage door with security features ensures protection and peace of mind. Consider installing a sturdy manual lock or an automatic locking system to prevent unauthorized access. Alarm systems can be integrated to alert you of potential breaches. Reinforced materials and tamper-proof hinges add durability and resistance to forced entry. Secure remote controls with rolling code technology prevent signal interception. Additionally, smart security cameras and motion sensors can monitor activity around your garage. Always consult a professional for proper installation to maintain warranty validity and ensure compatibility with your door model. Regularly inspect and update security features to stay ahead of potential threats.

Considerations for DIY Modifications

When modifying your Steel-Line garage door, plan carefully to avoid complications. Assess your technical skills and experience before attempting DIY changes. Always use genuine or compatible parts to maintain performance and safety. Follow the manufacturer’s guidelines and safety protocols strictly. Ensure electrical modifications meet local regulations and safety standards. Test any changes thoroughly to verify functionality and reliability. Document your modifications for future reference or professional assistance. Consider consulting online forums or community resources for tips and troubleshooting common issues. Remember, improper modifications may void your warranty or compromise door operation. Proceed with caution and seek professional help if unsure about any aspect of the process.

Encouraging Proper Usage and Maintenance

Proper usage and regular maintenance ensure longevity and safety. Always adhere to guidelines for optimal performance. Review the manual periodically for updates and best practices. Seek professional assistance for complex issues to avoid hazards and warranty voidance. Consistent care enhances functionality and security, ensuring your Steel-Line garage door remains reliable for years;

year 6 maths worksheets pdf

Year 6 Maths Worksheets are printable PDF resources designed for 10-11 year olds, covering topics like place value, fractions, decimals, and geometry․ They provide comprehensive practice․

1․1 What are Year 6 Maths Worksheets?

Year 6 Maths Worksheets are educational resources designed for students aged 10-11, typically in their final year of primary school․ These worksheets are available as printable PDFs, covering a wide range of maths topics aligned with the national curriculum․ They include exercises on number and place value, fractions, decimals, percentages, geometry, measurement, and data analysis․ Many worksheets also incorporate word problems and real-world applications to enhance understanding․ Designed to be user-friendly, they often feature clear instructions, examples, and answer keys, making them ideal for both independent practice and teacher-guided lessons․ Whether used at home or in the classroom, these resources provide structured and engaging ways for students to refine their maths skills, ensuring a solid foundation for future studies․

1․2 Why Are They Important?

Year 6 Maths Worksheets are essential for reinforcing maths skills and ensuring a strong foundation for future studies․ They provide structured practice across all key areas of the curriculum, helping students master concepts like number operations, fractions, decimals, geometry, and data analysis․ These resources are particularly valuable for preparing students for standardized tests and assessments, such as SATs, by familiarizing them with exam-style questions․ Worksheets also cater to different learning styles, offering visual and hands-on activities that make maths engaging and accessible․ Additionally, they allow for self-assessment and immediate feedback, enabling students to identify and address gaps in their understanding․ Regular use of these worksheets fosters confidence, problem-solving skills, and a deeper appreciation for maths, making them an indispensable tool for both teachers and parents supporting Year 6 students․

Benefits of Using Year 6 Maths Worksheets

Year 6 Maths Worksheets enhance maths mastery by building conceptual knowledge, reinforcing classroom lessons, and preparing students for standardized tests through structured and engaging practice․

2․1 Building Conceptual Knowledge

Year 6 Maths Worksheets are designed to strengthen foundational understanding by breaking down complex concepts into manageable parts․ Topics like place value, fractions, and decimals are explored through structured exercises, ensuring students grasp basic principles before advancing․ These worksheets often include visual aids, real-world examples, and step-by-step problems, making abstract ideas more tangible․ Regular practice with these resources helps students develop a solid mathematical base, which is crucial for tackling more challenging problems in higher grades․ By focusing on core concepts, Year 6 Maths Worksheets empower students to approach maths with confidence and clarity․

2․2 Reinforcing Classroom Learning

Year 6 Maths Worksheets serve as an excellent tool for reinforcing concepts taught in the classroom․ By providing additional practice opportunities, these resources help students solidify their understanding of key topics such as fractions, decimals, and geometry․ Worksheets often include a variety of question types, from multiple-choice to open-ended problems, catering to different learning styles․ They also allow students to revisit challenging areas at their own pace, ensuring mastery before moving on to more advanced topics․ Many worksheets include answer keys, enabling students to self-assess and identify areas for improvement․ This structured approach complements classroom instruction, making maths more engaging and accessible for Year 6 students․

2․3 Preparing for Standardized Tests

Year 6 Maths Worksheets are invaluable for preparing students for standardized tests, such as SATs and maths competitions․ These resources often mirror test formats, familiarizing students with question styles and time management․ Worksheets covering topics like place value, fractions, and algebra ensure comprehensive exam readiness․ Regular practice builds confidence and reduces anxiety, helping students approach tests calmly․ Detailed answer keys allow for thorough review, highlighting strengths and areas needing improvement․ By simulating test conditions, these worksheets enable students to apply their knowledge effectively, ensuring they are well-prepared for assessments․ This structured practice is essential for achieving success in Year 6 maths standardized tests․

Topics Covered in Year 6 Maths Worksheets

Year 6 Maths Worksheets cover essential maths topics, including number and place value, fractions, decimals, geometry, and measurement․ These resources ensure a comprehensive understanding of key maths concepts;

3․1 Number and Place Value

Year 6 Maths Worksheets extensively cover Number and Place Value, focusing on multi-digit numbers, rounding, and estimation․ Students practice interpreting and comparing numbers up to millions, enhancing their numerical fluency․

3․2 Fractions, Decimals, and Percentages

Year 6 Maths Worksheets include detailed exercises on Fractions, Decimals, and Percentages, helping students master operations like adding, subtracting, and converting between these forms․ Practice includes real-world applications and problem-solving․

3․3 Geometry and Measurement

Year 6 Maths Worksheets extensively cover Geometry and Measurement, focusing on understanding shapes, volumes, and angles․ Students practice calculating the area of triangles and parallelograms, volumes of cubes, and converting between units․ These exercises enhance spatial awareness and problem-solving skills, preparing students for advanced geometric concepts in higher grades․

How to Use Year 6 Maths Worksheets Effectively

  • Create a structured study schedule to ensure consistent practice․
  • Encourage self-assessment by comparing answers with provided keys․
  • Integrate worksheets with classroom curriculum for reinforced learning․

4․1 Creating a Study Schedule

Creating a study schedule is essential for effective use of Year 6 Maths Worksheets․ Parents and teachers can allocate specific times each day or week for practice, ensuring consistency․ Start by identifying key topics and distributing them evenly across the schedule․ For example, dedicate Mondays to number operations, Wednesdays to fractions, and Fridays to geometry․ This structured approach helps students build a strong foundation gradually․ Incorporate breaks to maintain focus and avoid burnout․ Regular review sessions can be included to reinforce previously learned concepts․ A well-organized schedule not only enhances time management but also ensures comprehensive coverage of the curriculum․ By sticking to the plan, students can systematically improve their maths skills and confidence over time․

4․2 Encouraging Self-Assessment

Encouraging self-assessment is a powerful way to help students take ownership of their learning with Year 6 Maths Worksheets․ After completing a worksheet, students can compare their answers with the provided answer key or marking scheme․ This process fosters independence and responsibility, allowing them to identify strengths and areas needing improvement․ Parents and educators can guide students by asking reflective questions, such as “What did you find challenging?” or “How did you solve this problem?” This promotes deeper understanding and problem-solving skills․ Encouraging self-assessment also builds confidence, as students see their progress over time․ Regularly reviewing mistakes helps reinforce concepts and reduces errors in future tasks․ By integrating self-assessment into their routine, students develop a growth mindset and improve their maths skills effectively․

4․3 Integrating with Classroom Curriculum

Integrating Year 6 Maths Worksheets into the classroom curriculum ensures a seamless learning experience for students․ These worksheets are designed to align with national standards, covering topics such as fractions, decimals, and geometry․ Teachers can use them to reinforce concepts taught in class, providing additional practice for students․ Worksheets can be assigned as homework or used in class for targeted revision․ They can also be incorporated into lesson plans to cater to different learning styles, ensuring all students engage with the material․ By aligning worksheets with classroom teaching, educators create a consistent and comprehensive learning pathway․ This integration helps students build a strong foundation, making abstract concepts more tangible and manageable․ Regular use of these resources supports long-term retention of mathematical skills and prepares students for future academic challenges․ This approach fosters a cohesive and effective learning environment, benefiting both teachers and students․

Where to Find Free Year 6 Maths Worksheets

Discover free Year 6 Maths Worksheets on educational websites, teacher-made resources, and online learning platforms․ These sites offer printable PDFs aligned with the national curriculum․

5․1 Educational Websites

Educational websites are a reliable source for free Year 6 Maths Worksheets in PDF format․ Platforms like Third Space Learning, Twinkl, and White Rose Maths offer a wide range of resources․ These websites provide comprehensive worksheets covering topics such as place value, fractions, and geometry, all aligned with the UK curriculum․ Many of these resources are designed by teachers, ensuring they meet educational standards․ They often include answer keys, making it easy for parents and educators to assess progress․ Some websites also offer interactive tools and online versions of worksheets, allowing flexibility in learning․ With a simple download, these resources can be printed or accessed digitally, making them convenient for both home and classroom use․ They are an excellent way to supplement learning and reinforce mathematical skills in a structured manner․

5․2 Teacher-Made Resources

Teacher-made resources are highly effective for Year 6 Maths Worksheets, as they are crafted by educators to meet specific learning needs․ These resources are often shared on platforms like Teachers Pay Teachers or school websites, ensuring relevance and quality․ Many worksheets are tailored to cover curriculum requirements, with topics ranging from fractions to algebra․ Teachers design these materials to engage students, using clear instructions and structured exercises․ Some resources include interactive elements or creative problem-solving activities to enhance learning․ Additionally, teacher-made worksheets frequently incorporate real-world applications, helping students connect maths to everyday situations․ Parents and educators can trust these resources to provide targeted practice and support for Year 6 students, ensuring a strong foundation in mathematical concepts․ They are adaptable and can be easily integrated into lesson plans or home learning routines․

5․3 Online Learning Platforms

Online learning platforms offer a wealth of Year 6 Maths Worksheets in PDF format, providing convenient access to high-quality resources․ Websites like Third Space Learning and K5 Learning feature comprehensive collections of maths worksheets tailored for Year 6 students․ These platforms often include answer keys, making it easy for students to self-assess their work․ Many resources are designed to align with the national curriculum, covering topics such as fractions, decimals, geometry, and algebra․ Some platforms also provide interactive tools and progress tracking, enhancing the learning experience․ Parents and teachers can download these worksheets for free or with a subscription, ensuring students have ample practice material․ Online platforms are particularly useful for home learning, offering flexibility and accessibility․ They cater to diverse learning needs, making maths practice engaging and effective for Year 6 students․ These resources are regularly updated to maintain relevance and quality․

Tips for Parents Supporting Their Child’s Learning

Parents can support their child’s learning by providing a quiet study environment and using Year 6 Maths Worksheets as a teaching tool to reinforce concepts and build confidence․

6․1 Providing a Study Environment

Creating a dedicated study environment is crucial for helping your child excel in Year 6 Maths․ Ensure the space is quiet, well-lit, and free from distractions․ Equip it with essential tools like pens, pencils, and a calculator․ Encourage your child to use Year 6 Maths Worksheets PDFs as a primary resource for practice․ A structured setting helps them focus and retain information better․ Additionally, minimize digital distractions by designating the area as a no-screen zone․ By fostering a consistent and organized study routine, your child can effectively utilize these worksheets to master topics like fractions, decimals, and geometry․ A supportive environment not only enhances learning but also builds confidence and a positive attitude toward maths․ Regular practice in this setting will help your child achieve their full potential․

6․2 Using Worksheets as a Teaching Tool

Year 6 Maths Worksheets PDFs are invaluable as a teaching tool for parents and educators․ They provide structured, topic-specific exercises that align with the national curriculum, making them ideal for targeted practice․ Parents can use these worksheets to identify their child’s strengths and areas for improvement, offering personalized support․ Teachers can integrate them into lesson plans or use them for homework assignments․ The inclusion of answer keys allows for self-assessment and immediate feedback, fostering a deeper understanding of concepts like fractions, decimals, and geometry․ These resources are versatile, suitable for both home learning and classroom environments․ By leveraging Year 6 Maths Worksheets, parents and teachers can create engaging, effective learning experiences that cater to diverse learning styles and pace․ This approach helps build confidence and a strong foundation in maths, preparing students for future challenges․

Advanced Topics in Year 6 Maths

Advanced topics include algebra, complex fractions, and percentages, helping students build problem-solving skills and prepare for higher-level mathematics through targeted practice with worksheets․

7․2 Advanced Fraction Operations

Advanced fraction operations in Year 6 maths worksheets PDFs focus on complex skills such as adding, subtracting, multiplying, and dividing fractions, including mixed numbers and improper fractions․ These resources provide detailed practice in simplifying fractions, finding common denominators, and solving word problems involving fractions․ Students learn to apply fraction operations to real-world scenarios, enhancing their problem-solving abilities․ Worksheets often include visual aids like diagrams and models to help learners understand concepts better․ Additionally, advanced topics such as comparing and ordering fractions, converting between fractions and decimals, and identifying equivalent fractions are covered․ Regular practice with these worksheets ensures mastery of fraction operations, a critical skill for progression in mathematics․ Answer keys are typically included, allowing students to self-assess and improve their understanding․ These activities prepare learners for more challenging mathematical content in higher grades․

Year 6 Maths Worksheets are essential for mastering key concepts, building confidence, and fostering a strong foundation in mathematics, encouraging continuous practice for long-term success․

8․1 Summarizing the Importance

Year 6 Maths Worksheets are invaluable for reinforcing mathematical skills, ensuring students grasp essential concepts like place value, fractions, and geometry․ These resources provide structured practice, helping students build confidence and fluency․ They cover a wide range of topics, from number operations to measurement, aligning with the national curriculum․ The inclusion of answer keys enables self-assessment, fostering independent learning․ Parents and teachers can use these worksheets to identify areas needing improvement, ensuring targeted support․ Their accessibility in PDF format makes them convenient for both home and classroom use․ Regular practice with these worksheets enhances problem-solving abilities and prepares students for future academic challenges․ By offering comprehensive and engaging exercises, Year 6 Maths Worksheets play a crucial role in nurturing a strong mathematical foundation․

8․2 Encouraging Continuous Practice

Consistent practice with Year 6 Maths Worksheets is key to fostering long-term understanding and skill mastery․ Regular use of these resources helps students develop a routine, ensuring they stay engaged and motivated․ By dedicating a specific time each day to worksheet activities, learners can progressively build their mathematical fluency․ Parents and educators should encourage students to review past worksheets to reinforce previously learned concepts․ This approach not only strengthens foundational knowledge but also prepares students for more complex topics in higher grades․ Additionally, the variety of exercises available in these PDFs keeps the learning experience dynamic and interesting, preventing monotony․ Continuous practice with Year 6 Maths Worksheets equips students with the confidence and skills needed to excel in mathematics throughout their academic journey․

hoover clothes dryer 5030d manual

Welcome to the Hoover Clothes Dryer 5030D Manual. This guide provides essential information for optimal use, maintenance, and troubleshooting. Discover features, settings, safety tips, and care instructions to ensure peak performance and longevity.

1.1 Overview of the Hoover 5030D Dryer

The Hoover 5030D Dryer is a high-performance appliance designed to simplify your laundry routine. It features advanced drying technologies, including Sensor Dry, which adjusts drying time based on moisture levels, ensuring perfectly dry clothes without damage. With multiple drying programs tailored for different fabric types, this dryer offers versatility and efficiency. Its user-friendly control panel and energy-efficient design make it a practical choice for households seeking reliable and eco-friendly laundry solutions.

1.2 Importance of the User Manual

The user manual is essential for understanding and safely operating the Hoover 5030D Dryer. It provides detailed instructions for installation, maintenance, and troubleshooting, ensuring optimal performance. The manual also outlines safety precautions, energy-saving tips, and warranty information. By following the guidelines, users can extend the dryer’s lifespan, prevent damage, and resolve common issues efficiently. It serves as a comprehensive guide to maximize functionality and safety, making it indispensable for both new and experienced users.

1.3 What to Expect in This Guide

This guide offers a comprehensive overview of the Hoover 5030D Dryer, ensuring you make the most of its features. It covers installation, operation, maintenance, and troubleshooting, providing clear, step-by-step instructions. You’ll find detailed explanations of settings, energy-efficient modes, and safety tips. The guide also includes warranty information and support options. Designed to be user-friendly, it helps you understand and optimize your dryer’s performance, ensuring longevity and reliability. Whether you’re a new or experienced user, this manual is your go-to resource for all your drying needs.

Key Features of the Hoover 5030D Dryer

The Hoover 5030D Dryer features a 5kg capacity, advanced Sensor Dry technology, energy-efficient modes, multiple drying programs, and intuitive controls for tailored fabric care.

2.1 Capacity and Design

The Hoover 5030D Dryer offers a 5kg capacity, ideal for small to medium-sized households. Its compact design makes it suitable for limited spaces while maintaining efficiency. The dryer features a sleek, modern aesthetic with a large drum opening for easy loading and unloading. The design includes a clear window for monitoring clothes during the cycle. Built with durability and user convenience in mind, the 5030D balances functionality and style, ensuring reliable performance for everyday laundry needs.

2.2 Advanced Drying Technologies

The Hoover 5030D Dryer incorporates advanced drying technologies for optimal performance. It features Sensor Dry technology, which monitors moisture levels to prevent over-drying. Multiple drying programs cater to various fabric types, ensuring gentle care for delicate items and thorough drying for heavier loads. The dryer also includes intelligent temperature control, reducing energy consumption while maintaining efficiency. These technologies work together to provide faster drying times, better fabric protection, and enhanced energy efficiency, making the 5030D a reliable choice for modern laundry needs.

2.3 Energy Efficiency and Eco-Friendly Options

The Hoover 5030D Dryer is designed with energy efficiency in mind, featuring an Eco Mode that reduces energy consumption while maintaining performance. Intelligent sensors optimize drying times and temperature, minimizing energy use without compromising results. The dryer also includes specialized programs for eco-friendly drying, such as lower heat settings for delicate fabrics. By incorporating these technologies, the 5030D helps users reduce their carbon footprint and contribute to a more sustainable environment while ensuring efficient drying performance.

2.4 User-Friendly Controls and Settings

The Hoover 5030D Dryer features an intuitive control panel designed for ease of use. With a clear LCD display and straightforward button navigation, users can effortlessly select from various drying programs tailored to different fabric types and preferences. Customizable settings allow for precise control over temperature, drying time, and additional options like anti-crease or cooling phases. The user-friendly interface ensures a seamless experience, making it simple to achieve perfectly dried laundry every time while catering to individual needs and preferences.

Installation and Setup Guide

Ensure proper installation by following the manual’s step-by-step guide. Prepare the site, unpack, and position the dryer on a level surface. Connect electrical and ventilation systems safely.

3.1 Pre-Installation Requirements

Before installing the Hoover 5030D dryer, ensure the installation site is prepared. Choose a flat, stable surface in a well-ventilated area. Ensure the floor is level to prevent vibration. Check that the electrical supply matches the dryer’s requirements (230V, 50Hz). Verify the ventilation system is compatible and properly sized. Ensure all packaging materials are removed, and inspect for damage. Consult professionals if unsure about electrical or ventilation connections. Ensure compliance with local safety regulations and manufacturer guidelines for a safe setup.

3.2 Step-by-Step Installation Instructions

Unpack the Hoover 5030D dryer and inspect for damage. Position it on a level, stable surface in a well-ventilated area. Ensure the floor is even to prevent vibration. Connect the ventilation hose securely, following the manual’s guidelines. Install the exhaust vent according to local regulations. Plug the dryer into a grounded electrical outlet rated for 230V, 50Hz. Double-check all connections for tightness. Test the dryer by running an empty cycle to ensure proper operation. Secure the dryer to prevent movement during use.

3.3 Connecting Electrical and Ventilation Systems

Connect the Hoover 5030D dryer to a 230V, 50Hz power supply using a grounded plug. Ensure the electrical connection matches the dryer’s specifications. Attach the ventilation hose to the dryer’s outlet and secure it to an external vent. Use the supplied ventilation kit to maintain proper airflow. Avoid kinking or bending the hose to prevent restricted airflow. Ensure the vent system is clear of obstructions to reduce fire risks. Regularly inspect the ventilation system for blockages or damage to maintain efficiency and safety. Always follow local electrical and ventilation regulations during installation.

3.4 Final Check and Testing

After installation, perform a final check to ensure all connections are secure and correctly aligned. Verify that the electrical supply is stable and the ventilation system is unobstructed. Run a short test cycle to confirm proper operation, checking for heat output and even drying. Inspect for any leaks or unusual noises. Consult the manual for specific testing procedures tailored to the Hoover 5030D. Ensure all safety features function correctly before regular use. This step ensures optimal performance and safety.

Operating the Hoover 5030D Dryer

Learn to operate your Hoover 5030D with ease. This section guides you through using advanced features like Sensor Dry, multiple programs, and customizable settings effectively.

4.1 Understanding the Control Panel

The Hoover 5030D control panel is designed for intuitive operation. It features a user-friendly interface with clear buttons for selecting drying programs, adjusting settings, and monitoring progress. The LCD display provides real-time feedback on cycle status, temperature, and remaining time; Key buttons include program selection, start/stop, and options for eco mode or delayed start. Familiarize yourself with each function to customize drying cycles and ensure optimal performance. Refer to the manual for detailed explanations of advanced features and settings.

4.2 Selecting the Right Drying Program

The Hoover 5030D offers various drying programs tailored for different fabric types. Choose from options like Cotton, Synthetics, or Delicates to ensure gentle or intense drying as needed. The Sensor Dry feature automatically adjusts drying time based on moisture levels, preventing over-drying. Additional settings include Eco Mode for energy savings and Delayed Start for convenient scheduling. Always select the program that matches your load type to ensure optimal results and fabric care. Refer to the manual for guidance on specialized cycles and customization options.

4.3 Loading and Unloading Clothes

Proper loading ensures efficient drying and fabric care. Do not overload the drum, as this can reduce airflow and performance. Use the recommended capacity of 5kg for optimal results. Separate delicate fabrics from heavier items to prevent damage. Avoid adding large, bulky items or those with metal parts. When unloading, remove clothes immediately to prevent wrinkling and musty odors. Always check for missed items like socks or small garments. Follow these guidelines to maintain fabric integrity and dryer efficiency.

4.4 Monitoring the Drying Process

Monitor the drying process using the control panel display, which shows remaining time and program status. Avoid overloading the drum, as this can extend drying time. Use the cooling phase to prevent wrinkles and creases. Ensure the filter is cleaned regularly to maintain airflow and efficiency. Check clothes periodically to avoid over-drying, especially for delicate fabrics. Proper monitoring ensures clothes are dried evenly and prevents damage. Always keep the dryer vent clear for optimal performance and safety.

Maintenance and Care Tips

Regularly clean the filter and vent to ensure optimal airflow. Check and replace worn parts promptly. Schedule professional servicing annually. Store the dryer in a dry, cool place when not in use.

5.1 Cleaning the Filter and Vent

Regular cleaning of the filter and vent is essential for optimal performance. The filter should be removed and washed after each use to prevent lint buildup. Use a soft brush or vacuum to remove debris. For the vent, ensure it is clear of obstructions to maintain proper airflow. Neglecting this can lead to reduced efficiency, longer drying times, or even fire hazards. Always clean the filter before reuse to ensure safety and energy efficiency. Never operate the dryer without the filter in place to avoid damage. Regular maintenance ensures reliable operation and extends the dryer’s lifespan.

5.2 Regular Servicing and Inspections

Regular servicing and inspections are crucial for maintaining the performance and safety of your Hoover 5030D dryer. Check the drum and exterior for damage or blockages. Inspect electrical connections and ensure the venting system is secure. Clean or replace worn-out parts promptly. Schedule professional servicing annually to address internal components and ensure proper function. Regular maintenance prevents issues like overheating or reduced efficiency. Always refer to the manual for specific servicing guidelines or contact authorized technicians for complex repairs.

5.3 Troubleshooting Common Issues

Identify and resolve common issues with your Hoover 5030D dryer by following these troubleshooting steps. If the dryer won’t heat, check the power supply, thermostat, and heating element. For noise or vibration, ensure the dryer is level and clean the drum and rollers. If clothes aren’t drying, verify venting is clear and filters are clean. Reset the dryer by unplugging it for 30 minutes. Consult the manual for detailed solutions or contact Hoover support for complex problems. Regular checks can prevent these issues.

5;4 Storing the Dryer When Not in Use

Properly store your Hoover 5030D dryer to maintain its condition. Clean the drum, filters, and vents before storage; Disconnect the power and secure loose parts. Place the dryer in a dry, cool area away from direct sunlight. Cover it to protect from dust. Ensure the storage location is well-ventilated to prevent moisture buildup. Regularly inspect stored items to avoid damage. Follow these steps to preserve the dryer’s functionality and extend its lifespan when not in use for extended periods.

Troubleshooting and Repair

Troubleshoot common issues like no heat, noise, or vibration. Check filters, vents, and power supply. Reset the dryer if necessary. Refer to the manual for detailed repair guidance.

6.1 Identifying Common Problems

Identify common issues with your Hoover 5030D dryer, such as no heat, excessive noise, or vibration. Check for clogged filters, blocked vents, or faulty sensors. Ensure the power supply is stable. Look for error codes or unusual smells. Regularly inspect belts and hinges for wear. Addressing these problems early prevents major repairs and ensures efficient operation. Always refer to the manual for specific troubleshooting steps tailored to your model.

6.2 Solutions for No Heat or Low Heat

If your Hoover 5030D dryer isn’t producing heat or is generating low heat, start by checking the filter and vents for blockages. Clean or replace the filter if necessary. Ensure the venting system is clear and properly connected. Next, inspect the heating element for damage or malfunction and replace it if needed. Verify that the dryer is set to a heat-enabled program, as some modes may use eco settings. Finally, check the power supply and ensure it’s functioning correctly. Always refer to the manual for specific repair instructions.

6.3 Addressing Noise or Vibration Issues

If your Hoover 5030D dryer is noisy or vibrating excessively, check for uneven installation or loose parts. Ensure the dryer is placed on a level surface and secured firmly. Inspect the drum bearings and belt for wear or damage, replacing them if necessary. Clean the lint filter and vents to prevent airflow blockages, which can cause strain. If noise persists, check for foreign objects in the drum or worn-out rollers. Refer to the manual for diagrams or contact a professional for complex repairs to restore smooth operation.

6.4 Resetting the Dryer

To reset your Hoover 5030D dryer, unplug it from the power source and wait for 30 seconds. This allows the internal systems to reset. Plug it back in and ensure all settings are restored to default. If issues persist, check for error codes in the manual and address them accordingly. Resetting can resolve minor glitches, but if problems continue, contact Hoover support for further assistance. Regular resets can help maintain optimal performance and prevent operational disruptions.

Safety Precautions and Guidelines

Always follow safety guidelines to ensure safe operation. Keep the dryer away from flammable materials, never leave it unattended, and supervise children during use. Regularly clean the filter to prevent fires and ensure proper ventilation. Avoid overloading the drum and follow the recommended drying times. Never touch the dryer with wet hands or while standing on a damp surface. For detailed safety measures, refer to the manual.

7.1 General Safety Tips

Ensure safe operation by following essential guidelines. Keep flammable materials away from the dryer and maintain proper ventilation. Never leave the dryer unattended while in operation; Supervise children and pets around the appliance. Avoid touching electrical parts with wet hands. Do not overload the drum, as this can cause imbalance and reduce efficiency. Regularly clean the filter to prevent lint buildup and fire risks. Always follow the manufacturer’s instructions for installation, use, and maintenance. Refer to the manual for detailed safety measures to ensure optimal performance and longevity.

7.2 Avoiding Fire Hazards

To minimize fire risks, ensure proper ventilation around the dryer and regularly clean the lint filter. Remove flammable materials from the vicinity and avoid drying fabrics with volatile chemicals. Never leave the dryer unattended during operation. Check for blockages in the venting system, as restricted airflow can overheat the appliance. Keep the surrounding area clear of clutter and ensure the dryer is installed on a stable, heat-resistant surface. Always follow the manufacturer’s guidelines for safe operation and maintenance.

7.3 Child Safety Measures

Ensure child safety by installing a safety lock on the dryer’s controls to prevent accidental operation. Keep children away from the dryer while it is running, as the moving parts and heat can pose risks. Teach children not to play near or inside the dryer. Always supervise children when the dryer is in use. Store laundry detergent out of reach to avoid accidental ingestion. Regularly inspect the dryer’s exterior for any damage that could attract a child’s curiosity. Secure the area around the dryer to prevent access when not in use.

7.4 Electrical Safety Considerations

Always follow electrical safety guidelines to prevent hazards. Ensure the dryer is connected to a grounded power outlet with the correct voltage rating. Avoid using extension cords or damaged power cables. Keep the area around the dryer dry to prevent electrical shocks. Never modify the dryer’s plug or electrical components. If you notice any electrical issues, disconnect the dryer immediately. Have a qualified technician inspect and repair any electrical problems. Refer to the user manual for specific electrical safety recommendations to ensure safe operation.

Warranty and Support Information

Understand your warranty terms and how to access support. Register your Hoover 5030D dryer for warranty coverage. Contact Hoover customer support for inquiries or repairs. Visit their official website for detailed warranty information and authorized service centers. Keep your manual and purchase receipt safe for warranty claims. Ensure all repairs are done by certified technicians to maintain warranty validity.

8.1 Understanding the Warranty Terms

Your Hoover 5030D dryer is backed by a warranty that covers manufacturing defects for a specified period, typically 12 to 24 months. This warranty ensures repairs or replacements are provided free of charge for eligible issues. To validate your warranty, ensure your product is registered on Hoover’s official website. Keep your purchase receipt and warranty documents safe, as they are required for any warranty claims. The warranty does not cover damage caused by misuse or improper installation. Always use authorized service centers for repairs to maintain warranty validity.

8.2 Contacting Hoover Customer Support

For assistance with your Hoover 5030D dryer, visit the official Hoover website and navigate to the “Support” or “Contact Us” section. You can reach customer support via phone, email, or live chat. Call Hoover’s customer service hotline for immediate help. Be prepared to provide your dryer’s model number and a detailed description of your issue. Representatives are available Monday to Friday, 9 AM to 5 PM local time. Ensure you have your warranty information handy for faster resolution.

8.3 Finding Authorized Service Centers

To locate authorized service centers for your Hoover 5030D dryer, visit the official Hoover website and use the “Where to Buy” or “Service Locator” tool. Enter your location to find nearby centers. You can also contact Hoover customer support directly via phone or email for recommendations. Ensure the center is officially authorized to maintain your warranty and provide genuine parts. Additionally, platforms like Manua.ls offer resources for finding authorized service centers and downloading repair manuals. Always verify the center’s credentials before scheduling a service.

8.4 Registering Your Product

Register your Hoover 5030D dryer to ensure warranty validity and personalized support. Visit the official Hoover website and navigate to the product registration section. Enter your personal details, product serial number, and purchase information. Registration helps Hoover provide tailored service and notifications about updates or recalls. You can also register through the Hoover customer support portal or via the provided warranty card. Keep your registration confirmation for future reference to ensure seamless support experiences.

Environmental and Energy Considerations

Hoover dryers are designed with energy efficiency and eco-friendliness in mind. The 5030D model offers energy-saving modes and responsible recycling options, aligning with environmental sustainability goals.

9.1 Eco Mode and Energy Savings

The Hoover 5030D Dryer features an Eco Mode designed to reduce energy consumption while maintaining efficient drying performance. This mode optimizes heat and cycle duration, lowering energy use without compromising results. Additionally, the dryer’s advanced Sensor Dry technology automatically adjusts drying time based on moisture levels, preventing over-drying and further saving energy. By utilizing these eco-friendly settings, users can significantly reduce their energy bills and environmental impact. Regular maintenance, such as cleaning filters, also enhances efficiency, ensuring the dryer operates at its best while staying eco-conscious.

9.2 Proper Disposal of the Appliance

Proper disposal of the Hoover 5030D Dryer is crucial for environmental protection. Ensure the appliance is recycled responsibly by checking local regulations or partnering with certified recycling centers. Remove any hazardous materials, such as batteries or electronic components, before disposal. Contact Hoover’s customer support or authorized service centers for guidance on eco-friendly disposal methods. Proper disposal helps reduce waste and minimizes the appliance’s environmental impact, promoting sustainability and responsible consumption.

9.3 Reducing Carbon Footprint

Reducing your carbon footprint with the Hoover 5030D Dryer involves using eco-friendly settings and energy-efficient drying cycles. Opt for the Eco Mode to minimize energy consumption while ensuring effective drying. Regularly cleaning the filter and vent improves efficiency, reducing the dryer’s energy use. Additionally, avoiding overloading the drum and using shorter drying programs can lower your overall energy consumption. By adopting these practices, you contribute to a more sustainable environment while maintaining optimal dryer performance.

9.4 Recycling Options for Parts

Recycling parts from your Hoover 5030D Dryer is an eco-friendly way to dispose of unused components. Check with local recycling centers or electronic waste facilities that accept appliance parts. Many communities offer specialized programs for large appliances. Additionally, Hoover may provide guidance on authorized recycling partners through their official website. Properly recycling your dryer’s parts helps reduce landfill waste and supports sustainable practices. Consider donating working components to repair shops or charities if applicable.

This comprehensive guide has equipped you with essential knowledge to optimize your Hoover 5030D Dryer’s performance, efficiency, and longevity. By following the outlined tips and guidelines, you’ll ensure reliable operation and extend the life of your appliance. Stay informed about updates and maintain regular maintenance for consistent results. Happy drying!

10.1 Summary of Key Points

This manual provides comprehensive guidance for the Hoover 5030D Dryer, covering installation, operation, maintenance, and troubleshooting. It highlights the dryer’s advanced features, energy efficiency, and user-friendly controls. Regular maintenance, such as cleaning filters and proper ventilation, ensures optimal performance and longevity. Safety precautions and warranty details are also emphasized. By following this guide, users can maximize their dryer’s efficiency, reduce energy consumption, and extend its lifespan. Refer to the manual for specific instructions and support resources.

10.2 Maximizing the Lifespan of Your Dryer

To extend the life of your Hoover 5030D Dryer, regular maintenance is crucial. Clean the filter after each use to ensure proper airflow and efficiency. Check and clean the venting system periodically to prevent blockages. Avoid overloading the drum to reduce wear on the motor and belts. Schedule annual professional inspections to address any potential issues early. Proper storage when not in use, in a dry and cool environment, also helps preserve the appliance. Following these steps ensures your dryer operates effectively for years to come.

10.3 Staying Informed About Updates

Stay informed about the latest updates for your Hoover 5030D Dryer by regularly checking the official Hoover website or subscribing to their newsletter. Updates may include firmware improvements, new features, or safety enhancements. Register your product on the Hoover website to receive notifications about software updates or maintenance tips. Additionally, follow Hoover’s social media channels or join community forums for user discussions and updates. Keeping your dryer updated ensures optimal performance, efficiency, and safety. Regularly reviewing the user manual for new instructions or guidelines is also recommended to maximize functionality and longevity.

10.4 Providing Feedback to Hoover

Your feedback is invaluable to Hoover for improving products and services. Share your experiences with the 5030D dryer via Hoover’s official website, email, or customer support channels. Whether it’s praise, suggestions, or concerns, your input helps enhance future designs and user experiences. Regularly check for feedback opportunities or surveys from Hoover. By contributing, you play a role in shaping better appliances and ensuring customer needs are met. Your voice matters in helping Hoover deliver exceptional quality and innovation.

aldi k fee coffee machine manual

The ALDI K-Fee coffee machine is a convenient and affordable option for home use, utilizing capsules for various models like Wave, Twins II, and Grande. The manual is key for optimal performance and maintenance.

Importance of the Manual

The manual for the ALDI K-Fee coffee machine is essential for understanding its operation, maintenance, and troubleshooting. It provides detailed instructions on how to use the machine effectively, ensuring optimal performance and longevity. The manual covers key aspects such as brewing processes, customizing coffee settings, and daily cleaning tips. Additionally, it includes guidance on descaling, which is crucial for maintaining the machine’s efficiency and preventing damage from mineral buildup. Troubleshooting sections help users identify and resolve common issues, such as error codes or the machine not turning on. The manual also outlines warranty details, offering clarity on the coverage period and how to make a claim. By referring to the manual, users can avoid costly repairs and ensure their machine continues to deliver high-quality coffee. Regular updates and downloads for manuals are available online, making it easy to stay informed and maintain the machine properly.

Understanding the Manual Structure

The ALDI K-Fee coffee machine manual is designed to guide users through every aspect of machine operation and maintenance. It is structured into clear sections, starting with an introduction to the machine’s features and safety precautions. The manual then moves on to detailed instructions for brewing coffee, including step-by-step guides for different models like the Wave, Twins II, and Grande. Maintenance and cleaning procedures are thoroughly explained, with separate sections for daily cleaning tips and the descaling process. Troubleshooting is another key area, with error codes and solutions provided to address common issues. The manual also includes information on accessories and spare parts, as well as warranty details for added peace of mind. Each section is concise and easy to follow, ensuring users can quickly find the information they need. Visual guides and diagrams are often included to complement the text, making the manual user-friendly and accessible for all skill levels.

Model-Specific Manuals

The ALDI K-Fee coffee machine manual is tailored to specific models, such as the Wave, Twins II, and Grande, ensuring each user receives detailed guidance for their particular machine’s features and operation.

K-Fee Wave Manual

The K-Fee Wave manual provides comprehensive guidance for operating and maintaining the Wave capsule machine. It covers the brewing process, customization options, and maintenance tips to ensure optimal performance. The manual is available for download and has been rated highly by users, offering clear instructions for troubleshooting common issues like error codes and descaling. Specific to the Wave model, the manual highlights features such as a dedicated hot water spout, ideal for Americanos, and detailed steps for rinsing and preparing the machine. By following the manual, users can maximize the machine’s longevity and enjoy a perfect cup of coffee every time. It emphasizes the importance of regular cleaning and descaling to prevent mineral buildup and maintain flavor quality. The Wave manual is tailored to address the unique aspects of this model, ensuring users get the most out of their K-Fee Wave coffee machine.

K-Fee Twins II Manual

The K-Fee Twins II manual is tailored for users of this dual-capsule compatible coffee machine, offering detailed instructions for setup, brewing, and maintenance. It emphasizes the importance of regular descaling to prevent mineral buildup and ensure optimal flavor. The manual also provides troubleshooting tips for common issues, such as error codes and machine malfunction. Specific to the Twins II model, the guide outlines how to utilize its dual functionality, allowing users to switch between different capsule types seamlessly. Additionally, it covers customization options, enabling users to adjust brew strength and temperature to their preference. The manual is available online and is essential for maximizing the machine’s performance and longevity. By following the Twins II manual, users can enjoy a hassle-free coffee experience while maintaining their machine in top condition.

K-Fee Grande Manual

The K-Fee Grande manual provides comprehensive guidance for operating and maintaining this high-performance coffee machine. Designed for users seeking advanced features, the Grande model offers precise temperature control and customizable brew settings. The manual covers initial setup, including priming the machine and understanding capsule compatibility. It also details cleaning routines, such as daily wipe-downs and deep cleaning, to ensure longevity. Troubleshooting sections address common issues like low water pressure and error codes, offering step-by-step solutions. Additionally, the manual highlights the Grande’s unique features, such as its large water tank and adjustable cup sizes. By following the manual, users can optimize their coffee experience and keep the machine in excellent condition. The K-Fee Grande manual is available online, making it easy to access and refer to whenever needed.

How to Use the Machine

Plug in the machine, press the power button, and insert a capsule. Select your desired drink size and type using the control panel. Start brewing and enjoy your coffee.

Brewing Process

To start brewing, ensure the machine is preheated and turned on. Insert a compatible capsule into the machine, following the guidelines provided in the manual. Close the capsule compartment securely to ensure proper alignment. Select your desired drink size and type using the control panel, which may include options for espresso, coffee, or specialty beverages. Some models allow customization of strength and cup size. Once your settings are chosen, press the start button to begin the brewing process. The machine will puncture the capsule and force hot water through the grounds, delivering your beverage into the cup. Depending on the model, you may hear operational noises during brewing. Once complete, the machine will automatically stop, and the used capsule will be ejected into the internal bin. For optimal results, use ALDI K-Fee branded capsules, as they are specifically designed for these machines.

Customizing Your Coffee

Customizing your coffee with the ALDI K-Fee coffee machine is straightforward and offers flexibility to suit your preferences. Depending on the model, you can adjust the strength of your brew by selecting from pre-set options or fine-tuning the machine’s settings. For instance, the K-Fee Wave and Twins II models allow you to choose between different cup sizes, ensuring your coffee is tailored to your needs. Additionally, you can experiment with various capsule flavors and blends available at ALDI, offering a wide range of aromatic profiles. Some models also feature a milk frothing option, enabling you to create lattes and cappuccinos at home. To enhance your experience, refer to the manual for guidance on adjusting temperature settings or enabling eco-mode for energy efficiency. By exploring these customization options, you can enjoy a perfectly crafted coffee every time, whether you prefer a strong espresso or a milky latte.

Maintenance and Cleaning

Regular cleaning and descaling are essential for optimal performance of your ALDI K-Fee coffee machine. Follow the manual’s guidelines for daily cleaning and descaling to ensure longevity and hygiene.

_daily Cleaning Tips

Regular daily cleaning is crucial for maintaining the performance and hygiene of your ALDI K-Fee coffee machine. Start by turning off the machine and unplugging it for safety.

Empty the used capsule container and wipe it clean with a damp cloth. Also, rinse the drip tray and water tank regularly to prevent mineral buildup.

After each use, wipe the machine’s exterior and brew head with a soft cloth to remove any splatters or residue.

Run a rinse cycle without a capsule to ensure the system is clear of old coffee oils.

For models with milk compartments, clean and dry them thoroughly to avoid bacterial growth.

Refer to your specific model’s manual, such as the K-Fee Wave or Twins II, for any additional daily cleaning steps tailored to your machine.

Descaling Process

Descaling your ALDI K-Fee coffee machine is essential to remove mineral buildup and ensure optimal performance. Start by purchasing a descaling solution recommended for capsule machines.

Turn on the machine and select the “Descaling Mode” if available. Pour the descaling solution into the water tank, following the instructions on the product label.

Run the solution through the machine by brewing without a capsule until the tank is empty. Repeat the process if the machine indicates it is still needed.

After descaling, rinse the machine thoroughly by running multiple cycles with fresh water to remove any lingering solution taste.

Regular descaling, ideally every 2-3 months, prevents limescale buildup and extends the machine’s lifespan. Always refer to your specific model’s manual, such as the K-Fee Wave or Twins II, for detailed descaling instructions.

Troubleshooting Common Issues

Troubleshooting common issues with your ALDI K-Fee coffee machine involves checking error codes, ensuring proper power supply, and cleaning. Refer to the manual for specific solutions to resolve machine malfunctions effectively.

Error Codes and Solutions

Understanding error codes is crucial for resolving issues with your ALDI K-Fee coffee machine. Common error codes like E1 or E2 often indicate issues such as low water levels or temperature malfunctions. Refer to the manual for specific code meanings and solutions. For example, E1 may require refilling the water tank, while E2 could involve checking the machine’s heating elements. Descaling is frequently recommended to address mineral buildup causing errors. If the machine doesn’t power on, ensure it’s properly plugged in and check the power button functionality. For persistent issues, reset the machine by turning it off and on. Always consult the manual for detailed troubleshooting steps and ensure regular maintenance to prevent recurring problems. If issues persist, contact customer support for further assistance.

Machine Not Turning On

If your ALDI K-Fee coffee machine fails to turn on, start by checking the power supply. Ensure the machine is properly plugged into a functioning electrical outlet. Verify that the power button is functioning correctly and that no circuit breakers or fuses in your home have tripped. If using an extension cord, test it with another appliance to confirm it’s working. Next, inspect the power cord for any visible damage or frays. If the issue persists, check for any blockages in the machine’s internal components, as debris could prevent proper operation. Resetting the machine by unplugging it for 30 seconds and plugging it back in may also resolve the issue. If none of these steps work, consult the manual for specific troubleshooting guidance or contact customer support for further assistance. Regular maintenance and checks can help prevent such issues from occurring.

Accessories and Spare Parts

The ALDI K-Fee coffee machine offers a range of accessories, including capsules, milk frothers, and descaling solutions. These can be purchased at local ALDI stores or online through authorized retailers.

Available Accessories

The ALDI K-Fee coffee machine offers a variety of accessories to enhance your coffee experience. These include capsules for different flavors, descale solutions to maintain machine performance, and milk frothers for creating lattes and cappuccinos. Additional accessories like water filters and cleaning brushes are also available to ensure optimal functionality. These items can be purchased at local ALDI stores or through online retailers. The accessories are designed to complement the machine’s features, allowing users to customize their coffee drinks and maintain their device effectively. Regular use of genuine accessories ensures longevity and peak performance of the K-Fee coffee machine. Always refer to the manual for compatibility and usage guidelines when purchasing or using these accessories.

Where to Buy

The ALDI K-Fee coffee machine and its accessories are primarily available for purchase at ALDI stores. These machines are popular due to their affordability and quality, making them a frequent feature in ALDI’s product lineup. Additionally, online retailers such as the official K-Fee website or platforms like Manua.ls may offer these products, especially when they are not available in-store. For the most convenient shopping experience, visit your local ALDI store to explore the available models and purchase your preferred machine. Always ensure to check availability and pricing before making a visit, as stock levels may vary. Online marketplaces can also be a reliable option if the machine is not found in-store.

Warranty and Support Information

The ALDI K-Fee coffee machine comes with a 24-month warranty covering defects in materials and workmanship. For support, contact ALDI customer service or visit their official website for assistance and inquiries.

Warranty Details

The ALDI K-Fee coffee machine is backed by a 24-month warranty, ensuring coverage for manufacturing defects and faulty parts. This warranty period begins from the date of purchase and is valid for all models, including the Wave, Twins II, and Grande. To claim warranty benefits, users must retain their purchase receipt and product registration. The warranty card, provided with the machine, outlines the terms and conditions in detail. It is essential to note that the warranty does not cover damage caused by misuse, improper maintenance, or unauthorized modifications. For any warranty-related queries, customers can contact ALDI customer support directly. The warranty ensures peace of mind, allowing users to enjoy their coffee machine with confidence.

Customer Support

ALDI provides comprehensive customer support for the K-Fee coffee machine, ensuring users receive assistance when needed. Customers can access support through various channels, including phone, email, and live chat, available on the ALDI website. The official ALDI website also features a dedicated support section, where users can find troubleshooting guides, FAQs, and downloadable manuals for their specific K-Fee model. Additionally, the website offers a search function to locate product-specific information quickly. For warranty-related inquiries, customers can refer to the warranty card included with their machine or contact support directly. ALDI’s customer support team is committed to resolving issues promptly, ensuring a seamless experience for K-Fee coffee machine owners. Whether it’s operational guidance or maintenance advice, ALDI’s support resources are designed to help users make the most of their coffee machine.