Welcome to the Kenmore 12 Stitch Sewing Machine Manual, your comprehensive guide to understanding and operating this versatile sewing machine. This manual is designed to help you unlock the full potential of your Kenmore sewing machine, ensuring proper setup, operation, and maintenance. Whether you’re a beginner or an experienced sewer, this manual provides essential insights into the machine’s features, such as the Ultra-Stitch feature, Sew-by-Color functionality, and the full rotary shuttle, helping you achieve professional-grade stitching every time.
1.1 Overview of the Kenmore 12 Stitch Sewing Machine
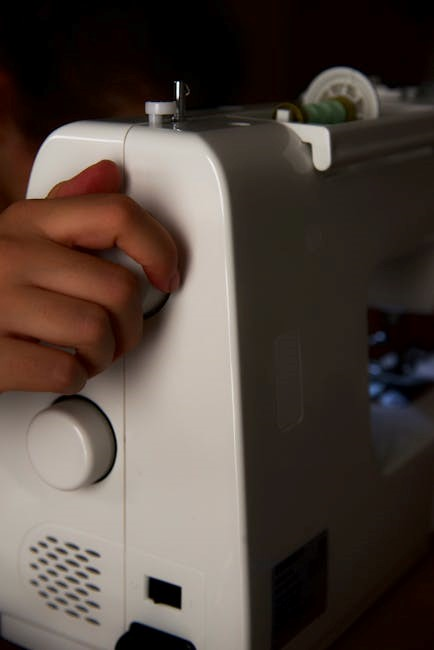
The Kenmore 12 Stitch Sewing Machine is a versatile and durable sewing machine designed for a variety of sewing tasks. It features 12 built-in stitches, including straight, zigzag, and decorative options, making it suitable for both beginners and experienced sewers. The machine is equipped with an Ultra-Stitch feature for consistent stitching and a Sew-by-Color guide to help users select the right settings for their fabric type. Its full rotary shuttle ensures smooth operation, making it ideal for heavy-duty projects. This machine is a reliable choice for crafting, repairs, and everyday sewing needs.
1.2 Importance of the Manual for Proper Machine Operation
The manual is essential for understanding and optimizing the Kenmore 12 Stitch Sewing Machine. It provides detailed instructions for setup, operation, and maintenance, ensuring users can utilize all features effectively. Without the manual, users may struggle with threading, stitch selection, and troubleshooting, potentially leading to machine damage or subpar results. By following the guide, users can prevent common issues and maintain the machine’s performance, extending its lifespan and enhancing their sewing experience. Regular reference to the manual ensures safe and efficient operation.
Key Features of the Kenmore 12 Stitch Sewing Machine
The Kenmore 12 Stitch Sewing Machine offers a variety of advanced features, including the Ultra-Stitch system for consistent stitching, Sew-by-Color functionality, and a full rotary shuttle for smooth operation.
2.1 Ultra-Stitch Feature for Uniform Stitches
The Ultra-Stitch feature of the Kenmore 12 Stitch Sewing Machine ensures consistent and uniform stitching, making it ideal for various fabrics. This advanced technology regulates stitch length and tension, providing professional-grade results. Whether sewing delicate fabrics or heavy-duty materials, the Ultra-Stitch feature delivers precise stitching every time. It is particularly useful for beginners, as it minimizes errors and ensures a polished finish. This feature is a standout aspect of the machine, enhancing overall sewing efficiency and quality.
2.2 Sew-by-Color Feature with Recommended Stitch Settings
The Sew-by-Color feature on the Kenmore 12 Stitch Sewing Machine simplifies the sewing process by recommending specific stitch settings based on fabric type and color. This intuitive system guides users to select the optimal stitch length and width for their project, ensuring the best results. Designed to enhance creativity and efficiency, the feature is especially helpful for beginners, allowing them to achieve professional-looking seams effortlessly. With its user-friendly interface, the Sew-by-Color feature makes it easy to navigate various stitching options, ensuring versatility and precision in every stitch.
2.3 Full Rotary Shuttle for Efficient Sewing
The Kenmore 12 Stitch Sewing Machine features a Full Rotary Shuttle, designed to enhance sewing efficiency and precision. This mechanism ensures smooth fabric handling and consistent stitch formation, making it ideal for various sewing tasks. The rotary shuttle reduces vibration and noise, providing a stable sewing experience. Its robust design supports heavy-duty sewing projects, allowing users to work with multiple fabric layers and thicknesses effortlessly. This feature is a testament to the machine’s durability and capability, ensuring reliable performance for both casual and professional sewing endeavors.
Setting Up Your Kenmore Sewing Machine
To ensure optimal performance, begin by installing your Kenmore sewing machine in a sturdy cabinet or on a flat surface. The machine comes pre-oiled, but wipe the needle plate, bed plate, and bobbin case before use for a clean start. Proper setup includes threading correctly, ensuring the bobbin is seated, and adjusting stitch settings. Regular cleaning and lubrication are essential for smooth operation. Store the machine in a dry, dust-free area when not in use to maintain its longevity; Follow these steps for a seamless sewing experience.
3.1 Installing the Machine in a Cabinet or on a Flat Surface
To set up your Kenmore 12 Stitch Sewing Machine, place it on a sturdy, flat surface or install it in a Kenmore sewing cabinet for stability. Ensure the machine is level to prevent vibration and uneven stitching. If using a cabinet, follow the manufacturer’s installation guide for proper alignment. The machine comes pre-oiled, so no additional lubrication is needed during initial setup. Before first use, wipe the needle plate, bed plate, and bobbin case with a soft cloth to remove any residue. This ensures smooth operation and prevents fabric snagging.
3.2 Initial Oiling and Preparation of the Machine
Your Kenmore 12 Stitch Sewing Machine arrives pre-oiled from the factory, ready for immediate use. However, it’s essential to inspect and prepare the machine before sewing. Gently wipe the needle plate, bed plate, and bobbin case with a soft, dry cloth to remove any excess oil or residue. This step ensures smooth operation and prevents fabric from sticking. Regular maintenance, including periodic oiling, will keep your machine running efficiently. Always use high-quality sewing machine oil for lubrication to maintain performance and extend the machine’s lifespan. Proper preparation ensures optimal stitching and durability.
3.4 Wipe Off the Needle Plate, Bed Plate, and Bobbin Case
Before sewing, gently wipe the needle plate, bed plate, and bobbin case with a soft, dry cloth to remove any excess oil or residue. This step ensures smooth operation and prevents fabric from sticking. While the machine is pre-oiled at the factory, wiping these areas helps maintain cleanliness and prevents dust buildup. Regularly cleaning these parts is crucial for consistent stitching quality. Use only a dry cloth; avoid harsh chemicals or liquids that could damage the machine’s finish or compromise its performance. This simple maintenance step contributes to the longevity and efficiency of your Kenmore 12 Stitch Sewing Machine.
Basic Operations of the Kenmore 12 Stitch Machine
Mastering the basic operations ensures smooth sewing. Start by threading the machine correctly, selecting the appropriate stitch for your fabric type, and adjusting stitch length and width;
4.1 Threading the Machine Correctly
Proper threading is essential for smooth operation. Start by turning off the machine and locating the spool pin. Gently pull the thread through the tension discs, ensuring it’s seated properly. Guide the thread through the take-up lever and needle bar, leaving a small loop. Insert the thread into the needle eye from front to back. Pull the thread gently to remove any slack. Trim excess thread close to the needle. Always refer to the manual for specific threading diagrams to avoid mistakes. Practice threading on scrap fabric to ensure accuracy.
4.2 Selecting the Right Stitch for Your Fabric
Choosing the correct stitch ensures optimal results for your fabric type. The Kenmore 12 Stitch Sewing Machine offers various stitches, including straight, zigzag, and stretch stitches. For lightweight fabrics like cotton or linen, use the straight stitch. Delicate fabrics may require a shorter stitch length. Heavier fabrics, such as denim, benefit from the reinforced straight stitch. Knits and elastic fabrics work best with the stretch stitch. Always consult the manual for fabric-specific recommendations and adjust stitch length and width as needed. Proper stitch selection enhances both durability and professional finishes.
4.3 Adjusting Stitch Length and Width
Adjusting stitch length and width on the Kenmore 12 Stitch Sewing Machine is straightforward. Use the stitch length control dial to regulate the length, typically ranging from 8 to 12 stitches per inch. For delicate fabrics, a shorter stitch length is recommended, while heavier fabrics may require a longer stitch. The zigzag stitch width can also be adjusted to accommodate different fabric types. Properly setting these adjustments ensures even stitching and prevents fabric distortion. Always refer to the manual for specific settings tailored to your fabric type for optimal results.
Advanced Stitching Techniques
Explore advanced techniques like automatic patterns, zigzag stitching, and stretch stitching for professional results. These features enhance creativity and adaptability for various fabric types and projects.
5.1 Using the Automatic Patterns and Zigzag Stitch
The Kenmore 12 Stitch Sewing Machine offers automatic patterns and a zigzag stitch, perfect for decorative sewing and stretch fabrics. To use these features, select the desired stitch pattern from the control panel. Adjust the stitch length and width as needed for your fabric type. The zigzag stitch is ideal for preventing fraying on raw edges, while automatic patterns allow for creative embellishments. Ensure the machine is properly threaded and the correct presser foot is in place before starting. Practice on scrap fabric to achieve optimal results. This feature enhances both functionality and creativity in your sewing projects.
5.2 Two-Point Shell Stitching for Professional Finishes
The two-point shell stitching on the Kenmore 12 Stitch Sewing Machine is designed for creating professional, smooth finishes. Ideal for hems, seams, and decorative edges, this stitch minimizes fabric fraying and provides a polished look. To use this feature, select the shell stitch pattern and adjust the stitch length and width according to your fabric type. The machine’s precise stitching ensures even, consistent results. This stitch is particularly effective for delicate or stretch fabrics, making it a versatile option for both functional and decorative sewing projects. Regular practice enhances mastery of this technique.
5.3 Stretch Stitching for Knits and Elastic Fabrics
The Kenmore 12 Stitch Sewing Machine offers a specialized stretch stitching feature, perfect for sewing knits, elastic fabrics, and stretchy materials. This stitch ensures that seams remain flexible, preventing tears and maintaining fabric elasticity. Ideal for garments like t-shirts, leggings, and swimwear, the stretch stitch adapts to the fabric’s movement. To use this feature, select the stretch stitch option, adjust the stitch length, and use a compatible needle. Always test on scrap fabric to ensure the best results for your project. This feature enhances durability and comfort in stretchy fabrics.
Maintenance and Care of the Kenmore Sewing Machine
Regular cleaning, lubrication, and proper storage are essential for maintaining the performance and longevity of your Kenmore sewing machine. Follow the manual’s guidelines to ensure smooth operation.
6.1 Regular Cleaning of the Machine
Regular cleaning is vital to maintain the performance and longevity of your Kenmore sewing machine. Use a soft, dry cloth to wipe the needle plate, bed plate, and bobbin case to remove dust, lint, and residual thread. Avoid using harsh chemicals or wet cloths, as they may damage the machine’s finish or internal components. Regularly cleaning these areas ensures smooth operation and prevents thread breakage or tension issues. This simple maintenance step helps keep your machine in optimal working condition for years.
6.2 Lubricating the Machine for Smooth Operation
Proper lubrication is essential to ensure the Kenmore 12 Stitch Sewing Machine operates smoothly and lasts longer. The machine comes pre-oiled at the factory, but additional lubrication may be needed over time. Use high-quality sewing machine oil and apply it to the shuttle hook and other moving parts as specified in the manual. Avoid using household oils, as they may damage the machine. Regular lubrication reduces friction, prevents wear and tear, and ensures consistent stitching performance. Always refer to the manual for specific lubrication points and instructions.
6.3 Storing the Machine Properly
Proper storage of your Kenmore 12 Stitch Sewing Machine ensures its longevity and optimal performance. Before storing, clean the machine thoroughly, paying attention to the needle plate, bobbin case, and shuttle hook. Use a soft cloth to remove dust and debris. Store the machine in a cool, dry place, away from direct sunlight and moisture. Cover it with a protective cloth or case to prevent dust accumulation. Avoid storing it in extreme temperatures or humid environments. For added protection, use the original storage case if available. Regular maintenance before storage ensures the machine remains in excellent condition.

Troubleshooting Common Issues
This section addresses common issues like thread breakage, stitch quality problems, and bobbin case malfunctions. The manual offers practical solutions to restore smooth machine operation quickly.
7.1 Resolving Thread Breakage and Tension Problems
Thread breakage and tension issues are common challenges that can disrupt your sewing workflow. To address these problems, start by ensuring the machine is properly threaded and that the tension discs are clean and free from debris. Check the bobbin for correct placement and alignment, as improper positioning can cause uneven tension. If thread continues to break, inspect for worn or damaged parts like the take-up spring or needle. Regularly cleaning and oiling the machine can also prevent these issues, promoting smooth operation. Always refer to the manual for specific guidance on adjusting tension settings for different fabrics.
7.2 Fixing Issues with Stitch Quality
Poor stitch quality can often be resolved by checking the thread tension, ensuring proper needle alignment, and verifying that the bobbin is correctly seated. If stitches are uneven or puckering occurs, adjust the tension settings according to the fabric type. Inspect the needle for damage or dullness and replace it if necessary. Ensure the machine is threaded correctly and that the take-up lever is in the correct position. For knits or stretch fabrics, use the stretch stitch option. Regular cleaning and lubrication can also improve stitch consistency and overall machine performance. Always consult the manual for specific adjustments.
7.3 Dealing with Bobbin Case Problems
If you encounter issues with the bobbin case, start by ensuring it is properly seated and aligned with the machine’s shuttle hook. Check that the bobbin is correctly threaded and that the tension is adjusted according to the fabric type. Remove any lint or debris from the bobbin case and surrounding areas, as buildup can cause poor stitch formation. If the bobbin case is damaged or bent, replace it with a genuine Kenmore part. Always refer to the manual for specific guidance on adjusting or replacing the bobbin case. Regular maintenance can prevent such issues.
Accessories and Replacement Parts
Explore essential accessories for your Kenmore 12 Stitch, including compatible needles, replacement bobbins, and more. Find genuine parts at Sears Parts Direct for optimal performance.
8.1 Compatible Needles for the Kenmore 12 Stitch Machine
Choosing the right needle for your Kenmore 12 Stitch Sewing Machine is crucial for optimal performance. Use genuine Kenmore needles, available at Sears, to ensure compatibility and quality stitching. These needles are designed to work seamlessly with the machine’s Ultra-Stitch feature and various fabric types. For general sewing, standard sharp needles are ideal, while heavy-duty needles are better for thick fabrics. Specialized needles, like stretch needles for knits, are also available. Always refer to your manual or Sears Parts Direct for the most accurate recommendations.
8.2 Bobbins and Other Essential Accessories
The Kenmore 12 Stitch Sewing Machine requires specific accessories for optimal performance. Bobbins are essential for holding the bobbin thread, ensuring smooth stitching. Using the correct size and type of bobbin is crucial to prevent thread breakage and maintain stitch quality. Additional accessories like presser feet are necessary for various fabrics and sewing tasks. Sears Parts Direct offers genuine Kenmore parts, ensuring compatibility and performance. Always use authentic accessories to uphold your machine’s functionality and warranty. Consult your manual for specific recommendations on accessories.
8.3 Where to Find Genuine Kenmore Parts
For authentic Kenmore 12 Stitch Sewing Machine parts, visit Sears Parts Direct, which offers a wide range of genuine components. This includes needles, bobbins, and other essential accessories. The platform provides detailed part diagrams to help you identify the correct items for your machine. Genuine parts ensure compatibility and optimal performance, avoiding potential issues with non-authentic alternatives. Sears Parts Direct allows instant downloads of manuals and parts lists, making it easy to find and purchase what you need. Contact their support team for assistance with orders or downloads.
Downloading and Accessing the Kenmore Manual
The Kenmore 12 Stitch Sewing Machine manual is easily accessible online. Visit Sears Parts Direct to download a free PDF version, ensuring you have the correct model number for accurate instructions.
9.1 Finding the Correct Model Number for Your Machine
To download the correct manual, locate your Kenmore sewing machine’s model number. This is usually found on a label attached to the back or bottom of the machine. Ensure the number is accurate, as it determines the right manual for your specific model. For Kenmore 385 models, the 5-digit stock number following “385” is crucial. Visit Sears Parts Direct and enter this number to access your manual. Double-check the model number to avoid downloading incorrect instructions.
9.2 Free PDF Downloads from Sears Parts Direct
Sears Parts Direct offers free PDF downloads for Kenmore sewing machine manuals, including the 12 Stitch model. Visit their website, enter your machine’s model number, and access the manual instantly. This service provides a convenient way to retrieve instructions without additional costs. Ensure compatibility by verifying your model number beforehand. Downloading the manual allows you to print or save it for future reference, making it easier to troubleshoot and maintain your machine effectively. Sears Parts Direct ensures quick access to essential information.
9.3 Printing and Saving the Manual for Future Use
Once downloaded, printing the Kenmore 12 Stitch Sewing Machine Manual allows for easy reference while working on projects. Print the PDF on standard paper for a physical copy or save it to your device for digital access. Consider organizing the manual in a binder for quick navigation. Saving the file to cloud storage ensures accessibility across devices. This convenient approach helps maintain the manual’s availability for years, preventing loss and ensuring uninterrupted use of your sewing machine.
Mastering the Kenmore 12 Stitch Sewing Machine unlocks endless creative possibilities. Regular practice and experimentation with its advanced features will enhance your sewing skills. Happy sewing!
10.1 Maximizing Your Sewing Experience with the Kenmore 12 Stitch
To maximize your sewing experience with the Kenmore 12 Stitch, explore its advanced features like the Ultra-Stitch and Sew-by-Color settings. Regularly maintain the machine by cleaning and lubricating it to ensure smooth operation. Experiment with different fabrics and stitches to expand your creative horizons. By following the manual’s guidelines and practicing consistently, you’ll achieve professional-quality results and enjoy a fulfilling sewing journey with your Kenmore machine. Happy sewing!
10.2 Encouragement to Practice and Experiment
Don’t hesitate to explore the full potential of your Kenmore 12 Stitch sewing machine by practicing and experimenting with its features. Start with simple projects to familiarize yourself with the Ultra-Stitch and Sew-by-Color settings. Gradually move to more complex tasks, like two-point shell stitching or stretch stitching, to refine your skills. The more you sew, the more confident you’ll become in handling various fabrics and techniques. Remember, creativity is key—use this machine as a tool to bring your unique ideas to life and enjoy the satisfaction of crafting something truly personalized. Happy sewing!