The Abandoned Wife is a captivating contemporary romance novel by Titi Love, revolving around Roxanne Jarvis and Lucian Farwell․ It explores themes of heartbreak, betrayal, and self-discovery, offering a gripping narrative of love and empowerment․ The story delves into Roxanne’s journey from a loveless marriage to her rise as a medical genius, intertwining with Lucian’s complexities․ This emotional rollercoaster is available for PDF download on platforms like GoodNovel and Hinovel, making it accessible to readers worldwide․
1․1 Overview of The Abandoned Wife Story
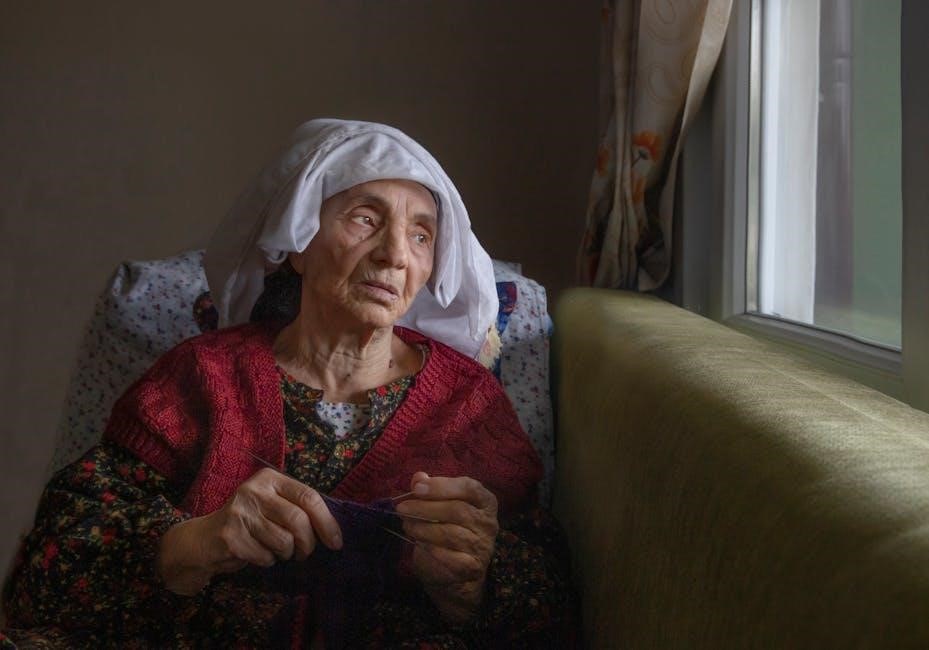
The Abandoned Wife follows Roxanne Jarvis, a woman trapped in a loveless marriage with Lucian Farwell, a wealthy businessman․ Despite her devotion, Lucian’s heart belongs to another woman, Aubree Pearson․ The story explores Roxanne’s emotional turmoil as she navigates a marriage devoid of affection and confronts the harsh realities of betrayal․ After years of unrequited love, Roxanne discovers her own strength and embarks on a journey of self-discovery․ Six years later, she returns as a renowned medical genius, transforming her life and defying societal expectations․ The novel delves into themes of heartbreak, empowerment, and the complexities of relationships, making it a compelling read for fans of contemporary romance․ Roxanne’s resilience and growth serve as the core of this emotional and inspiring narrative․
1․2 Background of the Novel
The Abandoned Wife is a contemporary romance novel authored by Titi Love, blending elements of comedy, medical genius, and adventure․ The story centers around Roxanne Jarvis, a devoted wife, and Lucian Farwell, a wealthy businessman whose heart belongs to another woman, Aubree Pearson․ Set against the backdrop of societal pressures and family expectations, the novel explores themes of love, betrayal, and self-discovery․ Roxanne’s journey from a loveless marriage to her transformation into a world-renowned medical genius highlights her resilience and growth․ The novel’s background is rooted in the complexities of relationships, trust issues, and personal empowerment, making it a compelling read․ Titi Love’s storytelling weaves a narrative that resonates with readers, offering a mix of emotional depth and inspiring character development․ The novel’s setting and character dynamics further enhance its appeal, making it a standout in the romance genre․

Plot Summary of The Abandoned Wife
The Abandoned Wife follows Roxanne Jarvis, trapped in a loveless marriage with Lucian Farwell, a wealthy businessman obsessed with his first crush, Aubree․ After years of heartbreak, Roxanne discovers her true worth, transforming into a medical genius․ Her journey from betrayal to empowerment is intertwined with Lucian’s internal conflict, creating a gripping narrative of love, loss, and redemption․ The novel’s emotional depth and character development make it a compelling read, with the full story available for PDF download on platforms like GoodNovel and Hinovel․
2․1 Roxanne Jarvis’s Journey
Roxanne Jarvis’s journey is a poignant tale of resilience and transformation․ Married to Lucian Farwell, she endures a loveless relationship, with Lucian’s heart belonging to his first crush, Aubree․ Despite her devotion, Roxanne faces betrayal and emotional neglect․ Her breaking point comes when she realizes her feelings will never be reciprocated, leading her to initiate a divorce․ Six years later, Roxanne reemerges as a world-renowned medical genius, raising her twin sons Archie and Benny․ Her transformation from a scorned wife to an empowered woman highlights themes of self-discovery and independence․ Readers witness her growth from a desperate, heartbroken wife to a confident, successful individual, making her journey a central focus of The Abandoned Wife novel, which is available for PDF download on platforms like GoodNovel and Hinovel․
2․2 Lucian Farwell’s Role in the Story
Lucian Farwell, the wealthy CEO of Farwell Group, plays a pivotal role in The Abandoned Wife as Roxanne’s husband and emotional adversary․ His obsession with Aubree Pearson drives much of the story’s conflict, leaving Roxanne in a loveless marriage․ Lucian’s inability to reciprocate Roxanne’s devotion creates a toxic dynamic, marked by disdain and emotional distance․ Despite his cold exterior, Lucian’s character reveals deep-seated emotional turmoil, particularly when Roxanne confronts him about their marriage and initiates a passionate yet desperate encounter; His fury and subsequent realization of her departure underscore his complexity as a character․ Lucian’s role is not only that of an antagonist but also a catalyst for Roxanne’s growth, as his actions push her toward independence and self-discovery․ His journey, intertwined with Roxanne’s, explores themes of trust, betrayal, and the consequences of unresolved emotions․
The novel, available for PDF download on platforms like GoodNovel, delves into Lucian’s internal conflicts, making him a multifaceted character central to the story’s emotional depth․
2․3 Family Tensions and Conflicts
The Abandoned Wife intricately weaves family tensions and conflicts into its narrative, highlighting the strained relationships within the Farwell household․ Roxanne’s marriage to Lucian, arranged to fulfill his grandfather’s wishes, sets the stage for enduring animosity․ Lucian’s open disdain for Roxanne and his preference for Aubree Pearson create a hostile environment, exacerbating the emotional distance between the couple․ Additionally, Roxanne’s own family contributes to her distress, as her father and stepmother prioritize financial gain over her well-being․ These familial conflicts not only drive the plot but also shape Roxanne’s resilience and determination to rebuild her life․ The novel, available for PDF download on platforms like Hinovel, masterfully portrays how these tensions propel Roxanne toward self-discovery and empowerment, making her journey both poignant and inspiring․

Key Characters in The Abandoned Wife
Roxanne Jarvis is the resilient protagonist, navigating a loveless marriage and personal growth․ Lucian Farwell, the wealthy CEO, struggles with his own demons and unrequited love․ Supporting characters like Aubree Pearson add depth to the story․
3․1 Roxanne Jarvis: The Protagonist
Roxanne Jarvis is the central figure in The Abandoned Wife, portrayed as a strong yet vulnerable woman․ Married to Lucian Farwell for three years, she endures a loveless relationship, her unrequited love for him driving her actions․ Desperate for connection, she initiates a intimate encounter with Lucian before filing for divorce, showcasing her emotional depth․ Her journey from heartbreak to independence highlights her resilience․ Roxanne’s transformation from a devoted wife to a self-reliant individual, later becoming a renowned medical genius, underscores her growth․ The novel vividly portrays her struggles, making her a relatable and inspiring character․ Her story resonates with themes of self-discovery and empowerment, central to the narrative․
3․2 Lucian Farwell: The Wealthy Businessman
Lucian Farwell is a pivotal character in The Abandoned Wife, depicted as a wealthy and enigmatic CEO of the Farwell Group․ His disdain for Roxanne is evident from their arranged marriage, his heart belonging to Aubree Pearson․ Despite his indifference, Roxanne’s desperate attempt to connect with him leads to a passionate encounter, revealing his internal conflict․ Lucian’s refusal to accept Roxanne and his subsequent anger upon discovering her divorce papers highlight his complex personality; His journey from a detached husband to a man forced to confront his emotions adds depth to the story․ Lucian’s character explores themes of unrequited love and the consequences of his choices, making him a multifaceted figure in the novel․ His role is crucial in shaping Roxanne’s transformation and the overall narrative․
3․3 Supporting Characters and Their Roles
In The Abandoned Wife, several supporting characters play pivotal roles in shaping the narrative․ Aubree Pearson, Lucian’s first love, underscores his emotional unavailability and disdain for Roxanne․ Roxanne’s manipulative father and stepmother, driven by greed, force her into the arranged marriage, highlighting family tensions․ Her twin sons, Archie and Benny, bring joy and chaos, showcasing her journey as a dedicated mother․ Professor Lambert, a mentor, supports Roxanne’s medical career, aiding her rise as a genius doctor․ These characters add depth, influencing Roxanne’s resilience and Lucian’s evolving perspective․ Their roles enrich the story, emphasizing themes of betrayal, forgiveness, and personal growth, while also providing moments of levity and emotional complexity to the plot․

Themes Explored in The Abandoned Wife
Love, betrayal, and heartbreak intertwine in Roxanne’s journey, while self-discovery and empowerment emerge as she overcomes adversity․ Themes of trust issues and family tensions highlight her resilience, leading to a pursuit of freedom and independence․
4․1 Love, Betrayal, and Heartbreak
Love, betrayal, and heartbreak are central to The Abandoned Wife, as Roxanne Jarvis navigates a marriage devoid of affection․ Her husband, Lucian Farwell, prioritizes his first crush, Aubree Pearson, leaving Roxanne emotionally shattered․ Despite her unwavering love, Roxanne faces consistent rejection, highlighting the pain of unrequited feelings․ Her desperate attempt to connect with Lucian leads to a fleeting, passionate encounter, yet it only deepens her sorrow․ The novel vividly portrays Roxanne’s internal turmoil, from her relentless devotion to her ultimate realization that love without reciprocity is futile․ This theme resonates deeply, offering readers a poignant reflection on the fragility of love and the strength required to move beyond heartbreak․ The narrative masterfully blends emotional depth with relatable struggles, making it a compelling read for romance enthusiasts․
4․2 Self-Discovery and Empowerment
Self-discovery and empowerment are pivotal themes in The Abandoned Wife, as Roxanne Jarvis evolves from a heartbroken wife to a confident, independent individual․ After years of living in a loveless marriage, Roxanne finds the strength to walk away, embracing a new chapter of her life․ Her journey is marked by personal growth, as she pursues a career in medicine, becoming a world-renowned genius doctor․ This transformation highlights her resilience and determination to redefine her identity beyond her failed marriage․ Roxanne’s empowerment is further evident in her ability to raise her twin sons, Archie and Benny, while navigating the challenges of single parenthood․ Through her experiences, the novel underscores the importance of self-worth and the power of reinventing oneself after adversity․ Roxanne’s story serves as a testament to the human spirit’s capacity for growth and renewal, inspiring readers to embrace their own paths to self-discovery․
4․3 Trust Issues and Relationships
Trust issues and strained relationships form a central theme in The Abandoned Wife, particularly through Roxanne and Lucian’s complex dynamic․ Roxanne’s unrequited love and Lucian’s emotional detachment create a deep chasm in their marriage, eroding trust and intimacy․ Roxanne’s desperate attempt to connect with Lucian, despite his indifference, highlights her internal struggle with self-worth and the futility of her efforts․ Meanwhile, Lucian’s unwavering devotion to Aubree Pearson further alienates Roxanne, intensifying her feelings of betrayal․ The novel explores how unresolved trust issues can devastate relationships, leaving scars that are difficult to heal․ Through Roxanne’s journey, the story emphasizes the importance of mutual respect and communication in relationships, while also illustrating the consequences of neglecting emotional needs․ Ultimately, the breakdown of trust between Roxanne and Lucian serves as a cautionary tale about the fragility of love and relationships․

Author Information
Titi Love is the author of The Abandoned Wife, a contemporary romance novel․ Her writing style blends emotional depth with relatable themes, making her works popular among romance readers worldwide․
5․1 About Titi Love: The Author
Titi Love is a renowned author known for her compelling contemporary romance novels․ Her works often explore themes of love, betrayal, and self-discovery, resonating deeply with readers․ In The Abandoned Wife, Titi masterfully weaves the intricate relationship between Roxanne and Lucian, creating an emotional journey that captivates audiences․ Her writing style is both intimate and engaging, allowing readers to connect with the characters on a personal level․ Titi’s ability to craft relatable narratives has earned her a dedicated following, making her a standout author in the romance genre․ Her stories are available on various platforms, including PDF downloads, ensuring accessibility for readers worldwide․
5․2 Titi Love’s Writing Style
Titi Love’s writing style in The Abandoned Wife is both evocative and engaging, blending elements of romance, comedy, and drama seamlessly․ Her narrative voice is intimate, allowing readers to deeply connect with the emotional journeys of Roxanne and Lucian․ Titi excels at crafting relatable characters, infusing them with complexity and depth․ Her storytelling is layered, exploring themes of love, betrayal, and self-discovery with sensitivity․ The author’s ability to weave suspense and humor into the plot keeps readers captivated․ Titi’s prose is descriptive yet concise, painting vivid scenes that immerse readers in the world of her characters․ Her writing resonates with audiences, making The Abandoned Wife a compelling read․ This style has earned her acclaim, solidifying her place as a talented contemporary romance author․ Her works, including this novel, are widely available for PDF download, ensuring accessibility for fans worldwide․

The Abandoned Wife PDF Download Sources
The Abandoned Wife novel is available for PDF download on platforms like GoodNovel, Hinovel, and Novelxo․ These sites offer free access, making the book easily accessible to readers worldwide․
6․1 Popular Platforms for Download
Readers can easily access The Abandoned Wife novel in PDF format through popular platforms like GoodNovel, Hinovel, and Novelxo․ These sites offer free downloads, ensuring accessibility worldwide․ GoodNovel provides a user-friendly interface with regular updates, while Hinovel allows readers to download the novel directly via its app․ Novelxo also offers a seamless reading experience with a vast library of novels, including The Abandoned Wife․ Additionally, platforms like Tapon and BTMBeta host the novel, making it widely available․ These platforms cater to fans of contemporary romance, ensuring that Roxanne and Lucian’s story reaches a global audience․ Always consider legal sources to support the author and the publishing industry․
6․2 Legal Considerations for PDF Downloads
When downloading The Abandoned Wife novel in PDF format, it is crucial to consider legal implications․ Downloading from unauthorized platforms may infringe on copyright laws, potentially harming the author and publishers․ Readers are encouraged to use legitimate sources like GoodNovel, Hinovel, or Tapon, which offer authorized access․ These platforms ensure that downloads are legal and support the creators․ Always verify the authenticity of the website to avoid pirated content․ Respecting copyright not only upholds the law but also promotes the sustainability of the literary industry․ By choosing legal options, readers contribute to the continued production of high-quality novels like The Abandoned Wife․ This approach ensures a fair and ethical way to enjoy the story while supporting the author, Titi Love, and the publishing community․

Analysis of The Abandoned Wife Novel
The Abandoned Wife masterfully explores Roxanne and Lucian’s complex relationship, delving into trust issues and emotional depth․ Titi Love’s storytelling weaves heartbreak with empowerment, creating a compelling narrative that resonates deeply․
7․1 Roxanne and Lucian’s Relationship Dynamics
Roxanne and Lucian’s relationship is a central theme in The Abandoned Wife, marked by unrequited love and emotional turmoil․ Roxanne, devoted and longing for affection, struggles with Lucian’s indifference, who remains fixated on his first crush, Aubree․ Their marriage, arranged for convenience, lacks intimacy, leading to Roxanne’s desperate attempt to connect physically, which complicates their dynamics further․ Despite her efforts, Lucian’s disdain and betrayal push Roxanne to seek independence․ The novel poignantly portrays how their relationship evolves from cold detachment to eventual separation, highlighting the pain of one-sided love and the strength found in self-discovery․ Their interactions are fraught with tension, making their story a compelling exploration of love’s complexities․
7․2 Themes and Their Relevance to Readers
The Abandoned Wife explores themes of love, betrayal, and self-discovery, resonating deeply with readers․ Roxanne’s journey from a loveless marriage to empowerment mirrors the struggles many face, offering inspiration and hope․ The novel delves into trust issues and the complexities of relationships, providing insight into the human experience․ Readers connect with Roxanne’s transformation from vulnerability to strength, highlighting personal growth and resilience․ Themes of heartbreak and recovery are universally relatable, making the story impactful and thought-provoking․ The exploration of family dynamics and societal pressures adds depth, appealing to a broad audience․ Overall, the novel’s themes of self-discovery and empowerment inspire readers to reflect on their own lives and relationships․
7․3 Character Development Throughout the Story
The character development in The Abandoned Wife is profound, with Roxanne Jarvis evolving from a heartbroken, abandoned wife to a confident, self-reliant individual․ Her journey from vulnerability to empowerment is central to the narrative․ Initially, Roxanne is portrayed as a devoted yet unappreciated wife, yearning for love and acceptance․ However, her experiences of betrayal and abandonment catalyze her transformation into a strong, independent woman․ Lucian Farwell, on the other hand, begins as a distant, emotionally guarded character but gradually reveals his complexities․ His growth from a man consumed by past loves to one grappling with self-awareness adds depth to the story․ The supporting characters also undergo significant development, contributing to the novel’s emotional richness․ The intricate evolution of these characters makes the story engaging and relatable, allowing readers to connect deeply with their struggles and triumphs․
The Abandoned Wife leaves a lasting impact, showcasing Roxanne’s transformation from heartbreak to empowerment․ The novel’s emotional depth and exploration of love, betrayal, and resilience resonate deeply, making it a memorable read․ Its themes of self-discovery and redemption, coupled with the availability of the PDF download, ensure its accessibility and appeal to romance enthusiasts worldwide; A captivating and thought-provoking journey that lingers long after the final page․
8․1 Impact of The Abandoned Wife on Readers
The Abandoned Wife profoundly resonates with readers, evoking emotions and sparking reflection on love, betrayal, and self-discovery․ Roxanne’s journey from heartbreak to empowerment inspires personal growth, making her relatable and admirable․ The novel’s exploration of trust issues and relationship dynamics challenges readers to evaluate their own experiences, fostering empathy and understanding․ Its emotional depth and satisfying narrative arc leave a lasting impression, encouraging readers to embrace resilience and independence․ The availability of the PDF download ensures global accessibility, allowing a wider audience to connect with Roxanne’s transformative story․ This contemporary romance not only entertains but also empowers, making it a memorable and impactful read for fans of the genre․

The Abandoned Wife Genre and Style
The Abandoned Wife is a captivating Contemporary Romance novel, blending emotional depth with elements of comedy, medical genius, and adventure․ The PDF download is readily available online, ensuring accessibility for all readers globally․
9․1 Contemporary Romance Elements
The Abandoned Wife seamlessly blends contemporary romance with elements of comedy, medical drama, and adventure, creating a unique narrative․ The story centers on Roxanne and Lucian, whose complex relationship evolves from a loveless marriage to a journey of self-discovery and empowerment․ The novel’s emotional depth, coupled with its relatable themes, makes it a standout in the contemporary romance genre․ The PDF download of this novel is widely available on platforms like GoodNovel and Hinovel, allowing readers to easily access and immerse themselves in Roxanne’s transformative journey․ Through its engaging plot and well-developed characters, The Abandoned Wife offers a compelling reading experience that resonates with fans of modern romance stories․