The Chamberlain Keypad is a convenient keyless entry system designed for garage door openers, offering reliable performance and user-friendly operation for enhanced security and accessibility.
Overview of the Chamberlain Keypad
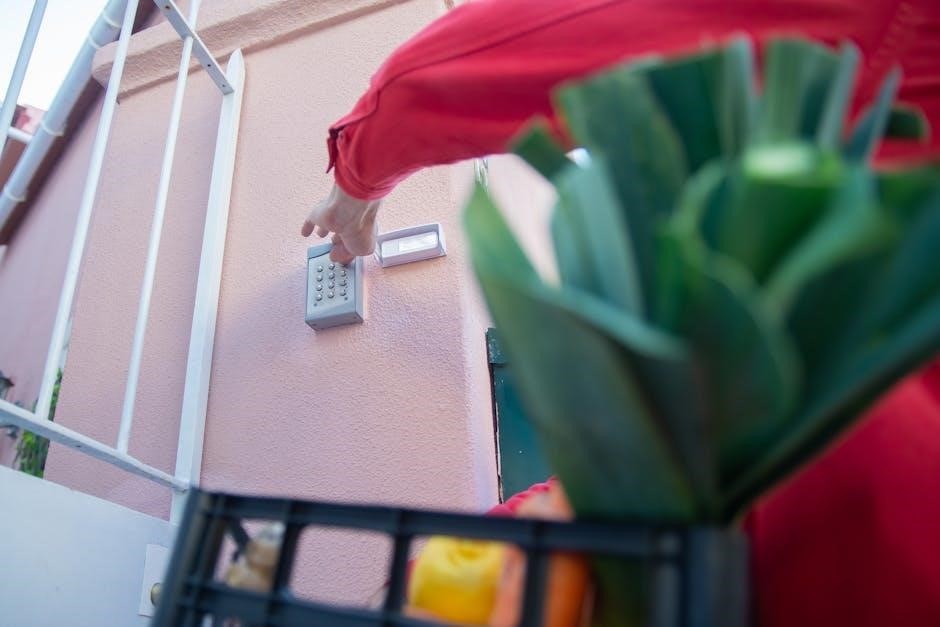
The Chamberlain Keypad is a versatile and user-friendly keyless entry system designed for seamless integration with Chamberlain, LiftMaster, and Craftsman garage door openers. It offers a convenient solution for accessing your garage without the need for keys, combining durability with modern functionality. The keypad is weather-resistant, ensuring reliability in various outdoor conditions, and features a backlit design for improved visibility in low-light environments. Its compact and sleek design allows for easy installation while maintaining a professional appearance. With compatibility across multiple garage door opener models, the Chamberlain Keypad is a practical choice for homeowners seeking enhanced security and convenience for their garage access needs.
Key Features and Benefits
The Chamberlain Keypad offers a range of features that enhance garage security and accessibility. Its keyless entry system eliminates the need for physical keys, providing a secure and convenient way to access your garage. The backlit keypad ensures visibility in low-light conditions, while its weather-resistant design withstands harsh outdoor elements. Programmable codes allow for personalized security, and compatibility with Chamberlain, LiftMaster, and Craftsman openers ensures versatility. The keypad’s compact design blends seamlessly with most home exteriors. Additionally, it integrates with smart home systems via myQ technology, enabling remote monitoring and control. These features combine to offer a reliable, modern, and user-friendly solution for garage door access, enhancing both security and convenience for homeowners.

Installation of the Chamberlain Keypad
Mount the keypad within sight of the garage door, ensuring it’s out of the door’s path. Secure it using screws, following the manual’s guidelines for placement and leveling. Connect the keypad to your garage door opener, either through wiring or wireless syncing by pressing the ‘learn’ button on the opener. Program a unique PIN for secure access. Test the keypad to ensure proper function and troubleshoot if necessary. Regular maintenance, like battery replacement and cleaning, will keep it operational. Follow the manual’s instructions carefully for a successful installation.
Mounting the Keypad
Mount the Chamberlain keypad securely on a wall or post, ensuring it is within sight of the garage door but out of its path. Use the provided screws to fasten it firmly. Position it at a comfortable height for easy access, typically around 4-5 feet from the ground. Ensure the keypad is level to prevent malfunctions. Avoid installing it near moving parts or where it could be damaged by weather. Follow the manual’s guidelines for proper placement to ensure safe and reliable operation. Secure the keypad tightly to prevent tampering or accidental dislodgement. Proper mounting is essential for functionality and longevity. Always refer to the manual for specific installation instructions.
Positioning for Safety and Functionality
Position the Chamberlain keypad where it is easily visible and accessible but out of the garage door’s path. Ensure it is installed at a height that prevents tampering by children or unauthorized individuals. The keypad should be within clear sight of the garage door to allow users to monitor the door’s movement while operating it. Avoid areas exposed to direct sunlight, heavy rain, or snow, as this could affect visibility and functionality. Proper positioning ensures smooth operation and enhances safety by preventing accidents caused by obstructed views. Always follow the manufacturer’s guidelines to optimize both safety and functionality. Correct placement is crucial for reliable performance and user convenience.

Programming the Chamberlain Keypad
Programming the Chamberlain keypad is straightforward, offering compatibility with various garage door opener types. Follow step-by-step instructions, using the learn button for quick and secure setup.
Step-by-Step Programming Instructions
Programming the Chamberlain keypad involves a few simple steps. First, locate the “learn” button on your garage door opener, which may be yellow, green, red/orange, or purple. Press and release this button. Next, enter your desired PIN on the keypad and press the button to test the connection. Ensure the keypad is mounted within sight of the garage door for safety and functionality. Follow the specific instructions for your opener type, as outlined in the manual. This process ensures secure and efficient operation of your garage door opener with the Chamberlain keypad.
Compatibility with Different Garage Door Opener Types
The Chamberlain keypad is designed to work seamlessly with various garage door opener types, including those from Chamberlain, Sears, Craftsman, and LiftMaster. Its universal compatibility ensures it can be paired with most systems manufactured after 1999. For optimal functionality, ensure your opener has a “learn” button, typically colored yellow, green, red/orange, or purple. The keypad supports both belt and chain drive systems, making it versatile for different garage setups. Always verify compatibility with your specific opener model before installation to ensure smooth operation and avoid any potential issues.
Safety Guidelines and Precautions
Always prioritize safety when installing and using the Chamberlain keypad. Install the keypad within sight of the garage door but out of reach to prevent accidents. Ensure proper installation and usage to avoid risks of injury from moving doors.
Important Safety Warnings
Always follow safety guidelines when installing and using the Chamberlain keypad. Install the keypad within sight of the garage door but out of reach to prevent serious injury or death. Ensure the keypad is mounted securely and away from moving garage door parts. Never allow children or pets to play with the keypad or garage door. Be cautious of entrapment hazards and ensure the garage door reverses properly. If the keypad malfunctions, discontinue use until repaired. These precautions are crucial for safe operation and to avoid potential risks associated with moving garage doors. Adhering to these guidelines ensures optimal safety and functionality.
Preventing Accidents and Ensuring Safe Operation
To ensure safe operation, always install the keypad within clear view of the garage door and out of children’s reach. Regularly inspect the keypad and door sensors for proper function. Ensure the garage door’s auto-reverse feature is enabled and functioning correctly. Avoid placing fingers or objects near moving parts during operation. Test the door’s safety features monthly by placing an object in the door’s path to confirm it stops or reverses. Never allow children to operate the keypad unsupervised. Keep emergency release handles accessible in case of power failures. These steps help prevent accidents and ensure smooth, secure operation of your garage door system. Safety should always be the top priority.
Maintenance and Troubleshooting
Regularly clean the keypad to ensure proper function and maintain durability. Check batteries for wear and replace them as needed. Reset the system if issues arise.
Regular Maintenance Tips
Regular maintenance ensures the Chamberlain keypad operates smoothly. Clean the keypad with a soft cloth and mild detergent to remove dirt and grime. Inspect and replace batteries annually or when low-battery indicators appear. Ensure the keypad is mounted securely and out of reach of children. Check for firmware updates through the myQ app to keep the system up-to-date. Lubricate hinges and moving parts if necessary. Avoid exposing the keypad to harsh weather conditions. Test the keypad periodically to ensure proper functionality. Refer to the manual for specific care instructions tailored to your model. Regular upkeep extends the lifespan and reliability of your Chamberlain keypad.
Common Issues and Solutions
Common issues with the Chamberlain keypad include the keypad not responding, keypad not working after battery replacement, or synchronization problems with the garage door opener. For a non-responsive keypad, clean the surface with a soft cloth and mild detergent. If issues persist after battery replacement, ensure batteries are installed correctly and check for low battery levels. For synchronization problems, reprogram the keypad following the manual’s instructions or reset the garage door opener. Always refer to the manual for specific troubleshooting steps tailored to your model. Regular maintenance and proper installation can prevent many of these issues, ensuring reliable operation.
Battery Replacement and Care
The Chamberlain keypad uses a single 9-volt battery. Regular replacement ensures uninterrupted operation. Inspect every six months and replace dead batteries promptly. Use alkaline batteries for optimal performance and avoid mixing old or different types. Proper disposal of used batteries is recommended.
How to Change the Battery
To change the battery in your Chamberlain keypad, start by opening the keypad cover. Locate the battery compartment and remove the old 9-volt battery. Insert a new alkaline battery, ensuring the polarity matches the diagram inside the compartment. Close the cover securely. Test the keypad to confirm it works properly. Always use a high-quality battery for optimal performance. If the keypad malfunctions after replacement, check the connections or try resetting the system. Proper battery care ensures reliable operation and extends the keypad’s lifespan. Regularly inspect the battery for signs of wear or corrosion. Replace every 6-12 months or when the keypad’s response becomes slow.
Battery Life and Monitoring
The Chamberlain keypad uses a 9-volt alkaline battery, which typically lasts 6-12 months depending on usage. Monitor battery life by checking for slow or dimmed keypad responses. Replace the battery when the keypad’s functionality begins to decline. Avoid using rechargeable batteries, as they may not provide consistent power. Regularly inspect the battery for signs of corrosion or wear. Clean the terminals with a soft cloth if necessary. For optimal performance, replace the battery every 6-12 months, even if it still works, to prevent unexpected malfunctions. Always use high-quality alkaline batteries to ensure reliable operation and extend the keypad’s lifespan.

Security Features
The Chamberlain keypad offers enhanced security with rolling code technology, ensuring each access code is unique. It provides keyless entry for convenience and secure access to your garage, compatible with smart home systems for remote monitoring and added protection.
Enhancing Garage Security
The Chamberlain keypad enhances garage security by providing keyless entry and advanced rolling code technology. This ensures that each access code is unique, reducing the risk of unauthorized entry. The keypad is compatible with smart home systems, allowing for remote monitoring and control, which adds an extra layer of protection. Additionally, the keypad can be mounted in a visible and secure location, ensuring it is out of reach from potential intruders. By using a combination of these features, the Chamberlain keypad helps to maximize garage security while maintaining ease of use and convenience for homeowners.
Privacy and Data Protection
The Chamberlain keypad ensures robust privacy and data protection through secure transmission of access codes. Advanced encryption technology safeguards user data, preventing unauthorized access. The system securely stores access codes and ensures only authorized users can operate the garage door. Compatibility with smart home systems adds layers of protection, with secure authentication protocols. Regular software updates maintain the highest security standards, ensuring your garage remains protected. Chamberlain’s commitment to privacy means your personal and access data is never compromised, providing peace of mind for homeowners. By integrating cutting-edge security measures, the keypad protects both your garage and personal information effectively.
Smart Home Integration
The Chamberlain keypad seamlessly integrates with smart home systems, including Amazon Key and Google Assistant, allowing remote monitoring and voice control via the myQ app.
Compatibility with Smart Home Systems
The Chamberlain keypad is designed to work seamlessly with popular smart home systems, including Amazon Key and Google Assistant, allowing for voice control and remote access. It integrates effortlessly with the myQ app, enabling users to monitor and control their garage door from anywhere. This compatibility ensures enhanced convenience and security, making it a versatile addition to any smart home setup. The keypad’s integration capabilities also extend to Apple HomeKit, providing a unified smart home experience. With these features, users can enjoy a modern, connected lifestyle while maintaining reliable garage door operation and security.
Remote Monitoring and Control
The Chamberlain keypad offers advanced remote monitoring and control features, allowing users to manage their garage door from anywhere using their smartphone. Through the myQ app, homeowners can check the status of their garage door, receive notifications when it is opened or closed, and even grant access to guests or service providers remotely. This feature enhances security and convenience, providing peace of mind while away from home. The keypad’s integration with smart home systems ensures seamless control and monitoring, making it a modern solution for garage door management. This capability is especially useful for busy households or those who need to monitor their garage door activity regularly.

Product Manual Overview
The Chamberlain keypad manual provides detailed instructions for installation, programming, and troubleshooting, ensuring users can easily manage their garage door opener’s settings and resolve common issues efficiently.
Navigating the Chamberlain Keypad Manual
Navigating the Chamberlain keypad manual is straightforward, with clear sections for installation, programming, and troubleshooting. The manual begins with safety precautions, ensuring users are aware of potential hazards. It then guides through mounting the keypad securely and positioning it for optimal functionality. Programming instructions are detailed, covering compatibility with various garage door opener types. Troubleshooting sections address common issues, offering solutions to minimize downtime. Technical specifications are included for reference, providing insights into the product’s capabilities. The manual’s structured approach ensures users can efficiently find the information they need, making setup and maintenance hassle-free. This comprehensive guide supports both new and experienced users effectively.
Understanding Technical Specifications
The Chamberlain keypad’s technical specifications highlight its compatibility with Chamberlain, LiftMaster, and Craftsman garage door openers manufactured after 1993. It operates on a 9V battery, ensuring reliable power for keyless entry. The keypad features rolling code technology, enhancing security by generating unique codes for each remote signal. Designed for durability, it is weather-resistant, suitable for outdoor installation. The manual provides detailed diagrams and charts to help users understand the product’s features and capabilities. These specifications ensure seamless integration with compatible garage door systems, offering a secure and convenient solution for home access. Understanding these details helps users make informed decisions and troubleshoot effectively, ensuring optimal performance and longevity of the keypad.
Compatible Garage Door Opener Models
The Chamberlain keypad is compatible with Chamberlain, LiftMaster, and Craftsman garage door openers manufactured after 1993, ensuring universal functionality across various residential garage door systems.
Identifying Compatible Models
To determine compatibility, check your garage door opener’s manufacturing date and brand. Chamberlain keypads work with Chamberlain, LiftMaster, and Craftsman models produced after 1993. Ensure your opener uses a compatible frequency, typically 315 MHz or 390 MHz, for seamless integration. Refer to the product manual or manufacturer’s specifications to confirm compatibility. Additionally, look for the learn button on your opener, which is usually yellow, green, red/orange, or purple, as this indicates programming capability. If your opener lacks this feature, consult Chamberlain support for alternative solutions. Proper identification ensures optimal performance and compatibility with your garage door opener system.
Chamberlain, LiftMaster, and Craftsman Compatibility
Chamberlain keypads are designed to work seamlessly with Chamberlain, LiftMaster, and Craftsman garage door openers manufactured after 1993. These brands share similar technology, ensuring compatibility and smooth operation. To verify compatibility, check if your opener uses a 315 MHz or 390 MHz frequency, which Chamberlain keypads support. Additionally, ensure your opener has a learn button, typically yellow, green, red/orange, or purple, as this is essential for programming. If your opener is from these brands and meets these criteria, the keypad will integrate effortlessly, providing reliable keyless entry and enhanced security for your garage door system; Always refer to the product manual for specific compatibility details.
The Chamberlain Keypad offers a convenient, secure, and reliable solution for garage door access. Its seamless integration and smart features enhance user experience and modern garage security.
Final Tips for Optimal Use
For the best experience with your Chamberlain Keypad, ensure regular checks of battery life and keypad functionality. Mount the device in a visible yet secure location to maintain convenience and safety. Always clean the keypad surface to prevent dirt interference. Test the opener periodically to ensure smooth operation. Utilize weather-resistant features to protect the keypad from environmental damage. Monitor access codes and update them periodically for enhanced security. Lastly, explore smart home integration options to maximize convenience and control over your garage door system. By following these tips, you can enjoy reliable, long-term performance from your Chamberlain Keypad.
Maximizing the Keypad’s Potential
To fully utilize your Chamberlain Keypad, explore its advanced features such as smart home integration and remote monitoring through the myQ app. Regularly update access codes and customize settings for enhanced security. Ensure the keypad is mounted in a strategically visible location for easy access while maintaining safety. Keep the device clean and free from debris to ensure reliable performance. Additionally, take advantage of compatibility with various garage door opener models, including Chamberlain, LiftMaster, and Craftsman, for seamless operation. By leveraging these features and maintaining proper care, you can enhance the functionality and longevity of your Chamberlain Keypad, ensuring it remains a reliable and convenient solution for your garage door needs.