patagonia nano puff washing instructions

Proper care for your Patagonia Nano Puff Jacket is essential to maintain its performance‚ longevity‚ and sustainability. Following specific washing and maintenance guidelines ensures the jacket retains its insulation‚ water-resistance‚ and overall functionality. Regular cleaning and careful handling are key to preserving its quality and eco-friendly design‚ making it a reliable choice for outdoor adventures. By adhering to recommended practices‚ you can enjoy your Nano Puff Jacket for years while supporting sustainable use. Understanding the right techniques and products is crucial for optimal care and durability.

1.1. Understanding the Importance of Proper Washing

Proper washing is crucial to maintain the Patagonia Nano Puff Jacket’s performance‚ longevity‚ and sustainability. Improper techniques can damage the DWR finish‚ insulation‚ and fabric. Using the right detergent and following care label instructions ensures the jacket retains its water-resistance and insulation properties. Regular‚ gentle cleaning prevents wear and tear‚ while avoiding harsh chemicals and excessive heat preserves its eco-friendly design. Proper care extends the jacket’s lifespan‚ ensuring reliable performance for outdoor adventures.

Before Washing Your Patagonia Nano Puff Jacket

Always check the care label for specific instructions and pre-treat any stains or high-wear areas. Use a mild detergent and avoid harsh chemicals to prevent damage to the fabric and insulation.

2.1. Checking the Care Label Instructions

Always check the care label for specific instructions. It provides guidance on detergents‚ wash cycles‚ and special treatments. Following these ensures the jacket’s performance and longevity. Ignoring them can lead to damage. Look for symbols or written advice to make informed decisions. Proper care also supports sustainability and maintains the jacket’s water-repellent finish.

2.2. Pre-Treatment of Stains and High-Wear Areas

Gently treat stains and high-wear areas before washing to prevent damage. Use a mild detergent or soap‚ applying it directly to the affected areas. Avoid harsh chemicals or abrasive scrubbing‚ as they can harm the fabric or insulation. Spot clean stains by hand‚ working from the outside inward. Allow the treatment to sit for a few minutes before rinsing or washing. This ensures stains are removed without compromising the jacket’s performance or water-repellent finish. Always test a small‚ inconspicuous area first to ensure no damage occurs. Proper pre-treatment helps maintain the jacket’s functionality and extends its lifespan. Air dry after treatment to preserve insulation loft. Regular spot cleaning prevents dirt buildup and keeps the jacket in optimal condition. Avoid soaking the jacket‚ as it can affect the insulation. Instead‚ focus on targeted cleaning for best results. By addressing stains early‚ you protect the fabric and ensure the jacket remains durable and water-resistant. Proper care now prevents costly repairs later. Patagonia recommends using eco-friendly products to align with their sustainability goals. Mild detergents are preferred to maintain the jacket’s DWR finish. Following these steps ensures the jacket continues to perform as intended. Always refer to the care label for specific guidance on pre-treatment methods. This attention to detail ensures your Nano Puff Jacket remains a reliable companion for outdoor adventures. Regular inspections and timely treatment of stains and wear areas are essential for maintaining its quality and functionality. Avoid using bleach or fabric softeners‚ as they can degrade the materials. Instead‚ opt for gentle‚ pH-neutral cleaners designed for outdoor gear. Proper pre-treatment and washing habits are key to preserving the jacket’s insulation‚ water resistance‚ and overall integrity. By taking these steps‚ you ensure your Patagonia Nano Puff Jacket remains in excellent condition for years to come.

Washing Methods for Patagonia Nano Puff Jacket

Wash your Nano Puff Jacket using a gentle cycle with cold water or hand wash with mild detergent to maintain its insulation and DWR finish effectively.

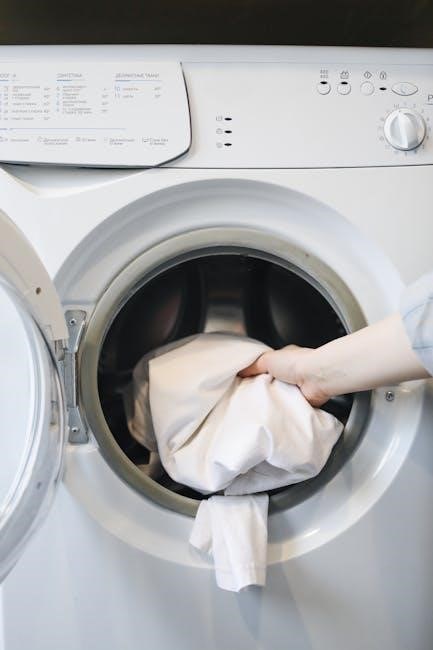
3.1. Machine Washing: Cycle and Settings Recommendations

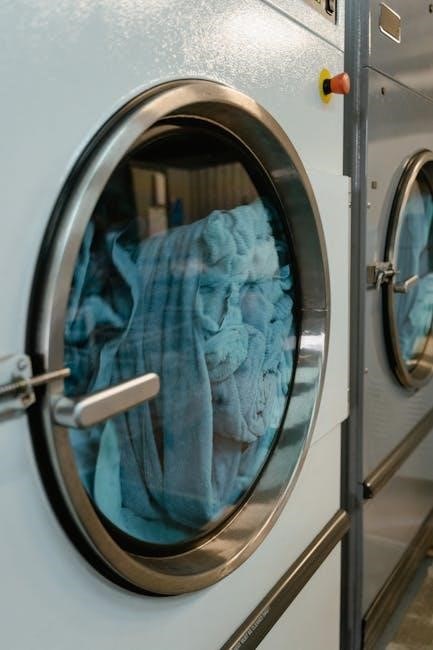
For machine washing‚ use a gentle cycle with cold water to protect the jacket’s insulation and DWR finish. Choose a mild detergent and avoid fabric softeners or bleach. Place the jacket in a mesh laundry bag for added protection. Front-loading washers are recommended to minimize abrasion. Ensure the care label instructions are followed for optimal results. Avoid overloading the machine to maintain fabric integrity.

3.2. Hand Washing: A Gentle Alternative

Hand washing is a gentle and effective method for cleaning your Patagonia Nano Puff Jacket. Fill a basin with cold water and add a small amount of mild‚ biodegradable detergent. Gently agitate the water to create suds‚ then submerge the jacket‚ focusing on high-wear areas. Rinse thoroughly to remove all soap residue. Gently squeeze out excess water without wringing‚ then reshape the jacket and allow it to air dry.

Drying Your Patagonia Nano Puff Jacket

Air drying is recommended to maintain the jacket’s loft and insulation. Lay it flat or hang it in a well-ventilated area‚ away from direct heat.

4.1. Air Drying: The Recommended Method

Air drying is the best way to preserve your Patagonia Nano Puff Jacket’s loft and insulation. Lay it flat on a clean‚ dry surface or hang it in a well-ventilated area‚ away from direct sunlight and heat. Avoid moisture exposure and ensure the jacket is completely dry before storing. Fluff the insulation gently to restore its natural loft. Patience is key‚ as air drying ensures long-term durability and sustainability of the jacket’s performance.

4.2. Machine Drying: Tips for Safe Tumble Drying

Machine drying your Patagonia Nano Puff Jacket is possible on a low heat setting. Use a gentle cycle and remove it as soon as the cycle ends to prevent creases; To restore loft‚ toss in a clean tennis ball. Avoid exposing the jacket to high heat‚ as it can damage the insulation. Always check the care label for specific instructions to ensure safe drying.

Special Care for the Nano Puff Jacket’s Materials

Use mild detergents to protect the synthetic insulation and DWR finish. Avoid harsh chemicals or fabric softeners‚ as they can degrade the materials. Air drying is recommended.

5.1; Maintaining the DWR (Durable Water Repellent) Finish

The DWR finish enhances water repellency and breathability. To maintain it‚ use a mild detergent and avoid fabric softeners or bleach. After washing‚ tumble dry on low heat or air dry. If water stops beading‚ reapply a DWR treatment. Regular maintenance ensures the jacket retains its water-resistant properties and performs optimally in wet conditions‚ extending its lifespan and reliability for outdoor use.

5.2. Avoiding Damage to Insulation and Fabric

To protect the Nano Puff Jacket’s insulation and fabric‚ avoid using harsh detergents‚ bleach‚ or fabric softeners. Never wring or twist the jacket‚ as this can damage the insulation. Avoid machine drying on high heat‚ as it can break down the fabric and insulation. For best results‚ hand wash gently and air dry away from direct sunlight. Store the jacket in a cool‚ dry place to maintain its integrity and performance;

Common Mistakes to Avoid When Washing

Common mistakes include using harsh detergents‚ excessive heat‚ and overloading the machine; These can ruin the jacket’s insulation‚ fabric‚ and water-repellent coating‚ reducing its performance and longevity.

6.1. Using Harsh Detergents or Excessive Heat

Using harsh detergents or excessive heat can damage the Nano Puff Jacket’s materials. Harsh chemicals can strip the fabric of its natural oils and DWR coating‚ while high heat can shrink the jacket or break down its insulation. Stick to mild‚ eco-friendly detergents and avoid hot water or high-heat drying to preserve the jacket’s performance and extend its lifespan. Gentle care ensures durability and maintains its water-repellent properties.

6.2. Overloading the Washing Machine

Overloading the washing machine can damage your Patagonia Nano Puff Jacket. Excess weight and friction may cause tears or stretch the fabric. It can also prevent the jacket from rinsing properly‚ leaving detergent residues. To avoid this‚ wash the jacket separately or with similar lightweight items. Ensure the machine is not more than half full. This prevents excessive abrasion and ensures a gentle cleaning cycle for the delicate materials.

Environmental Considerations

Use eco-friendly detergents to minimize environmental impact. Reduce water and energy consumption by washing in cold water and avoiding unnecessary cycles. Sustainable practices help preserve the jacket’s performance and the planet.

7.1. Using Eco-Friendly Detergents

Opt for biodegradable‚ non-toxic detergents that are free from harsh chemicals. These eco-friendly options protect both the environment and your Nano Puff Jacket’s performance. Avoid bleach or fabric softeners‚ as they can degrade the DWR finish and insulation. Mild‚ phosphate-free detergents are ideal for maintaining the jacket’s water-resistance and breathability while promoting sustainable care practices.

7.2. Reducing Water and Energy Consumption

Minimize water usage by washing your Nano Puff Jacket only when necessary. Use a gentle wash cycle with cold water to conserve energy and protect the fabric. Spot cleaning stains can reduce the need for frequent full washes. Air drying instead of machine drying saves significant energy and prevents wear on the jacket. These practices align with Patagonia’s environmental values and help extend the jacket’s lifespan while reducing your ecological footprint.

Reproofing and Refreshing the Jacket

Reproofing restores the DWR finish‚ ensuring water repellency. Refreshing the insulation maintains its loft and warmth. Regular care extends the jacket’s performance and sustainability‚ keeping it in prime condition.

8.1. When and How to Reapply DWR Coating

Reapply DWR coating when water no longer beads on the fabric. Use a DWR-specific cleaner or treatment‚ following product instructions. Wash the jacket first with a mild detergent‚ rinse thoroughly‚ and then apply the DWR treatment evenly. Air dry or tumble dry on low heat to activate the coating. Regular reproofing maintains water resistance and breathability‚ ensuring optimal performance.

8.2. Refreshing the Jacket’s Insulation

Refreshing the insulation involves ensuring it remains lofty and effective. After washing‚ gently shake the jacket to redistribute the insulation. Avoid over-drying‚ as high heat can damage synthetic insulation. Air drying is recommended to maintain loft. If necessary‚ tumble dry on low heat‚ checking periodically to prevent overheating. Proper drying ensures the insulation retains its insulating properties‚ keeping you warm and comfortable during outdoor activities.

Storing the Patagonia Nano Puff Jacket

Store your Nano Puff Jacket in a cool‚ dry place to maintain its shape and insulation. Avoid compression or hanging for extended periods to preserve loft and fabric integrity.

9.1. Proper Storage to Maintain Shape and Insulation

Store the Patagonia Nano Puff Jacket in a cool‚ dry place‚ away from direct sunlight. Use a breathable storage bag or lay it flat to prevent compression and maintain loft. Avoid hanging for extended periods to preserve fabric integrity. Ensure the jacket is clean and dry before storage to prevent moisture buildup and damage to insulation.

9.2. Avoiding Moisture and Humidity

Moisture and humidity can damage the Nano Puff Jacket’s insulation and DWR finish. After washing‚ ensure the jacket is completely dry before storing. Avoid placing it in damp environments or exposing it to prolonged humidity. Use a well-ventilated area for drying‚ and avoid using heaters or dryers‚ as high heat can harm the materials. Proper drying preserves loft and water-resistance‚ ensuring optimal performance for outdoor use.

Troubleshooting Common Issues

Common issues include loss of loft‚ reduced insulation performance‚ or fabric discoloration. Identify the root cause‚ such as improper washing or drying‚ and address it promptly to restore functionality.

10.1. Loss of Loft or Insulation Performance

Losing loft or insulation performance in your Patagonia Nano Puff Jacket often results from improper washing or drying. Excessive heat‚ harsh detergents‚ or over-drying can compress the insulation‚ reducing its effectiveness. To restore loft‚ avoid high-heat settings and ensure the jacket is thoroughly air-dried. Re-treating the DWR coating may also help maintain insulation efficiency. Addressing these issues promptly can extend the jacket’s performance and longevity.

10.2. Fading or Discoloration of the Fabric

Fading or discoloration of the Patagonia Nano Puff Jacket can occur due to excessive washing‚ exposure to sunlight‚ or improper detergent use. To prevent this‚ wash the jacket in cool water with a mild detergent and avoid direct sunlight. Using eco-friendly detergents and gentle cycles can help preserve the fabric’s color and vibrancy. Regular care and avoiding harsh chemicals will maintain the jacket’s appearance and extend its lifespan effectively.

Patagonia’s Worn Wear Program and Repair Options

Patagonia’s Worn Wear program promotes sustainability by encouraging repair over replacement. It offers DIY repair resources and professional services to extend the life of your Nano Puff Jacket‚ reducing environmental impact and ensuring long-term performance.

11.1. Patagonia’s Approach to Sustainability and Repair

Patagonia prioritizes sustainability through its Worn Wear program‚ emphasizing repair over replacement to reduce waste. The brand offers DIY repair guides‚ workshops‚ and professional repair services to extend the life of products like the Nano Puff Jacket. By encouraging maintenance and repair‚ Patagonia promotes environmental stewardship‚ aligning with its mission to create high-quality‚ durable gear while minimizing ecological impact.

11.2. DIY Repair vs. Professional Service

Patagonia supports both DIY repair and professional service options for Nano Puff Jacket maintenance. DIY repair kits and online tutorials empower users to fix minor damages independently. For complex issues‚ professional services at Patagonia repair centers ensure expert care. Both options align with Patagonia’s sustainability goals‚ promoting garment longevity and reducing waste‚ while catering to different customer preferences and repair needs.

Recommended Cleaning Products

For the Patagonia Nano Puff Jacket‚ use mild‚ non-toxic detergents to preserve its materials and DWR finish. Avoid harsh chemicals‚ opting for eco-friendly cleaners designed for outdoor gear‚ ensuring optimal performance and sustainability. Patagonia recommends specific products to maintain the jacket’s water-resistance and insulation‚ while eco-conscious options align with their environmental values.

12.1. Mild Detergents Suitable for Nano Puff Fabric

Use mild‚ non-toxic detergents specifically designed for outdoor and technical fabrics to clean the Patagonia Nano Puff Jacket. Avoid harsh chemicals‚ as they can damage the DWR finish or insulation. Eco-friendly cleaners like Nikwax Tech Wash or Dr. Bronner’s soap are excellent choices. Patagonia recommends using products free of phosphates and optical brighteners to preserve the jacket’s water-resistance and maintain its performance. Always follow the manufacturer’s instructions for optimal results.

12.2. DWR-Specific Cleaners and Treatments

After washing‚ restore the Nano Puff Jacket’s water-resistance with a DWR-specific cleaner like Nikwax Tech Wash or Grangers Performance Wash. These treatments rejuvenate the DWR finish‚ ensuring water beads up and rolls off. Apply the cleaner according to the product instructions‚ typically after washing and while the fabric is still damp. Avoid using regular detergents or conditioners‚ as they can degrade the DWR coating over time. Regular reproofing maintains the jacket’s weather-resistant performance and breathability.

Washing Frequency and Maintenance

Wash your Patagonia Nano Puff Jacket sparingly to preserve its insulation and DWR finish. Spot clean stains and odors to avoid unnecessary full washes. Use mild‚ eco-friendly detergents specifically designed for waterproof and breathable fabrics to maintain performance and sustainability.

13.1. How Often to Wash Your Nano Puff Jacket

Wash your Patagonia Nano Puff Jacket only when necessary to maintain its performance. Over-washing can degrade the DWR finish and insulation. Spot clean stains and allow the jacket to air out between uses. For full washes‚ limit frequency to once or twice a season‚ depending on usage. Use mild detergents designed for technical fabrics to preserve water repellency and insulation integrity. Avoid harsh chemicals or excessive heat to maintain optimal function and extend lifespan.

13.2. Spot Cleaning for Everyday Maintenance

Spot cleaning is a practical way to maintain your Nano Puff Jacket without full washing. For minor stains or spills‚ dampen a soft cloth with cold water and a small amount of mild detergent. Gently scrub the affected area‚ then rinse with clean water. Avoid harsh chemicals or abrasive scrubbers‚ as they may damage the fabric or DWR finish. Regular spot cleaning helps prevent dirt buildup and keeps the jacket looking its best. Air dry thoroughly after cleaning to maintain loft and water resistance.

Caring for Different Color and Fabric Variants

Care for Nano Puff Jackets varies by color and fabric type. Dark colors may require color-protecting detergents‚ while recycled fabrics need gentle handling to preserve their integrity. Always check Patagonia’s specific guidelines for your jacket’s material and dye to ensure optimal care and longevity.

14.1. Specific Care for Dark Colors and Bright Dyes

Dark colors and bright dyes on Nano Puff Jackets require extra care to prevent fading. Wash in cold water using a mild detergent to preserve vibrancy. Avoid using bleach or harsh chemicals‚ as they can damage dyes and fabric. For especially vibrant colors‚ consider using a color-protecting detergent; Turn the jacket inside out before washing to reduce dye transfer and abrasion. Air drying is recommended to maintain color intensity and prevent shrinkage.

14.2. Variations in Care for Recycled or Blended Fabrics

Recycled or blended fabrics in the Nano Puff Jacket may require slightly different care. Use a mild detergent and avoid fabric softeners‚ as they can leave residues. Opt for a gentle wash cycle or hand washing to protect the fabric blend. Avoid harsh chemicals‚ as they may degrade the material. Turn the jacket inside out to reduce abrasion during washing. Air drying is recommended to preserve the fabric’s integrity and prevent shrinkage.

Tips for Extending the Jacket’s Lifespan

Recycled or blended fabrics in the Patagonia Nano Puff Jacket require gentle care. Use a mild detergent‚ avoiding fabric softeners‚ to prevent residue buildup. Opt for a gentle wash cycle or hand washing to protect the fabric blend. Avoid harsh chemicals‚ as they may degrade the material. Turn the jacket inside out to reduce abrasion during washing. Air drying is recommended to preserve the fabric’s integrity and prevent shrinkage.

15.1. Avoiding Abrasion and Rough Handling

Avoiding abrasion and rough handling is crucial for extending the jacket’s lifespan. Prevent dragging or catching on rough surfaces‚ as this can damage the fabric. When washing‚ avoid using harsh detergents or scrubbing‚ as these can weaken the material. Always handle the jacket gently to maintain its integrity. Store it in a cool‚ dry place‚ away from direct sunlight‚ to prevent fading and fabric degradation. Regular inspections can help address minor wear before it becomes significant.

15.2. Regular Inspections for Wear and Tear

Regular inspections are vital to identify wear and tear early‚ ensuring minor issues don’t escalate. Check seams‚ zippers‚ and high-wear areas for signs of damage or fraying. Look for stains or discoloration that may require spot cleaning. Addressing these issues promptly prevents further deterioration. Inspect the DWR finish and insulation for any loss of performance. Regular checks help maintain the jacket’s functionality and extend its lifespan‚ ensuring it remains a reliable outdoor companion.

Proper care ensures longevity‚ sustainability‚ and peak performance. Adhering to guidelines maintains functionality and appearance‚ promoting long-term use and environmental responsibility. Regular maintenance is essential for durability.

16.1. Summarizing Key Care Practices

Proper care involves checking labels‚ using mild detergents‚ avoiding harsh chemicals‚ and gentle washing. Air drying is recommended to maintain insulation. Avoid high heat and overloading machines. Store the jacket in a dry‚ cool place to prevent moisture damage. Regular inspections and spot cleaning can prevent major issues. Following these practices ensures the jacket remains durable‚ water-resistant‚ and functional for years‚ aligning with Patagonia’s sustainability goals.

16.2. Encouraging Sustainable and Long-Term Use

Patagonia’s commitment to sustainability encourages long-term use of the Nano Puff Jacket. Their Worn Wear program promotes repairing and reusing gear‚ reducing waste. Proper care with eco-friendly detergents and gentle washing extends the jacket’s life. Using recycled materials‚ Patagonia supports environmental responsibility. By embracing these practices‚ users can enjoy their jacket for years while contributing to a more sustainable future.

minolta srt 201 instruction manual

The Minolta SRT 201 instruction manual is an essential guide for photographers, detailing camera features, operation, and troubleshooting․ Available in PDF format, it ensures easy access and understanding․

Overview of the Minolta SRT 201 Camera

The Minolta SRT 201 is a high-quality single-lens reflex camera known for its durability and ease of use․ It features manual focus and exposure control, making it ideal for professionals and enthusiasts․ The camera includes a built-in light meter for precise settings and is compatible with Minolta MC Rokkor lenses․ Its robust design and intuitive controls have made it a favorite among photographers seeking reliability and creative control in various shooting conditions․

Historical Context and Significance

The Minolta SRT 201, part of the SRT series, holds a notable place in photography history․ Introduced in the 1970s, it became a symbol of innovation and reliability, favored by professionals and hobbyists alike․ Its design and functionality set a benchmark for future SLR cameras, making it a cherished collectible among vintage photography enthusiasts today․

Locating the Minolta SRT 201 Instruction Manual

The Minolta SRT 201 manual can be found through online sources like ManualsLib or OrphanCameras, offering free PDF downloads․ Additionally, used copies are available on marketplaces like eBay․

Online Sources for Downloading the Manual

Several online platforms offer the Minolta SRT 201 manual for free download․ Websites like ManualsLib and OrphanCameras provide high-resolution PDF versions; Additionally, the M․ Butkus library and specialized camera forums host downloadable manuals․ These sources ensure easy access to the guide, allowing users to understand and operate the camera effectively․ Some sites may require registration, but the manuals are widely available for instant access․

Used Copies and Marketplace Availability

Used copies of the Minolta SRT 201 manual can be found on online marketplaces like eBay and specialized photography equipment sites․ Platforms such as Etsy and vintage camera forums often list these manuals for sale․ Some sellers offer original printed versions, while others provide scanned copies․ Prices vary depending on condition and rarity․ Additionally, collector communities and photography enthusiasts frequently list these manuals, making them accessible to those seeking physical copies․

Key Features of the Minolta SRT 201

The Minolta SRT 201 is a single-lens reflex camera offering manual focus, exposure control, and a built-in light meter․ Its durability and reliability make it a favorite among photographers․

Manual Focus and Exposure Control

The Minolta SRT 201 features precise manual focus and exposure control, allowing photographers to have full creative command․ The camera’s manual operation ensures a hands-on approach to aperture and shutter speed adjustments, catering to both professionals and enthusiasts․ This feature-rich design provides unparalleled control over every shot, making it a timeless choice for those who value precision and craftsmanship in photography․

Unique Attributes of the SRT 201 Model

The Minolta SRT 201 stands out for its robust design, precise mechanical controls, and compatibility with a wide range of Minolta MC Rokkor lenses․ Its interchangeable viewfinders and screens enhance versatility, while the built-in match-needle metering system offers accurate exposure control․ These features, combined with its durability, make the SRT 201 a preferred choice among photographers seeking a reliable and customizable SLR camera experience․

Camera Controls and Operations

The Minolta SRT 201 features intuitive controls, including a shutter speed dial, aperture ring, and metering system․ The manual provides detailed guidance on operating these components effectively for precise photography․

Understanding the Viewfinder and Metering System

The Minolta SRT 201’s viewfinder offers a clear, unobstructed view for precise composition․ The built-in light meter provides accurate exposure readings, essential for manual control․ The manual explains how to interpret metering data, adjust settings, and ensure optimal exposure in various lighting conditions, making it a vital resource for mastering the camera’s capabilities effectively․

Shutter Speed and Aperture Settings

The Minolta SRT 201 allows precise control over shutter speed and aperture, essential for manual photography․ Shutter speeds range from 1/1000th of a second to 1 second, plus a Bulb setting․ Aperture settings depend on the lens but typically range from f/1․4 to f/16; The manual explains how to adjust these settings using the camera’s dials and how they interact with the metering system for optimal exposure control in various lighting conditions․

Shooting Modes and Techniques

The Minolta SRT 201 offers manual mode for full control over exposure, aperture, and shutter speed, enabling photographers to refine their creative vision through precise adjustments and techniques․

Manual Mode Operations

The Minolta SRT 201’s manual mode empowers photographers with full control over aperture, shutter speed, and ISO settings․ The camera’s mechanical design ensures precise adjustments, while the built-in light meter aids in achieving accurate exposures․ Photographers can experiment with creative techniques, leveraging the camera’s tactile controls for a hands-on shooting experience․ This mode is ideal for those seeking to master manual photography and understand the fundamentals of exposure control․

Using the Built-in Light Meter

The Minolta SRT 201 features a built-in light meter designed to assist photographers in achieving precise exposures․ The meter measures ambient light and provides accurate readings, helping you set the correct aperture and shutter speed combinations․ To use it effectively, align the meter needle with the optimal exposure mark․ This tool is invaluable for mastering manual mode and ensuring well-balanced images in various lighting conditions․

Maintenance and Care

Regular cleaning and servicing are crucial for the longevity of the Minolta SRT 201․ Use a soft cloth to wipe down the camera body and lenses, avoiding harsh chemicals․ Ensure proper battery management to maintain reliable operation․ Periodic professional servicing is recommended to uphold optimal performance and prevent mechanical issues over time․

Cleaning and Servicing the Camera

Regular cleaning is essential to maintain the Minolta SRT 201’s performance․ Use a soft, dry cloth to wipe the camera body and lenses, avoiding harsh chemicals․ For the viewfinder and mirror, a microfiber cloth and gentle cleaning solution may be used․ Servicing should be done by professionals to ensure proper handling of internal mechanisms․ Regular maintenance helps prevent dust buildup and ensures optimal functionality over time․

Battery and Power Management

The Minolta SRT 201 uses two AA batteries, which are not included in the camera kit․ Ensure to use high-quality batteries for optimal performance․ The camera’s light meter is powered by these batteries, so regular checks are recommended․ Replace batteries promptly if the meter becomes inaccurate․ Proper battery management prevents leakage and ensures reliable operation of the camera’s electronic features․

Troubleshooting Common Issues

Shutter and aperture malfunctions can be resolved by cleaning or adjusting mechanisms․ Inaccurate light meter readings may require battery replacement or sensor calibration for precise functionality․

Resolving Shutter and Aperture Problems

The Minolta SRT 201 manual provides detailed guidance for addressing shutter and aperture issues․ Common problems include stuck shutter curtains or misaligned aperture blades․ Cleaning the shutter mechanism with a soft brush and ensuring proper battery power can resolve many issues․ Adjusting the aperture linkage or replacing worn seals may be necessary․ Always refer to the manual for precise troubleshooting steps to maintain optimal camera functionality and prevent further damage․

Addressing Light Meter Inaccuracies

Light meter inaccuracies in the Minolta SRT 201 can often be resolved by ensuring proper battery power, as weak batteries may affect meter performance․ Clean the meter sensors gently with a soft cloth to remove dirt or debris․ Calibrate the meter according to the manual’s instructions for accurate readings․ Regular maintenance and proper handling can prevent such issues, ensuring reliable light meter functionality for precise exposures․

Compatible Accessories and Lenses

The Minolta SRT 201 is compatible with Minolta MC Rokkor lenses, offering exceptional optical quality․ Remote shutter releases and other accessories enhance functionality, ensuring versatility for photographers․

Minolta MC Rokkor Lenses

The Minolta MC Rokkor lenses are renowned for their exceptional optical quality and compatibility with the SRT 201․ Designed to enhance the camera’s capabilities, these lenses offer a wide range of focal lengths, from wide-angle to telephoto, providing versatility for various photography needs․ The

Remote Shutter Release and Other Accessories

The Minolta SRT 201 supports a remote shutter release, enhancing stability by minimizing camera shake during exposures․ Additional accessories include neck straps, lens caps, and protective cases, ensuring safe handling and transport․ The compatibility with MC Rokkor lenses further expands creative possibilities, making the SRT 201 a versatile tool for photographers seeking precision and reliability in their craft․

Historical and Cultural Impact

The Minolta SRT 201 holds a significant place in photography history, serving as a reliable workhorse for professionals and an inspiration for enthusiasts, leaving an enduring legacy in film photography․

The Role of the SRT Series in Photography History

The Minolta SRT Series, including the SRT 201, played a pivotal role in photography history by offering high-quality, user-friendly SLR cameras that democratized advanced photography techniques․ Their robust construction, precise metering systems, and interchangeable lenses made them favorites among professionals and amateurs alike, contributing significantly to the evolution of film photography in the mid-20th century․ Their impact remains evident in the enduring popularity of vintage cameras today․

Collectibility and Vintage Value

The Minolta SRT 201 is highly sought after by collectors due to its historical significance and enduring build quality․ As a vintage SLR, it holds strong appeal for photography enthusiasts and collectors, with its manual often serving as a valuable resource for maintenance and operation․ The availability of the instruction manual in PDF format ensures its collectibility and timeless value, making it a cherished piece in many vintage camera collections․

User Reviews and Feedback

Photographers praise the Minolta SRT 201 manual for its clarity and depth, aiding users in understanding camera functions and troubleshooting, making it a valuable resource for both beginners and experienced photographers․

Photographer Experiences and Recommendations

Photographers widely praise the Minolta SRT 201 manual for its detailed guidance on camera operation, troubleshooting, and optimization of features like manual focus and exposure control․ Many enthusiasts recommend it for its clear instructions, making it invaluable for mastering the camera’s capabilities and ensuring optimal performance in various shooting conditions․ Its comprehensive nature has solidified its reputation as an indispensable resource for both professionals and hobbyists alike․

Comparisons with Other SRT Models

The Minolta SRT 201 shares many features with the SRT 200 and 202, but its manual highlights unique attributes like improved metering accuracy․ Photographers often compare it favorably to other models, noting its durability and intuitive controls․ While the SRT 202 adds minor upgrades, the SRT 201 remains a popular choice for its balance of functionality and affordability, making it a standout in the SRT series for many enthusiasts and collectors․

Technical Specifications

The Minolta SRT 201 is a 35mm SLR camera with a focal-plane shutter, offering shutter speeds from 1/1000 to 1 second plus B mode, and flash synchronization at 1/60 second․

Camera Dimensions and Weight

The Minolta SRT 201 measures approximately 146mm (W) x 102mm (H) x 86mm (D) and weighs around 810 grams without the lens․ Its durable metal body ensures long-lasting performance, while its compact size makes it portable for photographers․ The camera’s balanced design allows for comfortable handling, even during extended use․ Dimensions and weight may vary slightly due to accessories or lens attachments․

Shutter Speed Range and Flash Compatibility

The Minolta SRT 201 features a versatile shutter speed range of 1/1000 to 1 second and a Bulb mode for extended exposures․ It supports Flash sync at 1/60 second with a hot shoe mount for external flash units․ The camera is compatible with Minolta’s Auto Electro-Flash and other standard flash devices, enhancing lighting control for various photography scenarios․ This functionality ensures flexibility in low-light conditions and creative flash photography․

Repair and Service Manuals

Repair manuals for the Minolta SRT 201 are available in PDF format, detailing disassembly and troubleshooting․ DIY guides cover common fixes, while complex repairs may require professional service․

DIY Repair Guides

DIY repair guides for the Minolta SRT 201 are available in PDF format, covering common issues like shutter mechanisms and aperture adjustments․ These guides provide step-by-step instructions, allowing photographers to maintain and repair their cameras independently․ Tools and precautions are emphasized to prevent damage․ While DIY repairs are feasible for minor issues, complex problems may require professional expertise for optimal results․

Professional Service Recommendations

For complex repairs or maintenance beyond DIY capabilities, professional servicing is recommended․ Authorized Minolta service centers or experienced camera technicians can ensure precise adjustments and genuine parts․ They handle intricate issues like shutter overhauls or light meter recalibrations․ Regular professional maintenance ensures optimal performance and longevity of the SRT 201, preserving its functionality for years of reliable use in photography․

Comparison with Other SRT Models

The Minolta SRT 201 shares many features with the SRT 200 and 202 but offers specific upgrades, making it a standout model in the SRT series․

Differences Between SRT 200, 201, and 202

The SRT 200, 201, and 202 share a core design but differ in features․ The SRT 201 added a hot shoe for flash and improved metering․ The SRT 202 introduced further upgrades, including a more precise shutter mechanism and enhanced durability, making it the most advanced in the series while maintaining compatibility with Minolta’s MC Rokkor lenses․

Upgrades and Improvements in the SRT 201

The Minolta SRT 201 introduced notable upgrades, including a hot shoe for external flash synchronization and enhanced metering accuracy․ It retained the robust build and manual focus capabilities of its predecessor but added refinements for smoother operation․ The SRT 201 also maintained compatibility with the Minolta MC Rokkor lens series, ensuring versatility for photographers․ These improvements solidified its reputation as a reliable and versatile camera․

Frequently Asked Questions

Common queries include locating the manual, understanding camera features, and troubleshooting tips․ The manual addresses these, ensuring photographers can optimize their Minolta SRT 201 experience effectively․

Common Queries About the SRT 201

Photographers often ask about the SRT 201’s manual focus, aperture settings, and metering system․ The manual provides detailed guidance on these features, ensuring users can fully utilize the camera’s capabilities․ Additionally, queries about battery management and troubleshooting shutter issues are addressed, offering practical solutions to common problems encountered by photographers using this classic camera model․ This makes the manual an indispensable resource for both new and experienced photographers seeking to master the SRT 201․

Clarifications on Manual Instructions

The Minolta SRT 201 manual clarifies operations, ensuring users understand all features․ It highlights model-specific sections, as the manual covers SRT 200, 201, and 202․ Users are guided through manual focus, aperture settings, and metering, with clear instructions for optimal use․ This comprehensive resource helps photographers master the camera’s capabilities, addressing any confusion arising from shared documentation across models․ Its detailed explanations make it an invaluable tool for both new and experienced photographers․

The Minolta SRT 201 instruction manual is a vital resource for photographers, offering detailed guidance on camera operation, features, and troubleshooting, ensuring optimal use of this classic model․

Final Thoughts on the Minolta SRT 201

The Minolta SRT 201 remains a beloved camera for photography enthusiasts, offering exceptional build quality and reliability․ Its manual focus and exposure controls provide precise creative freedom․ The availability of its instruction manual online, often in PDF format, ensures users can easily access guidance for optimal operation․ Whether for vintage collectors or active photographers, the SRT 201 continues to be a timeless choice, supported by comprehensive resources․

Importance of the Instruction Manual

The Minolta SRT 201 instruction manual is crucial for unlocking the camera’s full potential․ It provides detailed guidance on operation, troubleshooting, and maintenance, ensuring optimal performance․ With the manual readily available online in PDF format, photographers can easily access essential information to enhance their shooting experience and preserve the camera’s functionality for years to come․

year 6 maths worksheets pdf

Year 6 Maths Worksheets are printable PDF resources designed for 10-11 year olds, covering topics like place value, fractions, decimals, and geometry․ They provide comprehensive practice․

1․1 What are Year 6 Maths Worksheets?

Year 6 Maths Worksheets are educational resources designed for students aged 10-11, typically in their final year of primary school․ These worksheets are available as printable PDFs, covering a wide range of maths topics aligned with the national curriculum․ They include exercises on number and place value, fractions, decimals, percentages, geometry, measurement, and data analysis․ Many worksheets also incorporate word problems and real-world applications to enhance understanding․ Designed to be user-friendly, they often feature clear instructions, examples, and answer keys, making them ideal for both independent practice and teacher-guided lessons․ Whether used at home or in the classroom, these resources provide structured and engaging ways for students to refine their maths skills, ensuring a solid foundation for future studies․

1․2 Why Are They Important?

Year 6 Maths Worksheets are essential for reinforcing maths skills and ensuring a strong foundation for future studies․ They provide structured practice across all key areas of the curriculum, helping students master concepts like number operations, fractions, decimals, geometry, and data analysis․ These resources are particularly valuable for preparing students for standardized tests and assessments, such as SATs, by familiarizing them with exam-style questions․ Worksheets also cater to different learning styles, offering visual and hands-on activities that make maths engaging and accessible․ Additionally, they allow for self-assessment and immediate feedback, enabling students to identify and address gaps in their understanding․ Regular use of these worksheets fosters confidence, problem-solving skills, and a deeper appreciation for maths, making them an indispensable tool for both teachers and parents supporting Year 6 students․

Benefits of Using Year 6 Maths Worksheets

Year 6 Maths Worksheets enhance maths mastery by building conceptual knowledge, reinforcing classroom lessons, and preparing students for standardized tests through structured and engaging practice․

2․1 Building Conceptual Knowledge

Year 6 Maths Worksheets are designed to strengthen foundational understanding by breaking down complex concepts into manageable parts․ Topics like place value, fractions, and decimals are explored through structured exercises, ensuring students grasp basic principles before advancing․ These worksheets often include visual aids, real-world examples, and step-by-step problems, making abstract ideas more tangible․ Regular practice with these resources helps students develop a solid mathematical base, which is crucial for tackling more challenging problems in higher grades․ By focusing on core concepts, Year 6 Maths Worksheets empower students to approach maths with confidence and clarity․

2․2 Reinforcing Classroom Learning

Year 6 Maths Worksheets serve as an excellent tool for reinforcing concepts taught in the classroom․ By providing additional practice opportunities, these resources help students solidify their understanding of key topics such as fractions, decimals, and geometry․ Worksheets often include a variety of question types, from multiple-choice to open-ended problems, catering to different learning styles․ They also allow students to revisit challenging areas at their own pace, ensuring mastery before moving on to more advanced topics․ Many worksheets include answer keys, enabling students to self-assess and identify areas for improvement․ This structured approach complements classroom instruction, making maths more engaging and accessible for Year 6 students․

2․3 Preparing for Standardized Tests

Year 6 Maths Worksheets are invaluable for preparing students for standardized tests, such as SATs and maths competitions․ These resources often mirror test formats, familiarizing students with question styles and time management․ Worksheets covering topics like place value, fractions, and algebra ensure comprehensive exam readiness․ Regular practice builds confidence and reduces anxiety, helping students approach tests calmly․ Detailed answer keys allow for thorough review, highlighting strengths and areas needing improvement․ By simulating test conditions, these worksheets enable students to apply their knowledge effectively, ensuring they are well-prepared for assessments․ This structured practice is essential for achieving success in Year 6 maths standardized tests․

Topics Covered in Year 6 Maths Worksheets

Year 6 Maths Worksheets cover essential maths topics, including number and place value, fractions, decimals, geometry, and measurement․ These resources ensure a comprehensive understanding of key maths concepts;

3․1 Number and Place Value

Year 6 Maths Worksheets extensively cover Number and Place Value, focusing on multi-digit numbers, rounding, and estimation․ Students practice interpreting and comparing numbers up to millions, enhancing their numerical fluency․

3․2 Fractions, Decimals, and Percentages

Year 6 Maths Worksheets include detailed exercises on Fractions, Decimals, and Percentages, helping students master operations like adding, subtracting, and converting between these forms․ Practice includes real-world applications and problem-solving․

3․3 Geometry and Measurement

Year 6 Maths Worksheets extensively cover Geometry and Measurement, focusing on understanding shapes, volumes, and angles․ Students practice calculating the area of triangles and parallelograms, volumes of cubes, and converting between units․ These exercises enhance spatial awareness and problem-solving skills, preparing students for advanced geometric concepts in higher grades․

How to Use Year 6 Maths Worksheets Effectively

  • Create a structured study schedule to ensure consistent practice․
  • Encourage self-assessment by comparing answers with provided keys․
  • Integrate worksheets with classroom curriculum for reinforced learning․

4․1 Creating a Study Schedule

Creating a study schedule is essential for effective use of Year 6 Maths Worksheets․ Parents and teachers can allocate specific times each day or week for practice, ensuring consistency․ Start by identifying key topics and distributing them evenly across the schedule․ For example, dedicate Mondays to number operations, Wednesdays to fractions, and Fridays to geometry․ This structured approach helps students build a strong foundation gradually․ Incorporate breaks to maintain focus and avoid burnout․ Regular review sessions can be included to reinforce previously learned concepts․ A well-organized schedule not only enhances time management but also ensures comprehensive coverage of the curriculum․ By sticking to the plan, students can systematically improve their maths skills and confidence over time․

4․2 Encouraging Self-Assessment

Encouraging self-assessment is a powerful way to help students take ownership of their learning with Year 6 Maths Worksheets․ After completing a worksheet, students can compare their answers with the provided answer key or marking scheme․ This process fosters independence and responsibility, allowing them to identify strengths and areas needing improvement․ Parents and educators can guide students by asking reflective questions, such as “What did you find challenging?” or “How did you solve this problem?” This promotes deeper understanding and problem-solving skills․ Encouraging self-assessment also builds confidence, as students see their progress over time․ Regularly reviewing mistakes helps reinforce concepts and reduces errors in future tasks․ By integrating self-assessment into their routine, students develop a growth mindset and improve their maths skills effectively․

4․3 Integrating with Classroom Curriculum

Integrating Year 6 Maths Worksheets into the classroom curriculum ensures a seamless learning experience for students․ These worksheets are designed to align with national standards, covering topics such as fractions, decimals, and geometry․ Teachers can use them to reinforce concepts taught in class, providing additional practice for students․ Worksheets can be assigned as homework or used in class for targeted revision․ They can also be incorporated into lesson plans to cater to different learning styles, ensuring all students engage with the material․ By aligning worksheets with classroom teaching, educators create a consistent and comprehensive learning pathway․ This integration helps students build a strong foundation, making abstract concepts more tangible and manageable․ Regular use of these resources supports long-term retention of mathematical skills and prepares students for future academic challenges․ This approach fosters a cohesive and effective learning environment, benefiting both teachers and students․

Where to Find Free Year 6 Maths Worksheets

Discover free Year 6 Maths Worksheets on educational websites, teacher-made resources, and online learning platforms․ These sites offer printable PDFs aligned with the national curriculum․

5․1 Educational Websites

Educational websites are a reliable source for free Year 6 Maths Worksheets in PDF format․ Platforms like Third Space Learning, Twinkl, and White Rose Maths offer a wide range of resources․ These websites provide comprehensive worksheets covering topics such as place value, fractions, and geometry, all aligned with the UK curriculum․ Many of these resources are designed by teachers, ensuring they meet educational standards․ They often include answer keys, making it easy for parents and educators to assess progress․ Some websites also offer interactive tools and online versions of worksheets, allowing flexibility in learning․ With a simple download, these resources can be printed or accessed digitally, making them convenient for both home and classroom use․ They are an excellent way to supplement learning and reinforce mathematical skills in a structured manner․

5․2 Teacher-Made Resources

Teacher-made resources are highly effective for Year 6 Maths Worksheets, as they are crafted by educators to meet specific learning needs․ These resources are often shared on platforms like Teachers Pay Teachers or school websites, ensuring relevance and quality․ Many worksheets are tailored to cover curriculum requirements, with topics ranging from fractions to algebra․ Teachers design these materials to engage students, using clear instructions and structured exercises․ Some resources include interactive elements or creative problem-solving activities to enhance learning․ Additionally, teacher-made worksheets frequently incorporate real-world applications, helping students connect maths to everyday situations․ Parents and educators can trust these resources to provide targeted practice and support for Year 6 students, ensuring a strong foundation in mathematical concepts․ They are adaptable and can be easily integrated into lesson plans or home learning routines․

5․3 Online Learning Platforms

Online learning platforms offer a wealth of Year 6 Maths Worksheets in PDF format, providing convenient access to high-quality resources․ Websites like Third Space Learning and K5 Learning feature comprehensive collections of maths worksheets tailored for Year 6 students․ These platforms often include answer keys, making it easy for students to self-assess their work․ Many resources are designed to align with the national curriculum, covering topics such as fractions, decimals, geometry, and algebra․ Some platforms also provide interactive tools and progress tracking, enhancing the learning experience․ Parents and teachers can download these worksheets for free or with a subscription, ensuring students have ample practice material․ Online platforms are particularly useful for home learning, offering flexibility and accessibility․ They cater to diverse learning needs, making maths practice engaging and effective for Year 6 students․ These resources are regularly updated to maintain relevance and quality․

Tips for Parents Supporting Their Child’s Learning

Parents can support their child’s learning by providing a quiet study environment and using Year 6 Maths Worksheets as a teaching tool to reinforce concepts and build confidence․

6․1 Providing a Study Environment

Creating a dedicated study environment is crucial for helping your child excel in Year 6 Maths․ Ensure the space is quiet, well-lit, and free from distractions․ Equip it with essential tools like pens, pencils, and a calculator․ Encourage your child to use Year 6 Maths Worksheets PDFs as a primary resource for practice․ A structured setting helps them focus and retain information better․ Additionally, minimize digital distractions by designating the area as a no-screen zone․ By fostering a consistent and organized study routine, your child can effectively utilize these worksheets to master topics like fractions, decimals, and geometry․ A supportive environment not only enhances learning but also builds confidence and a positive attitude toward maths․ Regular practice in this setting will help your child achieve their full potential․

6․2 Using Worksheets as a Teaching Tool

Year 6 Maths Worksheets PDFs are invaluable as a teaching tool for parents and educators․ They provide structured, topic-specific exercises that align with the national curriculum, making them ideal for targeted practice․ Parents can use these worksheets to identify their child’s strengths and areas for improvement, offering personalized support․ Teachers can integrate them into lesson plans or use them for homework assignments․ The inclusion of answer keys allows for self-assessment and immediate feedback, fostering a deeper understanding of concepts like fractions, decimals, and geometry․ These resources are versatile, suitable for both home learning and classroom environments․ By leveraging Year 6 Maths Worksheets, parents and teachers can create engaging, effective learning experiences that cater to diverse learning styles and pace․ This approach helps build confidence and a strong foundation in maths, preparing students for future challenges․

Advanced Topics in Year 6 Maths

Advanced topics include algebra, complex fractions, and percentages, helping students build problem-solving skills and prepare for higher-level mathematics through targeted practice with worksheets․

7․2 Advanced Fraction Operations

Advanced fraction operations in Year 6 maths worksheets PDFs focus on complex skills such as adding, subtracting, multiplying, and dividing fractions, including mixed numbers and improper fractions․ These resources provide detailed practice in simplifying fractions, finding common denominators, and solving word problems involving fractions․ Students learn to apply fraction operations to real-world scenarios, enhancing their problem-solving abilities․ Worksheets often include visual aids like diagrams and models to help learners understand concepts better․ Additionally, advanced topics such as comparing and ordering fractions, converting between fractions and decimals, and identifying equivalent fractions are covered․ Regular practice with these worksheets ensures mastery of fraction operations, a critical skill for progression in mathematics․ Answer keys are typically included, allowing students to self-assess and improve their understanding․ These activities prepare learners for more challenging mathematical content in higher grades․

Year 6 Maths Worksheets are essential for mastering key concepts, building confidence, and fostering a strong foundation in mathematics, encouraging continuous practice for long-term success․

8․1 Summarizing the Importance

Year 6 Maths Worksheets are invaluable for reinforcing mathematical skills, ensuring students grasp essential concepts like place value, fractions, and geometry․ These resources provide structured practice, helping students build confidence and fluency․ They cover a wide range of topics, from number operations to measurement, aligning with the national curriculum․ The inclusion of answer keys enables self-assessment, fostering independent learning․ Parents and teachers can use these worksheets to identify areas needing improvement, ensuring targeted support․ Their accessibility in PDF format makes them convenient for both home and classroom use․ Regular practice with these worksheets enhances problem-solving abilities and prepares students for future academic challenges․ By offering comprehensive and engaging exercises, Year 6 Maths Worksheets play a crucial role in nurturing a strong mathematical foundation․

8․2 Encouraging Continuous Practice

Consistent practice with Year 6 Maths Worksheets is key to fostering long-term understanding and skill mastery․ Regular use of these resources helps students develop a routine, ensuring they stay engaged and motivated․ By dedicating a specific time each day to worksheet activities, learners can progressively build their mathematical fluency․ Parents and educators should encourage students to review past worksheets to reinforce previously learned concepts․ This approach not only strengthens foundational knowledge but also prepares students for more complex topics in higher grades․ Additionally, the variety of exercises available in these PDFs keeps the learning experience dynamic and interesting, preventing monotony․ Continuous practice with Year 6 Maths Worksheets equips students with the confidence and skills needed to excel in mathematics throughout their academic journey․

hotpoint washing machine manual symbols

Understanding Hotpoint washing machine manual symbols is essential for optimal appliance operation․ These symbols guide users through cycles, settings, and maintenance, ensuring efficient and safe laundry processes․

1․1 Importance of Understanding Symbols

Understanding the symbols in your Hotpoint washing machine manual is crucial for proper appliance operation․ These symbols provide clear guidance on wash cycles, temperature settings, and special functions, ensuring optimal laundry care․ Misinterpreting symbols can lead to damaged garments or machine malfunction․ By familiarizing yourself with these icons, you can troubleshoot issues, prevent errors, and extend the lifespan of your washing machine․ Additionally, understanding symbols enables you to utilize advanced features, ensuring efficient and effective washing․ This knowledge empowers you to make informed decisions, enhancing your overall user experience and maintaining your appliance’s performance․

1․2 Overview of Hotpoint Washing Machine Manuals

Hotpoint washing machine manuals are comprehensive guides designed to help users understand and operate their appliances effectively․ These manuals typically include detailed sections on control panels, wash cycles, temperature settings, and maintenance routines․ They also cover error codes, troubleshooting tips, and essential symbols that appear on the machine․ The manuals are structured to be user-friendly, offering clear explanations and visuals to aid comprehension․ By referring to the manual, users can optimize their washing machine’s performance, resolve issues quickly, and ensure longevity․ Whether you’re setting up the machine, adjusting cycles, or performing routine maintenance, the manual serves as an indispensable resource for all your laundry needs․

Common Symbols Found in Hotpoint Washing Machine Manuals

Hotpoint washing machine manuals feature symbols for control panels, wash cycles, temperatures, spin speeds, and additional functions, guiding users through operation and maintenance effectively․

2․1 Control Panel Symbols

Control panel symbols on Hotpoint washing machines are designed to simplify operation․ Common symbols include the power button, often labeled with “I” for on and “O” for off․ Other icons indicate program selection, such as delicate, normal, or heavy-duty cycles․ Temperature settings are usually represented by numbers or dots, signifying cold, warm, or hot water options․ Spin speed symbols, like a spinning circle or numbers with arrows, denote speed levels․ Additional symbols may include child lock, delay start, or eco modes․ These visual cues ensure users can easily navigate and customize their laundry settings without confusion․

2․2 Wash Cycle Symbols

Wash cycle symbols on Hotpoint washing machines indicate specific programs for different fabric types․ A delicate cycle symbol, often a hand-wash icon, is for fragile items․ The normal cycle, represented by a standard wash icon, is for everyday laundry․ Heavy-duty cycles, shown with sturdy images, tackle tough stains․ Symbols may also denote specialized cycles like wool, silk, or quick wash․ These icons help users select the right program based on garment care labels․ Understanding these symbols ensures proper fabric care, preventing damage and extending the life of your clothes․ They are essential for optimizing wash performance and maintaining fabric integrity․ Proper cycle selection is key to effective laundering․

2․3 Temperature Symbols

Temperature symbols on Hotpoint washing machines are crucial for selecting the right wash settings․ These symbols often appear as numbers or dots, indicating water temperature levels․ A single dot may represent a cold wash, while multiple dots signify higher temperatures․ Some machines use icons like a sun for hot water or a snowflake for cold․ These symbols help users align wash cycles with garment care labels, preventing fabric damage․ Understanding temperature symbols ensures clothes are washed safely and effectively․ They also aid in energy efficiency by allowing users to choose the minimum necessary heat for each load․ Proper temperature selection is vital for fabric preservation and optimal washing performance․

2․4 Spin Speed Symbols

Spin speed symbols on Hotpoint washing machines indicate the rotation speed of the drum during the spin cycle․ These symbols are often represented by numbers (e․g․, 400, 800, 1200) inside a circle or a horizontal line with an arrow․ The numbers denote revolutions per minute (RPM), with higher values meaning faster spinning․ Faster spin speeds are ideal for heavily soiled clothes, while lower speeds are gentler for delicate fabrics․ Some machines may use additional icons, such as a horizontal line with arrows, to signify variable spin speeds․ Understanding these symbols helps users select the right setting for their laundry, ensuring effective moisture removal while protecting fabrics from damage․ Proper spin speed selection also aids in reducing drying time and preventing fabric wear․ Always refer to the manual for specific symbol meanings and recommendations for different fabric types;

2․5 Additional Function Symbols

Additional function symbols on Hotpoint washing machines provide options for enhanced laundry care․ These symbols may include child lock, delay start, eco mode, and steam functions․ The child lock symbol, often a padlock, prevents accidental changes to settings․ Delay start allows scheduling wash cycles in advance, while eco mode optimizes energy and water use․ Steam symbols indicate cycles that use steam for deeper cleaning and freshness․ These symbols are usually accompanied by icons or text for clarity․ Understanding these functions enables users to customize their wash settings for specific needs, ensuring better fabric care and energy efficiency․ Always refer to the manual for detailed explanations of these symbols and their applications․ Proper use of additional functions enhances washing performance and extends fabric life․

Interpreting Hotpoint Washing Machine Symbols

Interpreting Hotpoint washing machine symbols involves understanding their meanings for proper appliance operation․ Symbols guide users through cycles, settings, and maintenance, ensuring efficient and safe laundry processes always․

3․1 Following Garment Care Labels

Always follow garment care labels to ensure the best results when using your Hotpoint washing machine․ These labels provide essential information about the recommended wash cycle, temperature, and spin speed․ Symbols on the labels indicate whether the garment can be machine washed, hand washed, or dry-cleaned․ Matching these symbols to the corresponding settings on your Hotpoint washing machine ensures that your clothes are cleaned safely and effectively․ For example, a hand-wash symbol means the garment should not be machine washed, while a high-temperature symbol indicates it can tolerate hot water․ By aligning garment care labels with your machine’s settings, you prevent damage to fabrics and extend the life of your clothes․

3․2 Understanding the Door Lock Symbol

The door lock symbol on your Hotpoint washing machine indicates when the door is securely locked during operation․ This symbol, often represented by a padlock, lights up when the machine is in use to prevent accidental opening․ The door remains locked throughout the wash cycle to ensure safety and prevent water leakage․ Once the cycle is complete, the symbol will switch off, and the door can be opened․ If the symbol remains lit after the cycle ends, it may indicate an error or blockage․ Always wait for the symbol to deactivate before opening the door to avoid damage or injury․ This feature is essential for safe and efficient operation of your Hotpoint washing machine․

Error Codes and Their Meanings

Hotpoint washing machine error codes indicate specific issues, such as blockages or water inlet problems․ Codes like “END” signal cycle completion or malfunctions, guiding troubleshooting efforts effectively․

4․1 Common Error Codes in Hotpoint Washing Machines

Hotpoint washing machines display specific error codes to indicate issues․ Common codes include “END,” signaling cycle completion or a malfunction, and others like “F-01” or “F-02,” which may point to water inlet or drainage problems․ These codes help users identify problems quickly, such as blockages, faulty sensors, or pump issues․ Understanding these codes enables effective troubleshooting, guiding users to resolve issues like checking filters or ensuring proper water supply․ Regularly referring to the manual can help decipher these codes, ensuring optimal appliance performance and longevity․ Addressing these errors promptly prevents further damage and maintains efficient laundry operations․ Always consult the manual for code-specific solutions to ensure safety and effectiveness․

4․2 How to Troubleshoot Error Codes

To troubleshoot error codes on your Hotpoint washing machine, start by consulting the user manual for specific code meanings․ Reset the machine by switching it off and on again, as this often resolves minor glitches․ For codes related to water supply, check the inlet hoses for kinks or blockages and ensure water flows freely․ Drainage issues may require inspecting the drain hose for blockages or kinks․ Cleaning the filter is another common solution for codes indicating blockages․ If the issue persists, refer to the manual for advanced troubleshooting steps or contact Hotpoint support for professional assistance․ Regular maintenance can prevent many of these errors, ensuring smooth operation and extending the appliance’s lifespan․

Cleaning and Maintenance Symbols

Hotpoint washing machines use specific symbols to guide cleaning and maintenance․ These symbols, found in manuals or on the control panel, help ensure optimal performance and longevity․

5․1 Symbols for Cleaning the Filter

Hotpoint washing machines often display specific symbols indicating when the filter needs cleaning․ These symbols may appear as a small grid or mesh icon, signaling potential blockages․ Regular filter cleaning is crucial for maintaining water flow and preventing poor wash performance․ The manual typically provides visuals of these symbols, along with step-by-step instructions․ Users are often advised to clean the filter after every 5-10 cycles to remove lint and debris․ The filter is usually located at the bottom of the machine or near the drainage area․ Neglecting filter maintenance can lead to error codes or reduced efficiency, making it essential to monitor these symbols closely․

5․2 Symbols for Checking Blockages

Hotpoint washing machines use specific symbols to alert users about potential blockages in the drainage system․ These symbols may appear as a tornado-like spiral or a pipe with water flowing through it․ When these symbols light up, it indicates that the machine has detected an obstruction, often in the drainage hose or pump filter․ Regular checks are essential to ensure smooth operation․ Users are advised to inspect the drainage hose for kinks or blockages and clean the pump filter if necessary․ Ignoring these symbols can lead to poor drainage, extended wash cycles, or even machine damage․ Always refer to the manual for guidance on resolving blockage issues effectively․

Finding and Downloading Hotpoint Washing Machine Manuals

Locate your Hotpoint washing machine model number on the appliance or manual․ Visit the official Hotpoint website or trusted online resources to download the PDF manual easily․

6․1 How to Locate Your Hotpoint Washing Machine Model Number

To find your Hotpoint washing machine model number, check the appliance itself․ It is usually printed on a sticker or engraved plate located on the back, top, or bottom of the machine․ Sometimes, it can be found near the door or lid․ The model number may also be listed in the user manual or on the purchase receipt․ If you’re unable to locate it on the machine, refer to your manual or contact Hotpoint customer support for assistance․ Having the model number is crucial for downloading the correct manual and ensuring compatibility with your specific appliance․

6․2 Tips for Downloading PDF Manuals Online

Downloading a PDF manual for your Hotpoint washing machine is straightforward with the right approach․ Start by visiting the official Hotpoint website, where you can search for your specific model using the model number located on the appliance․ For additional reliability, use a search engine with your model number and terms like “manual” or “PDF” to find trusted sources․ Avoid suspicious websites that request personal information or require account creation․ If the manual isn’t available on the official site, consider reputable manual repositories or forums where users share resources․ Always prioritize official sources to ensure the manual’s accuracy and safety․ If unsuccessful, contacting Hotpoint customer support can provide direct assistance;

Understanding Hotpoint washing machine manual symbols enhances user experience and ensures optimal appliance performance․ Always refer to the manual for guidance and troubleshooting, optimizing your laundry routine effectively․

7․1 Summary of Key Symbols and Their Meanings

Hotpoint washing machine manuals feature a variety of symbols that represent wash cycles, temperatures, spin speeds, and additional functions․ These symbols are designed to guide users through operation, ensuring efficient and safe laundry care․ Common icons include wash cycle indicators, temperature settings, spin speed options, and maintenance alerts․ Error codes and door lock symbols are also essential for troubleshooting and understanding machine status․ By familiarizing yourself with these symbols, you can optimize your washing machine’s performance and address issues promptly․ Referencing the user manual is key to understanding these symbols fully and making the most of your appliance’s capabilities․

7․2 Encouragement to Refer to Manuals for Optimal Use

Referring to your Hotpoint washing machine manual is crucial for optimal use and troubleshooting․ Manuals provide detailed explanations of symbols, error codes, and maintenance procedures, ensuring you get the most out of your appliance․ By following the guidelines, you can avoid unnecessary damage and extend the machine’s lifespan․ Whether you’re dealing with wash cycles, temperature settings, or error messages, the manual offers clear instructions․ It’s also a valuable resource for understanding energy efficiency and eco-friendly settings․ For the best experience, always keep your manual handy and consult it whenever you encounter unfamiliar symbols or issues․ This will help you use your washing machine effectively and efficiently․

Additional Resources

Explore additional resources like Hotpoint’s official website and online forums for further guidance on symbols, troubleshooting, and user experiences․ These platforms offer extensive support and tips․

8․1 Hotpoint Official Website and Support

The Hotpoint official website is a primary resource for detailed information on washing machine symbols, manuals, and troubleshooting guides․ It provides easy access to product-specific materials, ensuring users can optimize their appliance’s performance․ The site also features sections dedicated to energy labels and technical specifications, offering a comprehensive understanding of your machine․

Additionally, Hotpoint’s support section includes FAQs, maintenance tips, and downloadable PDF manuals․ Users can find solutions for error codes and learn about new features․ The website is designed for easy navigation, making it a valuable tool for both new and experienced users seeking assistance or guidance․

8․2 Online Forums and Communities for Hotpoint Washing Machine Users

Online forums and communities dedicated to Hotpoint washing machines are invaluable resources for users seeking advice and shared experiences․ These platforms allow individuals to discuss various topics, including symbol interpretations, error codes, and maintenance tips․ Users can exchange insights and solutions, fostering a supportive environment for troubleshooting and optimization․ Many forums also feature detailed discussions about specific models, making them a great supplement to official manuals․ By engaging with these communities, users can gain practical knowledge and resolve issues more efficiently․ Additionally, forums often provide real-time advice, helping users address concerns promptly and effectively․ This collective knowledge enhances the overall user experience and promotes better understanding of Hotpoint appliances․ Always verify information with official sources for accuracy․

ideal logic combi 24 user guide

The Ideal Logic Combi 24 User Guide is a detailed resource designed to help users understand, install, and operate their boiler efficiently. It covers key features, safety, and maintenance tips to ensure optimal performance and energy savings.

Overview of the Ideal Logic Combi 24 Boiler

The Ideal Logic Combi 24 is a compact and highly efficient combination boiler designed to provide both central heating and instantaneous hot water. It is part of Ideal Boilers’ Logic Combi range, known for its reliability and user-friendly design. The boiler operates in condensing mode, ensuring high energy efficiency and reduced fuel bills. With a power output of 24 kW, it is suitable for smaller to medium-sized homes. The Logic Combi 24 features a built-in programmer, allowing for easy scheduling of heating and hot water. Its compact size makes it ideal for installation in kitchens or utility rooms. The boiler also includes advanced safety features and is compatible with optional controls for enhanced customization. With its balanced design and eco-friendly performance, the Ideal Logic Combi 24 is a popular choice for homeowners seeking a dependable and efficient heating solution.

Importance of Reading the User Guide

Reading the Ideal Logic Combi 24 user guide is essential for ensuring the boiler operates safely and efficiently. It provides detailed instructions for installation, operation, and maintenance, helping users avoid common issues. The guide explains how to set up controls, adjust temperature settings, and perform basic troubleshooting. Understanding the boiler’s features and functions through the manual enables users to customize their heating experience and maintain optimal performance. Additionally, the guide highlights safety precautions and compliance with gas regulations, which are crucial for protecting both the user and the property. By following the user guide, users can extend the boiler’s lifespan and ensure it runs efficiently, saving on energy costs and reducing the need for costly repairs. Regular servicing and maintenance tips outlined in the guide also contribute to the boiler’s reliability and longevity.

Key Features of the Ideal Logic Combi 24

The Ideal Logic Combi 24 is a high-efficiency combination boiler offering both central heating and instantaneous hot water. It operates in condensing mode for maximum efficiency and features a compact design, making it suitable for small to medium-sized homes. The boiler includes advanced controls for temperature adjustment and comes with a mechanical timer for scheduling heating. It also incorporates a self-check feature, with the pump operating briefly every 24 hours to ensure system readiness. Additionally, the Logic Combi 24 is compatible with optional digital timers and smart controls, allowing for enhanced customization and energy management. Its user-friendly interface and robust design ensure reliable performance, while its energy-saving capabilities help reduce utility bills. Overall, the Logic Combi 24 is designed to deliver consistent heating and hot water while maintaining high efficiency and ease of use.

Installation and Setup

The Ideal Logic Combi 24 installation involves following system requirements, step-by-step setup, and configuration to ensure optimal performance and energy efficiency, as outlined in the user guide.

System Requirements for Installation

The Ideal Logic Combi 24 requires specific system requirements for installation, including a compatible gas supply, adequate water pressure, and proper electrical connections. Ensure the boiler is installed in a well-ventilated area with sufficient clearance for maintenance. The system must comply with national gas safety regulations and building codes. Proper sizing of the central heating system is essential for efficiency. The boiler operates on natural gas and requires a 230V AC electrical supply. A minimum water pressure of 1 bar is recommended for optimal performance. Ensure all pipes are correctly sized and insulated. A qualified installer must perform the installation to guarantee safety and compliance with manufacturer guidelines. Failure to meet these requirements may void the warranty or compromise the boiler’s efficiency and safety. Always refer to the user guide for detailed specifications and compliance standards.

Step-by-Step Installation Process

The installation of the Ideal Logic Combi 24 begins with preparing the site, ensuring all necessary tools and materials are available. The boiler must be placed on a level surface, secured firmly to prevent movement. Next, connect the gas supply line, ensuring it is properly sized and leak-tested. The water supply lines should be connected to the appropriate inlets, with care taken to avoid cross-connection. Electrical connections must be made according to the wiring diagram provided in the user guide. Once all connections are secure, turn on the gas and water supplies and perform a thorough system check for leaks. Finally, power on the boiler and test its operation to ensure it functions correctly. Always follow the manufacturer’s instructions and safety guidelines to ensure a safe and efficient installation. A qualified professional should perform the installation to guarantee compliance with all regulations.

Initial Setup and Configuration

After installation, the initial setup of the Ideal Logic Combi 24 involves powering on the boiler and configuring basic settings. Begin by plugging in the boiler and ensuring the power supply is stable. Use the control panel to set the clock and choose the desired operation mode, such as central heating or hot water. Adjust the temperature settings to your preference, ensuring they align with your home’s needs. Next, check the boiler pressure using the built-in pressure gauge and top it up if necessary. Finally, test the system by running hot water and checking the heating function to ensure everything operates smoothly. Proper configuration ensures efficient performance and prevents potential issues. Refer to the user guide for detailed instructions on each step to complete the setup accurately. This process ensures your boiler is ready for daily use. Always follow safety guidelines during setup. The system will now be fully operational.

Operating the Ideal Logic Combi 24

Operating the Ideal Logic Combi 24 involves managing daily functions like heating and hot water through its user-friendly controls. Adjust settings for efficiency and comfort easily.

Daily Operation and Controls

Operating the Ideal Logic Combi 24 daily involves using its intuitive controls to manage central heating and hot water. Turn the boiler on or off using the mode selector, and adjust the temperature settings as needed. The boiler features a clear display showing current settings and any error codes. To ensure efficiency, the Logic Combi 24 operates in condensing mode by default. For hot water, the boiler provides instantaneous supply, and flow rates can be adjusted to suit your needs. Regularly check the system pressure using the built-in pressure gauge and top it up if necessary. Always refer to the user guide for detailed instructions on customizing settings or addressing specific operational needs. Proper daily operation ensures reliable performance and energy efficiency.

Adjusting Temperature Settings

Adjusting the temperature settings on the Ideal Logic Combi 24 is straightforward. Use the boiler’s control panel to set your desired central heating and hot water temperatures. The heating temperature can be adjusted between 20°C and 80°C, while hot water can be set between 35°C and 60°C. For energy efficiency, keep the settings at moderate levels. To change settings, navigate using the buttons on the control panel, selecting the temperature option and adjusting with the up or down arrows. Always ensure the system is balanced after changes. Regularly reviewing and optimizing these settings can lead to significant energy savings and improved comfort. Refer to the user guide for detailed instructions on customizing temperature settings to meet your specific needs. Proper adjustment ensures efficient and consistent heating performance.

Understanding Water Pressure and Flow

Understanding water pressure and flow is crucial for the optimal performance of the Ideal Logic Combi 24 boiler. The boiler requires a minimum water pressure of 0.5 bar to function correctly. You can check the pressure using the built-in pressure gauge on the control panel. If the pressure drops below 1 bar, you may need to top it up using the filling loop. The flow rate of hot water depends on the boiler’s output and your mains water supply. A higher flow rate is ideal for homes with multiple bathrooms. Regularly checking and maintaining the correct pressure ensures efficient heating and hot water delivery. Refer to the user guide for detailed instructions on adjusting and maintaining water pressure and flow for your specific setup. Proper management of these settings is key to maximizing the boiler’s efficiency and performance.

Maintenance and Servicing

Regular maintenance is essential to ensure the Ideal Logic Combi 24 operates efficiently and safely. Annual servicing by a qualified technician is recommended to maintain performance and longevity.

Annual Servicing Requirements

Annual servicing is crucial for the Ideal Logic Combi 24 to ensure optimal performance and compliance with safety standards. A qualified engineer should inspect the boiler, checking components like the heat exchanger, burner, and gas valve. They will also verify that all safety devices are functioning correctly. Additionally, the engineer will clean the boiler’s internal parts and ensure proper gas flow. Servicing should be documented in the Benchmark Service Interval Record, which is provided in the user guide. Regular servicing not only maintains efficiency but also helps prevent potential faults and extends the boiler’s lifespan. Users are advised to schedule this service annually to keep the boiler running smoothly and safely.

Checking and Topping Up Boiler Pressure

Checking and topping up the boiler pressure on your Ideal Logic Combi 24 is essential for maintaining efficient operation. The pressure gauge on the control panel indicates the current pressure level. The ideal range is between 1 and 2 bar. If the pressure drops below 1 bar, water may not flow properly, and the boiler may shut down. To top up the pressure, locate the filling loop (usually underneath the boiler) and open the valve slowly until the gauge reaches 1.5 bar. Be cautious not to over-pressurize, as this can cause damage. If you’re unsure, consult the user guide or contact a Gas Safe engineer. Regular checks and adjustments will help ensure consistent heating and hot water performance. Always follow safety guidelines when handling the filling loop to avoid any potential risks. Annual servicing by a qualified professional is also recommended to maintain proper pressure levels and overall boiler health.

Bleeding Radiators for Optimal Performance

Bleeding radiators is a simple yet crucial task to ensure your Ideal Logic Combi 24 boiler operates efficiently. Air trapped in radiators can reduce heat output and increase energy bills. To bleed a radiator, turn off the boiler and allow the system to cool. Use a radiator key to open the bleed valve located at the top of the radiator. You’ll hear a hissing sound as air escapes; once water starts to come out, close the valve. Repeat this process for all radiators. After bleeding, check and top up the boiler pressure if necessary, as the pressure may drop. Regular bleeding will maintain even heat distribution and prevent cold spots. For best results, bleed radiators annually or when you notice a drop in performance. Always follow safety precautions to avoid scalding from hot water. If unsure, consult the user guide or contact a professional. Proper maintenance ensures your heating system runs smoothly and efficiently.

Troubleshooting Common Issues

The Ideal Logic Combi 24 user guide provides solutions for common issues like error codes, low pressure, and ignition faults. Regular checks and resets often resolve problems quickly.

Identifying Error Codes and Solutions

The Ideal Logic Combi 24 user guide includes a detailed section on error codes, helping users diagnose and resolve issues quickly. Common codes like 0 or E1 indicate specific faults, such as low water pressure or ignition problems. Solutions often involve simple fixes like resetting the boiler or topping up pressure. For more complex issues, the guide advises contacting Ideal Customer Services or a qualified engineer. Regular maintenance, such as annual servicing and radiator bleeding, can prevent many errors. Users are encouraged to refer to the error code section for step-by-step troubleshooting guidance, ensuring their boiler operates efficiently and safely. This section is essential for maintaining optimal performance and addressing any unexpected problems effectively.

Resetting the Boiler: A Step-by-Step Guide

To reset the Ideal Logic Combi 24 boiler, locate the mode knob on the control panel. Turn it to the reset position and immediately return it to the desired setting. This action restarts the boiler, allowing it to perform a self-check. Ensure the boiler is turned off before resetting. After resetting, the boiler will briefly operate its pump for a system check. If issues persist, contact Ideal Customer Services or a qualified technician. Regular resets can help maintain functionality, but excessive use may indicate underlying problems. Always refer to the user guide for detailed instructions and safety precautions to ensure proper operation and longevity of the boiler.

Common Faults and DIY Fixes

Common faults with the Ideal Logic Combi 24 often relate to low water pressure, error codes, or issues with radiator performance. If the boiler displays an error code like “0,” it may indicate a gas supply problem or faulty sensor. To resolve low pressure, repressurize the system using the filling loop; For radiator issues, bleed them to remove airlocks. Always ensure the system is balanced and clean. If the pump fails to operate, check for blockages or power supply issues. Regular maintenance, such as annual servicing and checking for leaks, can prevent many of these faults. DIY fixes like topping up pressure or bleeding radiators can be done safely if you follow the user guide instructions. However, for persistent issues, always consult a qualified technician to ensure safety and compliance with gas regulations.

Additional Features and Settings

The Ideal Logic Combi 24 offers advanced timer controls, energy-saving modes, and compatibility with smart thermostats. Customizable heating profiles and adaptive temperature adjustments enhance efficiency and comfort.

Energy Efficiency and Savings

The Ideal Logic Combi 24 is designed with energy efficiency in mind, achieving high condensing performance. It operates in both heating and hot water modes, optimizing fuel use. Features like modulating burners and smart controls help reduce energy consumption. Users can save on utility bills by utilizing the boiler’s eco-mode, which lowers output when demand is low. Additionally, the boiler’s compact design minimizes heat loss, ensuring maximum energy is converted into usable heat. Regular servicing and proper usage, as outlined in the guide, further enhance its efficiency. By following the user guide’s recommendations, homeowners can maximize savings while maintaining comfort.

Advanced Controls and Customization

The Ideal Logic Combi 24 offers advanced controls and customization options to tailor heating and hot water systems to user preferences. The boiler features a user-friendly interface with adjustable temperature settings and scheduling capabilities. Additionally, it supports integration with smart thermostats, enabling remote control via smartphones for enhanced convenience. Customizable profiles allow users to set specific heating patterns for different times of the day or week. The boiler also includes a mechanical timer for precise control over heating cycles. These advanced features empower users to optimize their heating and hot water systems, ensuring comfort while maintaining energy efficiency. By leveraging these customization options, homeowners can create a system that perfectly aligns with their lifestyle and preferences.

Safety Precautions and Best Practices

Always follow the manufacturer’s guidelines and ensure proper ventilation. Use only approved spare parts and schedule annual inspections by a certified professional. Refer to the benchmark service record for compliance.

Gas Safety and Compliance

Ensure all installations and servicing comply with national gas safety regulations. Only certified professionals should handle repairs or adjustments. Regular inspections are essential to maintain compliance. Always use genuine spare parts approved by Ideal Boilers to meet safety standards. The Benchmark Service Interval Record must be completed after each annual service. This ensures compliance with industry regulations and maintains boiler efficiency. Familiarize yourself with the Gas Safety (Installation and Use) Regulations. Never attempt to modify or adjust the boiler’s gas settings without proper training. Keep records of all servicing and inspections for future reference. Always refer to the user guide for specific safety guidelines and recommendations. Compliance with these standards ensures safe operation and optimal performance of your Ideal Logic Combi 24 boiler.

The Ideal Logic Combi 24 User Guide provides comprehensive insights for optimal boiler performance. By following its instructions, users can ensure efficiency, safety, and reliability in their heating system.

Final Tips for Optimal Boiler Performance

For the Ideal Logic Combi 24, regular servicing is crucial. Ensure annual checks by a certified technician to maintain efficiency and safety. Check boiler pressure monthly and top it up as needed. Bleeding radiators annually prevents sludge buildup and ensures even heat distribution. Keep the system balanced and clean to avoid issues. Utilize the timer and temperature controls wisely to optimize energy use. Refer to the user guide for specific instructions on resetting the boiler or addressing error codes. Lastly, explore the Ideal Boilers website for helpful videos and troubleshooting tips to keep your boiler running smoothly year-round.

Resources for Further Assistance

For additional support with your Ideal Logic Combi 24, visit the Ideal Boilers website, where you can download the full PDF user manual or troubleshooting guide. Their customer service team is available to address queries and provide technical advice. You can also find instructional videos and maintenance tips on their official YouTube channel. If you encounter issues, contact a Gas Safe registered engineer for professional assistance. Ensure to use only genuine spare parts for any repairs to maintain warranty and safety standards. Refer to the Benchmark Service Record in your manual for servicing requirements. For further guidance, explore forums or professional heating communities where users share their experiences with the Ideal Logic Combi 24 boiler.

About the Manufacturer

Ideal Boilers, a renowned UK-based company, has a long-standing reputation for producing high-quality, energy-efficient heating solutions. Their commitment to innovation and customer satisfaction has made them a trusted name in the industry, with a history dating back over a century.

Ideal Boilers: History and Reputation

Ideal Boilers, established over a century ago, has built a strong reputation for innovation and reliability in the heating industry. With a rich history dating back to the early 20th century, the company has consistently delivered high-quality boilers that meet the evolving needs of homeowners. Known for their energy efficiency and durability, Ideal Boilers has become a trusted name, offering a range of models like the Logic Combi series. Their commitment to excellence is reflected in their cutting-edge designs and customer-focused approach, ensuring they remain at the forefront of the market. This legacy of quality and innovation underscores their position as a leading manufacturer in the UK.

myotomes chart pdf

The Myotomes Chart PDF is a detailed guide mapping spinal nerve innervation to muscle groups, essential for diagnosing nerve injuries and planning rehabilitation strategies in neurology and physical therapy.

Definition and Overview

A myotomes chart PDF is a detailed visual tool that maps the relationship between spinal nerve roots and their corresponding muscle groups. It serves as a critical resource for medical professionals, particularly in neurology and physical medicine. The term “myotome” originates from Greek roots, with “myo-” meaning muscle and “-tome” signifying a segment. This chart provides a structured overview of how spinal nerves innervate specific muscles, aiding in the diagnosis of nerve injuries and rehabilitation planning. By organizing information in a tabular format, it simplifies the complex relationship between nerve roots and muscle function, making it indispensable for clinical assessments and therapeutic strategies.

Importance in Neurology and Physical Medicine

The myotomes chart PDF holds significant value in neurology and physical medicine as a diagnostic and therapeutic tool. It aids in identifying nerve root damage by correlating muscle weakness with specific spinal segments. This mapping is crucial for assessing radiculopathy and planning targeted rehabilitation strategies. By providing a clear link between spinal nerves and muscle function, the chart enables precise localization of lesions and guides physical therapy interventions. Its structured format ensures accurate clinical correlations, making it an indispensable resource for improving patient outcomes and streamlining treatment plans in both neurological and musculoskeletal care settings.

Structure and Organization of the Chart

The myotomes chart PDF is typically organized in a tabular format, listing spinal nerve roots along one axis and corresponding muscle groups or movements along the other. This structured layout allows for quick reference and easy understanding of how specific nerves innervate particular muscles. The chart often includes both upper and lower limb myotomes, with detailed actions like elbow flexion or knee extension. Some versions also incorporate cranial nerves for comprehensive coverage. This clear and systematic organization makes it an invaluable tool for clinicians, educators, and students to visualize and correlate nerve function with muscle activity efficiently.

Detailed Anatomy of Myotomes

A myotome is a group of muscles innervated by a single spinal nerve, originating from the ventral root. Each myotome corresponds to specific spinal nerve roots, controlling voluntary movements.

Spinal Nerve Roots and Their Corresponding Myotomes

Spinal nerve roots are categorized into cervical, thoracic, lumbar, and sacral regions. Each root corresponds to specific myotomes, which are muscle groups controlling movements like elbow flexion, knee extension, and thumb opposition. For example, the C5 nerve root governs shoulder abduction, while L4-L5 roots control hip flexion and knee extension. These mappings are crucial for diagnosing radiculopathy and guiding physical therapy interventions, ensuring precise correlation between nerve function and muscle activity.

Muscle Groups and Their Innervation Patterns

Muscle groups are organized according to their innervation by specific spinal nerve roots, forming distinct myotomes. Each myotome corresponds to a spinal segment, such as cervical (C1-C8), thoracic (T1-T12), lumbar (L1-L5), and sacral (S1-S5) regions. For example, elbow flexion is primarily governed by the C5-C6 myotomes, while hip flexion involves L2-L3. These patterns are detailed in the myotomes chart PDF, which provides a clear mapping of nerve roots to muscle actions. Understanding these relationships aids in diagnosing nerve injuries and planning targeted rehabilitation strategies.

Upper and Lower Limb Myotomes

Upper limb myotomes involve cervical nerve roots (C5-T1), controlling muscles for shoulder abduction (C5), elbow flexion (C6), and thumb extension (C8). Lower limb myotomes are governed by lumbar (L2-L5) and sacral (S1) roots, regulating hip flexion (L2-L3), knee extension (L3-L4), and ankle dorsiflexion (L5). These myotomes are systematically detailed in the chart, aiding in the assessment of motor function and nerve integrity. The organization helps clinicians identify patterns of weakness and correlate them with specific nerve injuries, enhancing diagnostic accuracy and rehabilitation planning.

Cranial Nerves and Their Role in Myotomes

Cranial nerves contribute uniquely to myotomes, controlling muscles involved in eye movements (CN III, IV, VI), facial expressions (CN VII), chewing (CN V), swallowing (CN IX, X, XII), and neck movements (CN XI). While spinal myotomes focus on limb muscles, cranial myotomes govern essential functions like mastication, speech, and head mobility. The chart may include cranial nerve contributions, especially in assessing cranial nerve palsies or brainstem injuries. This integration highlights the comprehensive scope of myotomes, bridging spinal and cranial nerve functions for accurate neurological evaluation and treatment planning.

Connection to Dermatomes and Sclerotomes

Dermatomes, sclerotomes, and myotomes originate from somites, sharing a developmental connection. Dermatomes map sensory skin areas, sclerotomes relate to bony structures, and myotomes define muscle innervation patterns, collectively aiding in precise nerve injury localization and anatomical correlations;

Dermatomes: Sensory Distribution of Spinal Nerves

Dermatomes are specific areas of skin innervated by individual spinal nerve roots, creating a map of sensory distribution across the body. Each dermatome corresponds to a particular spinal nerve, providing a localized area of sensation. For example, cervical nerves innervate the neck and upper back, while lumbar nerves cover the lower extremities. Dermatomes are crucial for clinical assessments, as they help localize nerve injuries or lesions. Overlapping dermatomes ensure continuous sensory coverage, though this can complicate precise lesion identification. Understanding dermatomes is essential for correlating symptoms with specific nerve damage, aiding in accurate diagnoses and treatment plans.

Sclerotomes: Bony Structures and Their Development

Sclerotomes are segments of mesoderm that develop into bony structures, such as vertebrae and ribs, forming the axial skeleton. They originate from somites, which are paired clusters of mesenchyme along the embryonic backbone. Each sclerotome migrates and condenses to form specific bones, ensuring proper segmentation and alignment of the skeleton. Understanding sclerotomes is vital for correlating anatomical structures with nerve distributions, aiding in the diagnosis of musculoskeletal and nerve-related disorders. Their developmental origin ties them closely to dermatomes and myotomes, providing a comprehensive view of spinal anatomy and its clinical implications.

Interrelationship Between Dermatomes, Myotomes, and Sclerotomes

Dermatomes, myotomes, and sclerotomes are interconnected through their embryological origin in somites. Each somite divides into these three components, with dermatomes forming skin segments, myotomes developing into muscle groups, and sclerotomes contributing to bony structures. This interrelationship aids in clinical correlation, as injuries to a spinal nerve can affect sensation (dermatome), movement (myotome), and skeletal structures (sclerotome). Understanding their connection enhances diagnostic accuracy and treatment planning, particularly in cases of nerve damage or musculoskeletal disorders, by providing a holistic view of spinal anatomy and function.

Clinical Applications of Myotomes Chart PDF

The Myotomes Chart PDF aids in diagnosing radiculopathy, assessing musculoskeletal disorders, and guiding physical therapy. It is a valuable tool for clinicians to pinpoint nerve injuries and plan rehabilitation strategies effectively.

Diagnosis of Radiculopathy and Spinal Nerve Injuries

The Myotomes Chart PDF is instrumental in diagnosing radiculopathy by correlating muscle weakness with specific nerve roots. Clinicians use it to identify patterns of weakness, aiding in localizing spinal nerve injuries. For instance, weakness in elbow flexion may indicate a C5-C6 injury. The chart simplifies the assessment of musculoskeletal disorders by mapping nerve supply to muscle groups. It complements physical exams and imaging, providing a clear reference for pinpointing lesions. This tool is invaluable for both acute and chronic conditions, offering a structured approach to neurological evaluations and rehabilitation planning.

Assessment of Musculoskeletal Disorders

The Myotomes Chart PDF is a vital tool for assessing musculoskeletal disorders, enabling precise identification of muscle groups and their innervation patterns. By mapping specific movements to corresponding myotomes, clinicians can pinpoint dysfunction in spinal nerve supply. This chart aids in evaluating muscle weakness, atrophy, or paralysis, providing clarity in complex cases. It complements physical exams and imaging, offering a structured approach to identifying musculoskeletal impairments. Additionally, it helps guide targeted rehabilitation strategies, ensuring effective treatment plans for patients with movement or motor deficits. Its clear format enhances diagnostic accuracy and streamlines the assessment process for practitioners.

Physical Therapy and Rehabilitation Strategies

The Myotomes Chart PDF plays a pivotal role in shaping physical therapy and rehabilitation strategies by providing a clear map of muscle groups and their corresponding nerve supply. This resource allows therapists to design targeted exercises and interventions based on specific myotomes, ensuring efficient recovery. By identifying impaired muscles and their innervation, therapists can focus on strengthening weak areas and restoring movement. The chart also aids in monitoring progress, helping patients regain functional abilities effectively. Its structured format makes it an invaluable tool for creating personalized rehabilitation plans tailored to individual needs and injury profiles.

Case Studies and Practical Examples

Case studies highlight the practical application of the Myotomes Chart PDF in diagnosing and treating neurological conditions. For instance, a patient with a herniated disc causing leg weakness can be assessed using the chart to identify affected nerve roots. If knee extension is impaired, the chart links this to the L3-L4 myotome, guiding targeted rehabilitation. Practical examples also include restoring hand function by referencing C8-T1 myotomes for thumb extension. Such real-world applications demonstrate how the chart aids in developing precise treatment plans, ensuring effective recovery and functional restoration for patients with spinal nerve injuries or musculoskeletal disorders.

How to Read and Interpret the Myotomes Chart

The Myotomes Chart PDF is organized in a tabular format, listing spinal nerve roots and corresponding muscle groups or movements, enabling quick identification of nerve-muscle relationships for clinical assessment and diagnosis.

Understanding the Tabular Format

The Myotomes Chart PDF is typically organized in a table with spinal nerve roots listed on one axis and corresponding muscle groups or movements on the other. This format allows for quick identification of nerve-muscle relationships, simplifying clinical assessments. Each row represents a specific spinal nerve, while columns detail associated muscle actions, such as elbow flexion or knee extension. The table often includes both upper and lower limb myotomes, providing a comprehensive view of nerve function. This structured layout is essential for diagnosing radiculopathy and planning targeted rehabilitation strategies, making it a valuable tool for neurologists and physical therapists.

Identifying Key Movements and Muscle Groups

The Myotomes Chart PDF categorizes muscles based on their innervation by specific spinal nerves, linking each nerve root to key movements and muscle groups. For example, the C5 nerve root is associated with elbow flexion and shoulder stabilization, while L3 is linked to hip flexion and knee extension. This classification helps in pinpointing nerve damage by correlating muscle weakness with specific nerve roots. Clinicians use this information to assess neurological function and design targeted rehabilitation programs, ensuring precise and effective treatment plans for patients with musculoskeletal or nerve-related conditions;

Correlating Clinical Findings with the Chart

By aligning clinical symptoms with the Myotomes Chart PDF, clinicians can pinpoint nerve root dysfunction. For instance, weakness in elbow flexion suggests a C5-C6 nerve issue, while diminished knee extension points to L3-L4 involvement. This correlation aids in localizing lesions, guiding diagnostic accuracy. It also helps in monitoring recovery progress and refining treatment plans. The chart’s precision ensures targeted interventions, enhancing patient outcomes in neurology and physical medicine, making it an indispensable tool for practitioners assessing and managing nerve-related conditions effectively.

Anatomical Distribution of Myotomes

Myotomes are organized by spinal nerve roots, controlling specific muscle groups. Cervical myotomes govern neck and upper limb muscles, while thoracic, lumbar, and sacral myotomes manage torso and lower limb functions.

Cervical Myotomes and Their Functions

Cervical myotomes control essential movements of the neck, shoulders, and upper limbs. Each cervical nerve root (C1-C8) corresponds to specific muscle groups; C1-C4 manage neck flexion and lateral rotation, while C5-C8 govern shoulder elevation, elbow flexion, and wrist movements. These myotomes are crucial for diagnosing cervical radiculopathy and planning rehabilitation. Clinicians use them to assess muscle strength and reflexes, aiding in precise physical therapy strategies. Understanding cervical myotomes is vital for treating conditions like herniated discs or nerve compressions in the cervical spine.

Thoracic Myotomes and Their Roles

Thoracic myotomes (T1-T12) primarily govern the muscles of the trunk and abdominal wall, playing a key role in posture, respiration, and torso movements. These myotomes contribute to activities like sitting up, coughing, and stabilizing the spine. While they are less involved in limb movement compared to cervical or lumbar myotomes, they are crucial for core stability and visceral function. Clinicians use thoracic myotomes to assess conditions affecting mid-back muscles and internal organ innervation, aiding in the diagnosis of thoracic spine injuries and rehabilitation of postural disorders.

Lumbar and Sacral Myotomes: Lower Limb Innervation

Lumbar (L1-L5) and sacral (S1-S5) myotomes primarily control the muscles of the lower limbs, hips, and pelvic region. These myotomes are essential for movements like walking, running, and maintaining balance. They innervate key muscle groups such as the quadriceps, hamstrings, and glutes, enabling functions like knee extension, hip flexion, and ankle dorsiflexion. Clinically, these myotomes are crucial for diagnosing radiculopathy, sciatica, and nerve injuries affecting the lower limbs. They also guide rehabilitation strategies to restore mobility and strength in patients with spinal or musculoskeletal disorders.

Embryological Origins of Myotomes

Myotomes develop from the paraxial mesoderm, forming somites that differentiate into dermatomes, myotomes, and sclerotomes. This segmentation establishes the foundational organization of muscles and spinal nerve innervation.

Somites and Their Development into Dermomyotomes

Somites are paired mesodermal structures that form along the embryonic axis, giving rise to dermatomyotomes; These differentiate into dermatomes, myotomes, and sclerotomes. Dermatomyotomes further divide, with the dorsal portion forming dermatomes (precursors of skin and subcutaneous tissue) and the ventral portion developing into myotomes (muscle precursors). This segmentation is crucial for the organized innervation of muscles by spinal nerves. The development of somites into dermomyotomes lays the foundation for the precise mapping of myotomes, as detailed in the Myotomes Chart PDF, which is essential for understanding nerve-muscle relationships in clinical and therapeutic contexts.

Formation of Myotomes from Paraxial Mesoderm

The paraxial mesoderm, a type of embryonic tissue, segments into somites, which are paired structures along the neural axis. These somites differentiate into sclerotomes, dermatomes, and myotomes. The myotomes develop from the ventral portion of the somites, forming muscle precursors. This process establishes the foundational organization of skeletal muscles and their innervation by spinal nerves. The formation of myotomes from paraxial mesoderm is crucial for understanding the anatomical basis of muscle function and nerve supply, as outlined in the Myotomes Chart PDF, which maps these relationships for clinical and educational purposes.

Future Trends and Updates in Myotomes Chart PDF

The Myotomes Chart PDF is evolving with digital tools, offering interactive platforms and AI-driven assessments for enhanced precision in neurological evaluations and muscle function analysis.

Digital Tools and Interactive Resources

Digital tools and interactive resources are revolutionizing the Myotomes Chart PDF, enhancing its accessibility and functionality. AI-driven platforms now offer dynamic, interactive 3D models, allowing users to explore muscle groups and nerve pathways in depth. These tools provide real-time updates, ensuring clinicians and students access the most current anatomical data. Interactive quizzes and customizable charts enable personalized learning experiences, making complex concepts more engaging. Furthermore, mobile-friendly formats and cloud accessibility ensure the Myotomes Chart PDF is readily available for on-the-go reference, fostering better understanding and application in neurological assessments and rehabilitation planning.

Advancements in Neurological Assessment Techniques

Recent advancements in neurological assessment techniques have enhanced the utility of the Myotomes Chart PDF. Integration with advanced imaging and electromyography provides precise correlations between muscle function and nerve root activity. Machine learning algorithms now aid in identifying patterns of weakness, improving diagnostic accuracy. These innovations enable clinicians to detect subtle nerve impairments earlier, guiding targeted interventions. The fusion of traditional anatomical knowledge with cutting-edge technology ensures more accurate and efficient neurological evaluations, making the Myotomes Chart PDF an indispensable tool for modern clinical practice and research in neurology and physical medicine.

The Myotomes Chart PDF is an invaluable resource for understanding the intricate relationship between spinal nerve roots and muscle function. It serves as a cornerstone for diagnosing neurological conditions, assessing musculoskeletal disorders, and planning rehabilitation strategies. By correlating clinical findings with detailed anatomical mappings, clinicians can pinpoint nerve injuries and develop targeted treatments. Its integration with modern tools and techniques ensures its relevance in advancing neurological care. As a comprehensive guide, the Myotomes Chart PDF remains essential for both educational purposes and practical applications in neurology and physical medicine, offering a bridge between anatomy and clinical practice.

lowrance hook reveal 5 manual

The Lowrance Hook Reveal 5 is a high-performance fish finder designed for anglers, offering advanced sonar and GPS capabilities to locate fish and navigate effectively.

Key Features and Specifications

The Lowrance Hook Reveal 5 features a 5-inch high-resolution TFT display, SplitShot sonar, GPS, and Genesis Live real-time mapping for enhanced fishing and navigation experiences.

2.1 Display and Resolution

The Lowrance Hook Reveal 5 features a 5-inch high-resolution TFT display, providing clear and detailed imagery. The 480×480-pixel resolution ensures sharp visuals, making it easy to interpret sonar data and maps. The display is designed to be readable in both bright sunlight and low-light conditions, thanks to its adjustable backlight. The touchscreen interface allows for intuitive navigation and quick access to various features, enhancing the overall user experience. Whether you’re scanning underwater structures or reviewing mapping data, the display delivers vibrant colors and precise details, making it an essential tool for anglers seeking to optimize their fishing trips.

2.2 Sonar Capabilities

The Lowrance Hook Reveal 5 is equipped with advanced sonar technologies to deliver precise underwater imaging. It features SplitShot technology, which combines traditional sonar with DownScan Imaging, offering a detailed view of fish, structures, and the bottom. The device also includes FishReveal technology, which highlights fish targets and makes them stand out from surrounding clutter. With a maximum depth capability of 762 meters, it is suitable for both shallow and deep-water fishing. The sonar system operates at multiple frequencies, ensuring optimal performance in various fishing conditions. These features collectively enhance the ability to locate and track fish efficiently, making the Hook Reveal 5 a valuable asset for anglers of all skill levels.

2.3 GPS and Mapping

The Lowrance Hook Reveal 5 includes advanced GPS and mapping features to enhance navigation and fishing experiences. It supports Genesis Live Mapping, allowing users to create high-resolution custom maps of fishing hotspots. The device also enables precise GPS waypoint management, making it easy to mark and revisit key locations. With accurate chart plotting, anglers can navigate confidently, even in unfamiliar waters. The integration of detailed cartography ensures that users can identify underwater structures, drop-offs, and other fish-holding areas. These mapping capabilities, combined with real-time GPS tracking, provide a comprehensive toolset for locating and returning to productive fishing spots, ultimately improving fishing success and efficiency.

2.4 Additional Features

Beyond its core sonar and GPS capabilities, the Lowrance Hook Reveal 5 offers several additional features to enhance user experience. It includes SplitShot Technology, which combines traditional sonar with DownScan Imaging for a detailed view of underwater structures. The device also features FishReveal Technology, which helps identify fish and underwater vegetation more clearly. Anglers can customize their display with a split-screen option, allowing simultaneous views of sonar and mapping data; The unit is also compatible with microSD cards, enabling easy storage and transfer of custom maps and waypoints. These features, combined with its intuitive interface, make the Lowrance Hook Reveal 5 a versatile and user-friendly tool for both casual and experienced anglers, ensuring a more productive and enjoyable fishing experience.

Installation and Setup

The Lowrance Hook Reveal 5 requires careful installation, starting with mounting the unit and connecting the transducer. Ensure all components are securely fastened and wires are properly connected.

3.1 Mounting the Unit

Mounting the Lowrance Hook Reveal 5 requires careful planning to ensure optimal performance and visibility. Choose a location on your boat with clear sightlines and minimal obstruction. Use the provided mounting template to mark drill holes accurately. Secure the unit using the included hardware, ensuring it is tightly fastened to prevent vibration or movement. Align the unit to your viewing angle for comfort and ease of use. After mounting, connect the power and transducer cables, ensuring all connections are watertight. Double-check the installation to avoid loose wires or hardware, which could interfere with functionality. Refer to the manual for specific mounting recommendations and safety precautions to ensure a reliable setup. Proper installation is crucial for accurate sonar readings and smooth operation. Follow the guidelines to maximize your fishing experience with the Lowrance Hook Reveal 5.

3.2 Transducer Installation

Installing the transducer for the Lowrance Hook Reveal 5 is a critical step to ensure accurate sonar readings. Choose a location on the transom or hull where the transducer can maintain consistent contact with the water, avoiding obstructions like propellers or hull vents. Use the provided installation template to mark the drill holes accurately. Apply marine-grade adhesive to the transducer bracket and press firmly to secure it. Route the transducer cable carefully to the unit, ensuring no kinks or damage. After installation, test the system to confirm proper sonar performance. For optimal results, calibrate the transducer sensitivity and depth settings according to the manual. Proper transducer alignment and installation are essential for clear and accurate sonar imagery, enabling you to effectively locate fish and underwater structures.

Operating the Device

Power on the Lowrance Hook Reveal 5, navigate the menu using the keypad, and adjust settings as needed. Use the sonar and GPS features to locate fish and map your surroundings efficiently.

4.1 Controls Overview

The Lowrance Hook Reveal 5 features an intuitive keypad and touchscreen interface, allowing users to easily navigate menus and adjust settings. The keypad includes buttons for Home, Menu, Zoom, and Mark, enabling quick access to essential functions. The touchscreen offers a user-friendly experience, with prompts for sonar, GPS, and mapping. The device also includes a rotating knob for adjusting sensitivity and depth settings. These controls are designed to simplify operation, ensuring anglers can focus on fishing while utilizing advanced features. The interface is responsive and ergonomically designed, making it easy to use in various lighting conditions. By familiarizing yourself with these controls, you can optimize the performance of the Hook Reveal 5 for a seamless fishing experience.

4.2 Menu Navigation

The Lowrance Hook Reveal 5 menu system is intuitive and user-friendly, allowing anglers to easily access and adjust various settings. The main menu is categorized into key functions such as Sonar, GPS, and System, making it simple to navigate. Users can scroll through options using the touchscreen or keypad, selecting items with a tap or button press. Submenus provide detailed adjustments, such as sensitivity settings or waypoint management. The device also features a “Back” option to return to the previous screen, ensuring seamless navigation. The menu is logically organized, with clear labels and minimal complexity, allowing even novice users to quickly find what they need. Customization options are abundant, enabling anglers to tailor the device to their preferences. With practice, users can efficiently navigate the menu, enhancing their overall fishing experience.

4.3 Basic Sonar Functions

The Lowrance Hook Reveal 5 offers a range of basic sonar functions designed to enhance fishing experiences. It provides detailed underwater imagery, allowing users to identify fish, structures, and bottom contours. The device supports traditional 2D sonar, delivering clear views of fish schools and underwater features. Additionally, it includes CHIRP sonar technology, which offers higher resolution and better target separation. The sonar system can display data in split-screen mode, combining 2D sonar with other functions like DownScan Imaging. Users can adjust sensitivity settings to optimize performance in varying water conditions. Depth tracking is also a key feature, providing accurate measurements of water depth. These basic sonar functions ensure anglers can effectively locate and track fish, making it an essential tool for both novice and experienced fishermen. Regular software updates further enhance sonar capabilities, ensuring the device remains at peak performance.

Advanced Sonar Features

The Lowrance Hook Reveal 5 offers advanced sonar features like SplitShot technology, combining CHIRP sonar with DownScan Imaging for detailed underwater views, enhancing fish detection accuracy.

5.1 SplitShot Technology

SplitShot technology on the Lowrance Hook Reveal 5 combines CHIRP sonar with DownScan Imaging, delivering high-resolution images of underwater structures and fish. This advanced feature provides crystal-clear views of bottom contours, bait, and predators in real time. CHIRP sonar emits continuous frequency sweeps, offering precise depth penetration and target separation, while DownScan Imaging captures photo-like images of the seafloor. Together, these technologies enhance fish detection and improve accuracy, allowing anglers to identify potential hotspots effortlessly. The SplitShot display splits the screen, showing traditional sonar data on one side and detailed DownScan images on the other, giving users a comprehensive understanding of their surroundings. This feature is particularly useful for identifying schools of fish, vegetation, and submerged objects, making it an indispensable tool for both novice and experienced anglers seeking to maximize their fishing success.

5.2 FishReveal Technology

FishReveal Technology is an innovative feature of the Lowrance Hook Reveal 5, designed to simplify fish detection and identification. This technology enhances sonar imagery by overlaying fish icons onto the traditional sonar display, making it easier for anglers to quickly identify potential targets. By combining CHIRP sonar and advanced signal processing, FishReveal provides a clearer view of fish locations, sizes, and movements. The feature automatically highlights fish arches and bait schools, reducing the time spent interpreting sonar data. This intuitive system is particularly useful for anglers of all skill levels, as it eliminates guesswork and maximizes fishing efficiency. FishReveal Technology ensures that users can focus on fishing rather than deciphering complex sonar patterns, making it a valuable asset for enhancing fishing success.

Customizing Your Settings

The Lowrance Hook Reveal 5 allows users to tailor settings to their fishing preferences, including sensitivity, depth range, and Fish ID. These adjustments ensure optimal performance.

6.1 Sensitivity Adjustments

Sensitivity adjustments on the Lowrance Hook Reveal 5 allow users to fine-tune sonar performance for varying fishing conditions. By optimizing sensitivity, anglers can reduce clutter and enhance target clarity. The device offers both automatic and manual sensitivity options, ensuring precise control over sonar readings. Automatic sensitivity adjusts settings based on water conditions, while manual mode enables anglers to customize levels for specific depths or structures. Adjusting sensitivity is done through the menu system, providing an intuitive interface for quick modifications. Proper sensitivity tuning ensures accurate fish detection and minimizes false signals, making it a crucial step for maximizing the device’s effectiveness. This feature is essential for anglers seeking to refine their sonar experience and improve fishing success.

6.2 Depth and Range Settings

Depth and range settings on the Lowrance Hook Reveal 5 enable precise control over sonar readings, ensuring accurate fish detection at varying depths. Users can manually adjust the depth range to focus on specific water layers or rely on automatic adjustments for optimal performance. The device supports a maximum depth range of up to 762 meters, making it suitable for both shallow and deep-water fishing. Adjusting the range allows anglers to zoom in on target areas, enhancing detail and clarity. These settings are easily accessible via the menu, providing anglers with the flexibility to customize their sonar experience based on fishing conditions. Proper depth and range configuration is crucial for maximizing the device’s effectiveness and ensuring accurate underwater readings.

Mapping and Navigation

The Lowrance Hook Reveal 5 offers advanced mapping and navigation features, including Genesis Live for real-time contour mapping and GPS waypoint management for precise location tracking.

7.1 Live Imaging Sonar

The Lowrance Hook Reveal 5 features Live Imaging Sonar, delivering real-time, high-resolution images of underwater structures and fish. This technology enhances accuracy in detecting fish locations and underwater contours, allowing anglers to make informed decisions. With crystal-clear visuals, users can identify targets with precision, even in challenging conditions. The system integrates seamlessly with the unit’s display, providing an intuitive experience. This feature is particularly useful for mapping uncharted waters and locating fish habitats efficiently. By offering detailed live feedback, Live Imaging Sonar elevates the fishing experience, ensuring anglers spend less time searching and more time catching. Its advanced capabilities make it an essential tool for both novice and experienced fishermen alike.

7.2 Genesis Live Mapping

Genesis Live Mapping on the Lowrance Hook Reveal 5 offers real-time mapping capabilities, allowing users to create detailed underwater maps as they navigate. This feature provides high-resolution imagery of depth contours, structure, and bottom composition, enabling anglers to identify potential fishing hotspots instantly. With Genesis Live, users can map uncharted waters, track changes in depth, and pinpoint areas where fish are likely to gather. The system is highly customizable, allowing adjustments to contour intervals and color palettes for optimal visibility. Maps can be saved for future trips, ensuring anglers return to productive locations. This tool is invaluable for understanding underwater terrain and maximizing fishing success. Its integration with the Hook Reveal 5’s display ensures a seamless and intuitive mapping experience, making it easier than ever to explore and interpret aquatic environments.

7.3 GPS Waypoint Management

The Lowrance Hook Reveal 5 allows for efficient GPS waypoint management, enabling users to mark and organize key locations such as fishing hotspots, docks, and underwater structures. Waypoints can be created manually or automatically by saving your current position, ensuring you never lose track of important spots. These waypoints can be grouped into categories for easy access and organization. Additionally, users can add descriptions, icons, and depth information to each waypoint for better reference. The device also supports importing and exporting waypoint data, making it easy to share locations with friends or transfer data to other devices. This feature is particularly useful for anglers who frequently visit multiple fishing locations, as it allows them to plan and execute trips more effectively. The waypoint management system is intuitive, with clear on-screen instructions guiding users through the process.

Troubleshooting Common Issues

Address common issues like no sonar data or GPS signal loss by checking connections, restarting the device, and ensuring proper transducer installation for optimal performance.

8.1 No Sonar Data

If your Lowrance Hook Reveal 5 is not displaying sonar data, start by checking the transducer connection. Ensure it is securely attached to the unit and properly installed on the boat. Next, verify that the transducer is calibrated correctly and free from debris or air bubbles. Inspect the transducer cable for damage or loose connections. Restart the device to reset the system. If the issue persists, check the sonar settings in the menu to ensure the correct frequency and mode are selected. Adjust sensitivity levels to optimize performance. If no data appears, consult the user manual or contact Lowrance support for further assistance. Proper setup and maintenance are crucial for reliable sonar operation.

8.2 GPS Signal Loss

If the Lowrance Hook Reveal 5 experiences GPS signal loss, start by ensuring the GPS antenna has a clear view of the sky, free from obstructions like boat covers or nearby structures. Restart the unit to reset the GPS module. Check for any software updates, as outdated software can cause connectivity issues. Verify that the GPS settings are correctly configured in the menu, ensuring the unit is set to the appropriate location and satellite system. If the issue persists, perform a factory reset, but be aware this will erase saved waypoints and settings. Finally, contact Lowrance customer support for further troubleshooting or potential hardware repairs. Regular software updates and proper unit calibration are essential to maintain reliable GPS functionality.

Maintenance and Care

Regularly clean the display with a soft cloth and avoid harsh chemicals. Store the unit in a dry, cool place to prevent damage and ensure longevity.

9.1 Cleaning the Display

Regular cleaning of the Lowrance Hook Reveal 5’s display is essential to maintain clarity and functionality. Use a soft, dry cloth to wipe away dirt, smudges, or water spots. Avoid harsh chemicals, abrasive materials, or rough cloths, as they may scratch the screen. For stubborn smudges, lightly dampen the cloth with distilled water, but ensure no liquid seeps into the edges or internal components. Never use tissues or paper towels, as they can leave lint or scratches. For the transducer, clean it with a soft sponge or cloth and mild soap solution, avoiding abrasive materials. Proper cleaning ensures optimal performance and longevity of your device.

9.2 Storing the Unit

Proper storage of the Lowrance Hook Reveal 5 is crucial to maintain its performance and longevity. When not in use, store the unit in a cool, dry place, away from direct sunlight and moisture. Avoid extreme temperatures, as they may damage the electronics or display. Use a soft, protective cover or case to shield the screen from scratches. If storing for an extended period, ensure the battery is partially charged (around 50%) to prevent deep discharge. Do not leave the unit fully discharged or overcharged, as this can reduce battery life; Store the transducer separately, ensuring it is clean and dry to prevent corrosion. Always use the original packaging or a padded bag for added protection during transportation or storage. Regularly inspect the unit for signs of wear or damage before and after storage.

Software Updates and Support

Regular software updates ensure optimal performance. Check the current version in the About dialog and update as needed. For support, contact Lowrance via their official website or consult user manuals and FAQs for troubleshooting.

10.1 Updating Software

Regular software updates are crucial for maintaining optimal performance of the Lowrance Hook Reveal 5. To update, first check the current software version in the About dialog within the System Settings. Visit the official Lowrance website to download the latest software version. Transfer the update file to an SD card and insert it into the unit. Follow the on-screen instructions to complete the update process. Ensure the device is fully charged or connected to a power source during the update to prevent interruptions. It is recommended to back up settings before updating. For detailed steps, refer to the user manual or contact Lowrance customer support for assistance. Updating ensures access to new features, improved performance, and bug fixes.

10.2 Accessing Customer Support

Lowrance provides comprehensive customer support to assist with any questions or issues regarding the Hook Reveal 5. Visit the official Lowrance website and navigate to the support section for access to FAQs, user manuals, and tutorial videos. For direct assistance, contact Lowrance via phone, email, or live chat. Ensure you have your device’s serial number and a detailed description of your issue for faster resolution. Additionally, registered users can access exclusive resources and updates. The support team is available to help troubleshoot, clarify features, and provide guidance on maximizing your device’s potential. For more information, refer to the contact details provided in the user manual or on the Lowrance website. Lowrance is committed to ensuring a seamless and productive experience for all anglers using the Hook Reveal 5.

The Lowrance Hook Reveal 5 is an exceptional fish finder that combines advanced sonar, GPS, and mapping technologies to enhance fishing experiences. Its high-resolution display, intuitive controls, and robust features make it a valuable tool for anglers of all skill levels. By following the manual’s guidance, users can unlock its full potential, ensuring accurate fish detection and seamless navigation. Regular updates and reliable customer support further enhance its reliability. Whether for casual fishing or professional angling, the Hook Reveal 5 proves to be a durable and efficient companion on the water. Its innovative design and user-friendly interface make it a standout choice in the world of marine electronics, helping anglers achieve greater success and enjoyment on every fishing trip.

6 week pre-season training program soccer pdf

A well-structured 6-week pre-season training program is crucial for soccer players aiming to peak performance during the competitive season. This program focuses on building physical conditioning, technical proficiency, and tactical awareness, ensuring players are prepared for the demands of the game and setting a solid foundation for success.

Structure of the 6-Week Program

The program is divided into three two-week blocks, each focusing on specific aspects of fitness and skill development. Each week includes four running workouts, with two intense and two easy sessions, ensuring progressive overload and adaptation. Tactical and technical sessions are integrated to enhance overall performance.

Overview of the Program

The 6-week pre-season training program is designed to prepare soccer players for the upcoming season by enhancing physical fitness, technical skills, and tactical awareness. It is structured into three two-week blocks, each focusing on specific aspects of development. The program incorporates a mix of aerobic and anaerobic conditioning, strength training, agility drills, and small-sided games to improve overall performance. Each week includes four running workouts, with two intense sessions and two recovery runs, allowing for progressive overload and adaptation. Additionally, tactical and technical sessions are integrated to refine player positioning, ball control, and game strategy. The program is tailored to meet the demands of professional soccer, ensuring players are physically and mentally prepared for competition.

Weekly Breakdown and Progression

The 6-week program is divided into three two-week blocks, each with a focus on progressive overload and adaptation. Weeks 1-2 emphasize building a foundational fitness base with lower intensity and volume. Weeks 3-4 increase the intensity, introducing strength training and agility drills. Weeks 5-6 focus on maximizing speed, power, and game-specific conditioning. Each week includes four running workouts: two high-intensity sessions and two recovery runs. Sprint repetitions increase weekly, starting with three reps in Week 1 and progressing to six by Week 6. This structured approach ensures players gradually build fitness and reduce injury risk. Technical and tactical drills are integrated weekly to enhance ball control and positional awareness, preparing players for the demands of competitive play.

Physical Conditioning

Physical conditioning is the cornerstone of a successful pre-season program, focusing on building endurance, strength, agility, and speed. It prepares players for the physical demands of soccer.

Building Endurance and Aerobic Capacity

Building endurance and aerobic capacity is essential for soccer players to maintain performance over 90 minutes. This phase focuses on improving cardiovascular fitness through aerobic exercises like interval training, steady-state runs, and high-intensity drills. Players engage in progressive overload, increasing intensity and duration weekly to enhance stamina. Aerobic capacity is developed through structured sessions, ensuring players can sustain efforts during matches. Proper recovery and nutrition are emphasized to optimize adaptation. This foundation supports speed, agility, and overall performance, making it a critical component of the pre-season program.

Strength Training for Soccer-Specific Movements

Strength training is tailored to enhance power, stability, and resilience for soccer-specific movements; Exercises like squats, lunges, and deadlifts target key muscle groups such as the legs, core, and glutes. Each week introduces progressive overload, increasing intensity to build functional strength. Dynamic movements mimic game scenarios, improving explosiveness and agility. Focus is placed on injury prevention, ensuring proper form and recovery. This phase ensures players can withstand physical demands, maintain balance, and execute explosive actions on the field. The program is designed to maximize performance while minimizing injury risks, creating a strong foundation for the season ahead.

Agility and Speed Development

Agility and speed development are critical components of a 6-week pre-season soccer program. Drills focus on improving acceleration, deceleration, and rapid changes of direction. Shuttle runs, cone exercises, and ladder drills enhance foot speed and coordination. Sprint intervals and hill sprints build explosive power, while plyometric exercises increase vertical jump and agility. Each session is progressive, increasing intensity and complexity to simulate match conditions. These exercises not only improve physical performance but also enhance decision-making and reaction times, giving players a competitive edge on the field. The goal is to develop quick, sharp movements, enabling players to dominate in one-on-one situations and transition effectively between offense and defense. This phase ensures players are agile, fast, and game-ready.

Tactical Awareness and Positional Training

This phase enhances game understanding, spatial awareness, and decision-making through small-sided games and position-specific drills. Players learn to adapt to various scenarios, improving their ability to read the game and execute strategies effectively.

Small-Sided Games for Tactical Development

Small-sided games are a cornerstone of tactical development, offering players increased touches and decision-making opportunities in condensed spaces. These games, such as 3v3 or 4v4, simulate real match scenarios, fostering spatial awareness and positional understanding. By reducing the number of players, the focus shifts to movement, communication, and problem-solving, allowing players to develop game sense and adaptability. Progressive overload is introduced by adding defenders, changing field dimensions, or modifying rules to increase intensity. This approach enhances creativity, passing accuracy, and ball control under pressure. Over six weeks, these games evolve to mirror competitive situations, preparing players for the demands of full-sided matches while reinforcing teamwork and tactical execution. Small-sided games are both engaging and effective, making them a key tool in pre-season training.

Position-Specific Drills and Scenarios

Position-specific drills are tailored to enhance the unique demands of each role on the field, ensuring players master the skills required for their position. Defenders practice defensive headers, tackling, and zonal marking through exercises like 1v1 and 2v2 scenarios. Midfielders focus on ball retention, pressing, and transitioning, using drills that emphasize quick decision-making and accurate passing. Forwards work on finishing techniques, movement off the ball, and beating defenders in 1v1 situations. Goalkeepers participate in specialized sessions, focusing on reflex saves, distribution, and communication. These drills are complemented by game-like scenarios, such as breakaways or corner kick simulations, to apply skills in realistic contexts. Over six weeks, players develop position-specific expertise, improving their ability to execute their role effectively within the team framework. This targeted approach ensures each player is prepared to contribute optimally to the team’s success.

Technical Proficiency

Technical proficiency focuses on mastering essential soccer skills, including ball control, dribbling, shooting, and passing. Players engage in drills to improve precision, composure, and execution under pressure.

Ball Control and Dribbling Exercises

Ball control and dribbling exercises are essential for enhancing a player’s ability to maintain possession and create scoring opportunities. These exercises involve repetitive drills such as figure-eight runs, cone mazes, and box drills, which improve coordination and agility. Players practice controlling the ball with both feet, inside, and outside cuts, and perfecting their ability to change direction quickly. Advanced techniques like step-overs and feints are introduced to deceive defenders. Small-sided games are incorporated to apply these skills in game-like situations, ensuring players can maintain control under pressure. By mastering these exercises, players develop the confidence and precision needed to excel in competitive matches. This foundation is critical for overall technical proficiency and team success.

Shooting and Finishing Techniques

Shooting and finishing are critical components of a soccer player’s skill set, requiring precision, power, and composure. This section focuses on exercises designed to improve accuracy and effectiveness in front of goal. Players practice various shooting techniques, including instep drives, side-foot passes, and volleys, from both short and long ranges. Drills involve stationary shooting, dynamic movement into the box, and one-on-one scenarios against goalkeepers. Emphasis is placed on proper ball striking, body positioning, and follow-through to ensure consistency. Small-sided games and breakaway drills simulate match situations, helping players develop the confidence to finish under pressure. These exercises aim to refine technique, increase scoring ability, and prepare players for the intensity of competitive play.

Passing and Receiving Drills

Passing and receiving are fundamental skills that require precision, timing, and spatial awareness. This section focuses on drills designed to enhance players’ ability to control and distribute the ball effectively. Exercises include short and long-range passing, both on the ground and in the air, with an emphasis on accuracy and consistency. Players practice receiving techniques such as cushioning the ball, using different surfaces, and maintaining control under pressure. Dynamic drills involve moving targets and game-like scenarios, simulating match conditions. These exercises aim to improve first-touch quality, decision-making, and the ability to play one-touch or two-touch passes seamlessly. By mastering these skills, players can dictate the flow of the game and create scoring opportunities;

Injury Prevention and Recovery

Injury prevention and recovery are critical components of a successful pre-season program. Proper warm-up routines, flexibility exercises, and recovery techniques help maintain player health and enhance performance.

Warm-Up and Cool-Down Routines

Proper warm-up and cool-down routines are essential for injury prevention and performance enhancement. A dynamic warm-up, lasting 15-20 minutes, includes light cardio, dynamic stretches, and mobility exercises to prepare muscles for intense training. This routine improves blood flow, reduces muscle stiffness, and enhances flexibility. Similarly, a cool-down session, lasting 10-15 minutes, involves static stretching and breathing exercises to gradually lower heart rate and promote recovery. Over the 6-week program, these routines adapt to increasing intensity, ensuring players maintain optimal physical condition. Incorporating these practices consistently reduces the risk of injuries and accelerates recovery, allowing athletes to perform at their best throughout the pre-season. These routines are scientifically backed and tailored to meet the demands of soccer-specific movements.

Flexibility and Mobility Exercises

Flexibility and mobility exercises are vital for maintaining range of motion, preventing injuries, and enhancing soccer-specific movements. Dynamic stretches, such as leg swings and hip circles, are incorporated to improve joint mobility and muscle elasticity. Static stretches, like hamstring and quadriceps stretches, are performed post-session to promote recovery and reduce muscle tightness. Over the 6-week program, these exercises progress in intensity, focusing on areas critical for soccer, such as the hips, hamstrings, and calves. Incorporating foam rolling and self-myofascial release techniques further enhances muscle recovery and flexibility. These practices ensure players maintain optimal mobility, enabling them to perform at their best during training and matches. Regular consistency in these exercises is key to long-term injury prevention and performance improvement.

Nutrition and Recovery Strategies

Proper nutrition and recovery are essential for optimizing performance. A balanced diet rich in carbohydrates, proteins, and fats fuels training, while hydration and post-workout recovery strategies, like protein shakes, aid muscle repair.

Optimal Nutrition for Performance

A balanced diet is vital for soccer players to fuel their training and recovery. Carbohydrates provide energy, proteins aid muscle repair, and fats support overall health. Hydration is equally important, with water and electrolytes replenishing fluids lost during intense sessions. Post-workout recovery meals should include a mix of carbohydrates and proteins to restore energy stores and rebuild muscle tissue. Timing meals strategically, such as eating a light meal 2-3 hours before training, ensures optimal energy levels. Avoiding heavy, high-fat foods pre-session prevents digestive discomfort. Additionally, avoiding excessive sugar and caffeine helps maintain consistent energy levels. A well-planned nutrition strategy supports physical conditioning, technical proficiency, and mental focus, enabling players to perform at their best throughout the 6-week program. Proper nutrition also reduces the risk of fatigue and injury, ensuring peak performance.

Recovery Techniques for Enhanced Performance

Proper recovery is essential for optimizing performance during a 6-week pre-season program. Techniques such as foam rolling, stretching, and dynamic mobility exercises help reduce muscle soreness and improve flexibility. Incorporating ice baths or contrast showers can further aid in reducing inflammation and speeding up muscle repair. Additionally, compression garments and massage therapy can enhance blood flow, promoting recovery. Prioritizing quality sleep is crucial, as it allows the body to repair and adapt to the demands of training. Active recovery sessions, such as light jogging or swimming, can also maintain cardiovascular fitness without overtaxing the body. By integrating these recovery strategies, players can minimize fatigue, prevent injuries, and ensure consistent progress throughout the program. Consistent recovery practices are vital for achieving peak performance and longevity in the season.

A well-structured 6-week pre-season training program is essential for soccer players to achieve peak performance. By focusing on physical conditioning, technical proficiency, and tactical awareness, players can build a strong foundation for the competitive season. Proper recovery techniques, nutrition, and consistent training ensure optimal progress and injury prevention. This program not only enhances endurance, strength, and agility but also improves decision-making and teamwork. Players who commit to this program will be better prepared to meet the demands of the season, perform at their best, and contribute effectively to their team’s success. Dedication and adherence to the program will yield significant improvements, setting the stage for a successful and injury-free season.

servsafe manager study guide pdf free download

The ServSafe Manager Study Guide is a comprehensive resource for exam preparation, offering key concepts, practice questions, and strategies. Available as a free PDF download, it aids in mastering food safety principles and ensures readiness for the certification exam.

1.1 Overview of the ServSafe Manager Certification

The ServSafe Manager Certification is a prestigious credential for food service professionals, ensuring expertise in food safety and sanitation. It is valid for five years and requires passing a proctored exam. The certification covers critical topics like foodborne illnesses, contamination prevention, and safe food handling practices. Designed for managers and supervisors, it equips them to maintain safe food environments and comply with FDA Food Code guidelines. Resources like the ServSafe Manager Study Guide and practice tests are available to aid preparation. This certification is essential for advancing careers in the food industry and demonstrating commitment to consumer health and safety.

1.2 Importance of Food Safety in the Food Service Industry

Food safety is paramount in the food service industry to prevent foodborne illnesses and protect consumer health. Proper practices ensure food is handled, stored, and prepared safely, reducing risks of contamination. Managers play a crucial role in implementing safety protocols, as outlined in the ServSafe Manager Study Guide. Non-compliance can lead to legal issues, financial losses, and reputational damage. A safe food environment builds customer trust and satisfaction, fostering business growth. By prioritizing food safety, establishments contribute to public health and maintain operational excellence. Effective training and certification are vital for maintaining high standards and ensuring all staff understand their responsibilities in safeguarding food safety.

Key Concepts Covered in the Study Guide

The ServSafe Manager Study Guide covers essential topics such as foodborne illnesses, contamination prevention, safe food handling, and management systems like HACCP and FDA guidelines.

2.1 Foodborne Illnesses and Prevention

The ServSafe Manager Study Guide emphasizes understanding foodborne illnesses, their causes, and prevention strategies. It explains how pathogens, toxins, and contaminants lead to outbreaks, affecting public health. Key topics include identifying symptoms, high-risk foods, and vulnerable populations. Prevention methods covered are proper hygiene, temperature control, and safe food handling practices. The guide also details regulatory standards to minimize risks, ensuring managers can protect consumers and maintain a safe environment. By mastering these concepts, food service professionals can effectively prevent foodborne illnesses and uphold their establishment’s reputation. This section is crucial for certification and daily operational safety.

2.2 Forms of Contamination and Control Measures

The ServSafe Manager Study Guide details various forms of contamination, including biological, chemical, and physical sources. Biological contaminants, such as bacteria and viruses, are often introduced through improper handling or infected individuals. Chemical contamination may arise from cleaning agents or pesticides, while physical contamination involves foreign objects like glass or metal. The guide emphasizes prevention strategies, such as proper sanitation, staff training, and strict food handling protocols. It also highlights the importance of implementing HACCP systems to identify and control hazards. By understanding these concepts, managers can effectively safeguard food quality and ensure compliance with regulatory standards, reducing risks of contamination and foodborne illnesses.

2.3 Safe Food Handling Practices

Safe food handling practices are essential to prevent contamination and ensure food safety. The ServSafe Manager Study Guide emphasizes proper techniques for receiving, storing, preparing, and serving food. It highlights the importance of maintaining correct temperatures during cooking and storage, with specific guidelines for minimum internal temperatures of potentially hazardous foods. Proper utensils and equipment should be used to avoid cross-contamination. Handwashing and personal hygiene are stressed to prevent the spread of pathogens. Additionally, the guide covers appropriate food labeling, dating, and rotation practices to ensure quality and safety. By following these practices, food service managers can create a safe and healthy environment for customers.

The Flow of Food: From Purchasing to Service

The ServSafe Manager Study Guide details critical safe food handling practices to prevent contamination and ensure food safety. Proper techniques for receiving, storing, preparing, and serving food are emphasized. Maintaining correct temperatures during cooking and storage is crucial, with specific guidelines for minimum internal temperatures of hazardous foods. Preventing cross-contamination by using appropriate utensils and equipment is highlighted. Handwashing and personal hygiene are stressed to minimize pathogen spread. Additionally, the guide covers food labeling, dating, and rotation practices to maintain quality and safety. These practices, outlined in the study guide, are vital for creating a safe and healthy food service environment.

3.1 Purchasing and Receiving Food

The ServSafe Manager Study Guide emphasizes the importance of safe purchasing and receiving practices to ensure food quality and safety. When purchasing, it’s crucial to select reputable suppliers who adhere to food safety standards. Food should be received in a clean, sanitary condition, with proper labeling and packaging. Upon delivery, inspect for signs of tampering, pests, or spoilage. Verify that perishable items are stored at correct temperatures, and ensure all products meet regulatory requirements. Implementing a receiving checklist can help maintain consistency and compliance. Proper documentation of deliveries is also essential for traceability. This step sets the foundation for a safe food flow process.

3.2 Storage and Inventory Management

Proper storage and inventory management are critical to maintaining food safety and quality. The ServSafe Manager Study Guide highlights the importance of storing food in a clean, dry, and temperature-controlled environment. Separate raw and ready-to-eat foods to prevent cross-contamination. Label and date all stored items for easy identification and rotation. Use the FIFO (First-In, First-Out) system to ensure older stock is used before newer items. Regularly inspect stored foods for signs of spoilage or damage. Monitor inventory levels to avoid overstocking, which can lead to storage challenges. Proper storage practices help maintain food safety standards and ensure operational efficiency in food service establishments.

3.3 Preparation and Cooking Techniques

The ServSafe Manager Study Guide emphasizes safe food preparation and cooking practices to prevent contamination and ensure food safety. Proper handwashing, utensil sanitation, and avoiding cross-contamination are stressed. Techniques include thawing foods correctly—refrigerator, cold water, or microwave—to prevent bacterial growth. Cooking temperatures are critical, with minimum internal temperatures specified for poultry (165°F) and ground meats (160°F). Use of food thermometers is recommended for accuracy. Techniques also cover proper food handling during preparation to maintain safety standards. These practices are essential for protecting consumer health and ensuring compliance with food safety regulations.

3.4 Serving and Food Display Safety

The ServSafe Manager Study Guide highlights critical practices for serving and displaying food safely. Maintaining proper temperatures is essential: hot foods should stay above 145°F, while cold foods must remain below 41°F. Use of food thermometers ensures accuracy. Cross-contamination prevention includes separating raw and ready-to-eat foods. Food display areas must be kept clean and sanitized, with serving utensils replaced or sanitized regularly. Time control is vital—food left in the “danger zone” (40°F–140°F) for too long should be discarded. Proper labeling and dating of displayed foods ensure traceability. These practices protect consumer health and align with food safety regulations. Consistent staff training reinforces these protocols.

Food Safety Management Systems

The ServSafe Manager Study Guide covers food safety management systems, including HACCP, record-keeping, and staff training, ensuring compliance with FDA Food Code guidelines and industry standards.

4.1 HACCP (Hazard Analysis Critical Control Point)

The ServSafe Manager Study Guide emphasizes the importance of HACCP, a systematic approach to identifying and controlling food safety hazards. It outlines seven key principles: hazard analysis, critical control points (CCPs), setting limits, monitoring, corrective actions, verification, and record-keeping. By understanding HACCP, managers can effectively prevent biological, chemical, and physical hazards in food production. The guide provides practical examples and scenarios to help implement HACCP plans, ensuring a safe food environment. This section is crucial for managers aiming to comply with FDA regulations and maintain high food safety standards in their establishments.

4.2 Record Keeping and Documentation

Proper record keeping and documentation are essential for maintaining food safety standards and compliance with regulatory requirements. The ServSafe Manager Study Guide highlights the importance of accurate and detailed records, such as temperature logs, cleaning schedules, and supplier information. These records help track food safety practices, ensure accountability, and simplify audits. The guide provides examples of essential documents, including HACCP plans, employee training records, and food delivery receipts. By emphasizing organized record-keeping, the study guide equips managers with tools to demonstrate compliance and uphold food safety standards effectively. This section is vital for ensuring transparency and accountability in food service operations.

4.3 Staff Training and Supervision

Effective staff training and supervision are critical for ensuring food safety and compliance with regulations. The ServSafe Manager Study Guide emphasizes the importance of proper training programs, including topics like foodborne illness prevention, personal hygiene, and sanitation. Managers must supervise staff to ensure adherence to safety protocols and correct unsafe practices promptly. The guide provides tips for conducting effective training sessions and monitoring employee performance. It also covers how to document training activities and maintain records for compliance. By prioritizing staff training and supervision, managers can create a culture of food safety, reducing risks and ensuring customer well-being. This section is vital for maintaining high food safety standards in any food service establishment.

Regulatory Compliance and Standards

Understanding FDA Food Code guidelines and state-specific regulations is essential for food service establishments. The study guide ensures managers comply with all legal standards, maintaining safety and trust.

5.1 FDA Food Code Guidelines

The FDA Food Code Guidelines are foundational to food safety, providing a framework for safe food handling and preparation. These guidelines cover critical areas such as temperature control, food storage, and hygiene practices. Compliance with the FDA Food Code is essential for maintaining consumer health and preventing foodborne illnesses. The ServSafe Manager Study Guide thoroughly addresses these regulations, ensuring managers understand and implement them effectively. By adhering to these standards, food service establishments can create a safer environment for both customers and employees. The guide also includes practical examples and scenarios to aid in real-world application of these guidelines.

5.2 State and Local Health Regulations

State and local health regulations complement the FDA Food Code, often adding specific requirements tailored to regional needs. These regulations may vary significantly, requiring food service managers to stay informed about local laws. The ServSafe Manager Study Guide emphasizes the importance of understanding these regulations, which may include food handling procedures, inspection standards, and licensing requirements. Local health departments enforce these rules, ensuring food safety practices align with community standards. The guide provides practical guidance on navigating these regulations, helping managers maintain compliance and protect public health. Staying updated on local changes is crucial for avoiding violations and ensuring a safe food service environment.

5.3 Third-Party Certification Requirements

Third-party certifications add an extra layer of assurance, verifying that food service establishments meet rigorous food safety standards. The ServSafe Manager Study Guide highlights the importance of these certifications, which are often required by health departments or mandated by law. These certifications ensure compliance with established food safety protocols and may involve audits or inspections. The guide provides detailed information on obtaining and maintaining these certifications, emphasizing their role in enhancing food safety practices and customer trust. By understanding these requirements, managers can ensure their establishments meet all necessary standards, contributing to a safer and more reliable food service environment.

Study Resources and Practice Materials

The ServSafe Manager Study Guide PDF offers comprehensive materials, including practice tests with answers, flashcards, and quick reference guides. These resources aid in effective exam preparation and knowledge retention.

6.1 ServSafe Manager Practice Tests

The ServSafe Manager Practice Tests are essential tools for exam preparation, featuring 90 multiple-choice questions and detailed answer explanations. These tests cover topics like foodborne illnesses, contamination control, and HACCP. They simulate real exam conditions, helping candidates assess their knowledge and identify weak areas. Available online or via PDF downloads, these practice tests align with the latest FDA Food Code and industry standards. Regularly using these resources improves understanding and confidence, ensuring readiness for the certification exam. They are a valuable complement to the ServSafe Manager Study Guide, enhancing overall exam preparation.

6.2 Flashcards and Quick Reference Guides

Flashcards and quick reference guides are valuable tools for reinforcing key food safety concepts. These resources provide concise, portable summaries of critical topics like foodborne illnesses, contamination control, and HACCP. Available as free downloads alongside the ServSafe Manager Study Guide PDF, they enable quick reviews of essential information. Flashcards are particularly effective for memorizing definitions and processes, while quick reference guides offer at-a-glance overviews of complex topics. Together, they complement practice tests and study materials, ensuring thorough preparation for the ServSafe Manager exam. These tools are especially useful for last-minute reviews or on-the-go study sessions.

6.3 Online Study Groups and Forums

Online study groups and forums provide a collaborative environment for individuals preparing for the ServSafe Manager exam. These platforms allow participants to discuss challenging topics, share study materials, and gain insights from peers. Many forums offer access to free PDF resources, practice questions, and expert advice. They also serve as spaces to clarify doubts and review critical concepts like foodborne illnesses and contamination control. Additionally, some forums host live sessions or webinars, featuring industry professionals who provide tips and strategies for exam success. Engaging with these communities can enhance understanding and confidence, making them a valuable supplement to the ServSafe Manager Study Guide.

Exam Preparation Strategies

Effective preparation involves using the ServSafe Manager Study Guide, practicing with sample tests, and managing time efficiently. Focus on understanding key concepts and reviewing frequently.

7.1 Time Management During the Exam

Effective time management is crucial for success in the ServSafe Manager exam. Allocate time wisely to each question, ensuring enough minutes for both easy and challenging ones. Start with questions you’re confident about to secure early points. Budget approximately 1-2 minutes per question, leaving a few minutes at the end to review unanswered ones. Practice timed sessions using the free PDF study guide to build speed and accuracy. Avoid spending too long on a single question, as it may compromise your ability to complete the entire exam. Proper time management enhances your ability to perform calmly and effectively.

7.2 Understanding Question Formats

Understanding the question formats in the ServSafe Manager exam is essential for effective preparation. The exam primarily features multiple-choice questions, designed to assess your knowledge of food safety concepts. Each question offers four possible answers, with only one correct option. Some questions may include scenario-based situations to test practical application. Additionally, the exam may include pilot questions, which do not count toward your score but help in future test development. Familiarize yourself with these formats using the free PDF study guide and practice tests to enhance your ability to interpret and answer questions accurately. This understanding will improve your confidence and efficiency during the exam.

7.3 Reviewing Common Mistakes

Reviewing common mistakes is a crucial step in preparing for the ServSafe Manager exam. Many candidates overlook key concepts, such as proper temperature controls or misinterpret food safety regulations. Others struggle with time management, leading to incomplete answers. To avoid these errors, use the free PDF study guide to identify frequent pitfalls and focus on areas where mistakes are most common. Practice tests can also highlight weak points, allowing you to address them before the exam. By understanding and learning from these mistakes, you can approach the test with greater confidence and accuracy, ensuring a higher likelihood of success. This proactive approach is essential for achieving certification.

Maintaining Certification

ServSafe Manager certification requires renewal every five years. Use the study guide PDF to stay updated on food safety trends and fulfill continuing education requirements effectively.

8.1 Renewal Requirements

Renewing ServSafe Manager certification involves passing a recertification exam every five years. Users can prepare efficiently with the ServSafe Manager study guide PDF, ensuring they meet all FDA food safety standards;

8.2 Continuing Education Opportunities

The ServSafe Manager study guide PDF offers resources for ongoing learning, ensuring managers stay updated on food safety trends. It includes practice tests, flashcards, and online forums, providing continuous education opportunities to enhance knowledge and skills. These tools help professionals comply with evolving regulations and maintain certification standards. Regular updates in the study guide ensure that managers are well-informed about the latest food safety practices. By leveraging these resources, managers can strengthen their expertise and contribute to a safer food service environment. Continuing education is essential for long-term success in food safety management.

8.4 Staying Updated on Food Safety Trends

The ServSafe Manager study guide PDF emphasizes the importance of staying informed about the latest food safety trends. It highlights updates in FDA guidelines, emerging pathogens, and advanced sanitation techniques. Regular reviews of industry reports and participation in workshops are encouraged. The guide also provides access to online resources and forums where professionals can share insights and best practices. By staying current, managers can implement effective safety protocols and maintain compliance with regulatory changes. This proactive approach ensures a safer environment for both staff and customers. Continuous learning is a cornerstone of successful food safety management.

Benefits of ServSafe Manager Certification

The ServSafe Manager Certification enhances career opportunities, improves food safety knowledge, and boosts customer trust. It ensures compliance with health regulations and elevates professional credibility in the industry.

9.1 Enhanced Career Opportunities

Obtaining the ServSafe Manager Certification significantly enhances career opportunities in the food service industry. It positions candidates as experts in food safety, making them highly sought after by employers. This certification is recognized nationwide and demonstrates a commitment to maintaining high standards of food safety. It opens doors to advanced roles such as restaurant manager, kitchen supervisor, or food safety supervisor. By earning this credential, professionals gain credibility and trust from employers and customers alike. Additionally, it often leads to higher salary potential and greater leadership opportunities. The certification also provides a competitive edge in the job market, making it easier to advance in the food service industry.

9.2 Improved Food Safety Knowledge

The ServSafe Manager Study Guide equips professionals with in-depth knowledge of food safety practices, ensuring compliance with FDA guidelines and industry standards. It covers essential topics like foodborne illnesses, contamination prevention, and proper food handling. This comprehensive understanding enables managers to create a safer food environment, protecting both customers and staff. By mastering these concepts, individuals can identify and mitigate food safety risks effectively. The guide’s structured approach ensures that learners gain practical insights, which they can apply daily in their roles. This enhanced knowledge not only boosts confidence but also contributes to a culture of safety within the establishment.

9.3 Increased Customer Trust and Satisfaction

Obtaining the ServSafe Manager certification enhances customer trust by demonstrating a commitment to food safety excellence. By implementing the knowledge gained from the study guide, managers can ensure safer food handling practices, reducing the risk of foodborne illnesses. This leads to higher customer satisfaction and loyalty. When customers feel confident in the safety of the food being served, they are more likely to return and recommend the establishment. A reputation for prioritizing food safety can significantly boost business reputation and attract new customers. The certification serves as a visible assurance of quality, fostering trust and long-term customer relationships.

The ServSafe Manager Study Guide provides a comprehensive overview of food safety principles, helping you excel in your certification journey. Download the free PDF to ensure success and maintain high food safety standards.

10.1 Final Tips for Successful Certification

To excel in the ServSafe Manager certification, thoroughly review the study guide PDF, focusing on key areas like foodborne illnesses and contamination control. Utilize practice tests to assess your readiness and identify weak areas. Allocate sufficient time for each question during the exam to ensure accurate responses. Additionally, staying calm and managing time effectively are crucial for success. Regularly update your knowledge with the latest food safety trends and regulations. By following these strategies, you can confidently achieve your certification and maintain high standards in food safety management.

10.2 Encouragement to Continue Learning

After obtaining your ServSafe Manager certification, it’s essential to stay updated on food safety trends. Engage in continuing education opportunities, such as workshops and online forums, to deepen your knowledge. Regularly review industry updates and best practices to maintain compliance with evolving regulations. Sharing insights with your team fosters a culture of safety and excellence. By committing to lifelong learning, you not only enhance your career prospects but also contribute to safeguarding public health. Embrace new challenges and stay informed to remain a leader in food safety management.

dvc6200 instruction manual

The DVC6200 Digital Valve Controller, part of Emerson’s FIELDVUE series, is designed to enhance process control accuracy and reliability. It integrates seamlessly with various actuators and valves, offering advanced diagnostics and performance monitoring. Ideal for applications in oil and gas, chemical processing, and power generation, the DVC6200 ensures precise valve operation and optimal performance. Its user-friendly interface and compatibility with ValveLink software make it a versatile solution for modern industrial needs.

1.1 Overview of the DVC6200 Series

The DVC6200 Series, part of Emerson’s FIELDVUE product line, is a digital valve controller designed to enhance process control accuracy and reliability. It provides advanced diagnostics, performance monitoring, and precise control for various valve and actuator configurations. The series supports integral mounting on Fisher GX control valves, as well as compatibility with rotary and sliding-stem actuators. Its versatile design makes it suitable for applications in oil and gas, chemical processing, and power generation, ensuring optimal performance and reliability in demanding industrial environments.

1.2 Key Features and Benefits

The DVC6200 Series offers advanced features like FIELDVUE Performance Diagnostics for real-time monitoring and improved reliability. It provides precise control with minimal maintenance, ensuring consistent operation in industrial environments. The controller is compatible with various actuators and valves, including Fisher GX control valves, rotary, and sliding-stem actuators. Its user-friendly interface and integration with Emerson’s ValveLink software enable easy configuration and tuning. Enhanced durability and compliance with industry standards make it a reliable choice for applications requiring high performance and accuracy.

1.3 Scope of the Instruction Manual

This manual serves as a comprehensive guide for the DVC6200 Digital Valve Controller, providing detailed information on installation, configuration, calibration, and maintenance. It includes product specifications, reference materials, and troubleshooting procedures, ensuring optimal performance. The manual is designed to supplement the Quick Start Guide, offering in-depth insights for technicians and engineers. It covers various applications, including rotary and sliding-stem actuators, and provides guidance for compliance with industry standards. This resource is essential for understanding and effectively utilizing the DVC6200’s advanced features and capabilities.

Safety Precautions and Considerations

Adherence to safety guidelines is crucial when handling the DVC6200. Ensure proper precautions in hazardous areas and follow safe handling practices. Compliance with industry standards and regulations is mandatory. Always refer to the manual for specific instructions and use appropriate personal protective equipment. Proper training is essential for safe and effective operation.

2.1 General Safety Guidelines

Ensure compliance with industry standards and regulations when handling the DVC6200. Always follow proper installation, operation, and maintenance procedures as outlined in the manual. Verify that the system is correctly powered and grounded to prevent electrical hazards. Use personal protective equipment and adhere to all safety warnings and instructions. Avoid unauthorized modifications or tampering with the device. Keep the area clean and free from obstructions to maintain safe working conditions. Proper training is essential for safe and effective operation of the DVC6200 Digital Valve Controller.

2.2 Hazardous Area Considerations

The DVC6200 is designed for use in hazardous areas, adhering to global explosion protection standards. Ensure proper installation in classified locations, following ATEX, IECEx, or other relevant certifications. Use approved wiring and connectors to maintain explosion-proof integrity. Regularly inspect the device and its connections for damage or wear. Always comply with local regulations and safety practices when operating in hazardous environments. Refer to the product manual for specific guidelines on installation and operation in explosive atmospheres to ensure safe and reliable performance.

2.3 Proper Use and Handling

Proper handling and use of the DVC6200 are essential to ensure safety and optimal performance. Always wear protective gear, such as gloves and safety glasses, when installing or maintaining the device. Avoid exposing the controller to extreme temperatures or physical stress. Use only approved tools and follow the manual’s instructions for installation and calibration. Keep the device clean and dry to prevent damage. Regularly check for software updates and adhere to manufacturer guidelines for troubleshooting and maintenance. Improper handling may void the warranty or compromise device functionality. Always refer to the instruction manual for detailed procedures.

System Requirements and Compatibility

The DVC6200 is compatible with Fisher GX control valves and rotary actuators, supporting both sliding-stem and quarter-turn applications. It integrates with ValveLink software for advanced configuration and monitoring.

3.1 Compatible Actuators and Valves

The DVC6200 is designed for compatibility with a wide range of actuators and valves, including Fisher GX control valves and rotary actuators. It supports both sliding-stem linear and quarter-turn applications, ensuring versatility in various process environments. The controller can be mounted directly to the valve or actuator, simplifying installation and integration. Compatibility extends to pneumatic actuators, allowing seamless operation across different control systems. This adaptability makes the DVC6200 suitable for diverse industrial applications, enhancing operational efficiency and reliability.

3.2 Software Compatibility (e.g., ValveLink)

The DVC6200 is fully compatible with Emerson’s ValveLink software, enabling advanced configuration, calibration, and diagnostics. ValveLink provides a user-friendly interface for setting up and optimizing the controller’s performance. It supports firmware updates and integrates seamlessly with FIELDVUE diagnostics for real-time monitoring. Compatibility extends to other Emerson tools, ensuring a cohesive system for process control. Regular software updates from Emerson enhance functionality and ensure long-term compatibility with evolving industrial standards.

3.3 Mounting and Installation Requirements

The DVC6200 is designed for versatility in mounting, supporting integral installation on Fisher GX control valves and compatibility with rotary actuators. Proper alignment and secure fastening are crucial for optimal performance. The controller must be mounted according to the provided kit instructions, ensuring correct assembly of components like the magnet assembly and regulator. For sliding-stem applications, specific adapters may be required. Always refer to the mounting kit’s instructions for detailed procedures to ensure safe and effective installation.

Installation and Mounting

The DVC6200 supports integral mounting on Fisher GX control valves, compatibility with rotary actuators, and sliding-stem applications. Proper alignment and adherence to manual guidelines are essential.

4.1 Mounting the DVC6200 to a Fisher GX Control Valve

The DVC6200 is designed for integral mounting on Fisher GX control valves, ensuring seamless integration. Proper alignment and secure fastening are critical for optimal performance. Follow torque specifications and installation steps outlined in the manual to avoid damage. Ensure the valve and actuator system are compatible and properly prepared before mounting. Environmental factors, such as exposure to harsh conditions, should be considered for long-term reliability. Refer to the provided mounting kit instructions for detailed guidance specific to your setup.

4.2 Mounting to Rotary Actuators

Mounting the DVC6200 to rotary actuators requires careful alignment to ensure proper operation. Use the provided mounting kit and follow the torque specifications to secure the controller. Ensure the actuator’s rotational range is compatible with the DVC6200’s design. Properly connect the feedback mechanism to maintain accurate position control.Refer to the actuator’s manual for specific preparation steps. Environmental sealing may be necessary for outdoor or harsh environments. Double-check all connections before powering up the system to ensure reliable performance and durability.

4.3 Sliding-Stem Linear Applications

The DVC6200 is adaptable for sliding-stem linear valve applications, ensuring precise control and reliable operation. Mounting requires proper alignment with the valve stem to maintain consistent feedback. Use the provided mounting kit to secure the controller, ensuring stem engagement is accurate. Follow torque specifications for all connections to avoid damage or misalignment. Refer to the quick start guide for specific installation steps tailored to linear applications. Proper installation ensures optimal performance and longevity in demanding environments. Always verify environmental sealing for outdoor or corrosive settings to maintain operational integrity.

Configuration and Setup

The DVC6200 configuration involves initial setup steps, including parameter settings and communication protocol selection. Advanced options allow customization for specific applications, ensuring precise control and optimal performance.

5.1 Initial Configuration Steps

The initial configuration of the DVC6200 begins with powering up the device and connecting it to a communication network. Users should install the latest ValveLink software to access advanced features. The controller must be calibrated to match the specific valve and actuator system. Refer to the provided Quick Start Guide for step-by-step instructions. Ensure all safety precautions are followed during setup to avoid potential hazards. Proper configuration ensures accurate control and optimal performance of the valve operation.

5.2 Advanced Configuration Options

Advanced configuration of the DVC6200 involves customizing settings such as gain, deadband, and feedback adjustments using ValveLink software. Users can optimize the controller for specific valve types and process conditions. Diagnostic parameters can be fine-tuned to enhance performance monitoring. Additional features include valve stem position feedback calibration and advanced tuning for precise control. Refer to the instruction manual for detailed procedures on accessing and modifying these settings to ensure optimal functionality and reliability in industrial applications.

5.3 Using the Emerson Handheld Communicator

The Emerson Handheld Communicator simplifies setup, calibration, and maintenance of the DVC6200. It enables wireless or wired connection to the controller, allowing users to view diagnostics, adjust settings, and perform advanced configurations. The device provides real-time data monitoring and facilitates troubleshooting. Use the communicator to access valve performance metrics, run calibration routines, and update firmware. Its portability and intuitive interface make it an essential tool for efficient operation and maintenance of the DVC6200 in various industrial environments.

Calibration and Tuning

Calibration and tuning are essential for optimal DVC6200 performance. Follow manual procedures to ensure accurate valve control and responsiveness. Regular adjustments maintain precision and reliability.

6.1 Calibration Procedures

The DVC6200 calibration process involves using Emerson’s ValveLink software or the handheld communicator. Begin by ensuring the valve is in a known position. Follow the manual’s step-by-step guide to set zero and span adjustments. Perform a valve stroke test to verify accuracy. Regular recalibration ensures consistent performance. Always refer to the instruction manual for detailed instructions and safety precautions. Proper calibration is critical for precise control and optimal valve operation in various industrial applications.

6.2 Tuning the DVC6200 for Optimal Performance

Tuning the DVC6200 involves adjusting parameters to achieve precise control. Use ValveLink software or the Emerson handheld communicator to access advanced settings. Start with a valve stroke test to establish a baseline. Adjust proportional and integral gains to optimize response. Monitor performance and make incremental adjustments to avoid over-tuning. Refer to the instruction manual for detailed steps. Proper tuning ensures smooth operation, stability, and accurate control, maximizing the controller’s performance in various industrial applications.

6.3 Calibration Tools and Accessories

The DVC6200 requires specific tools for calibration, including the Emerson handheld communicator and ValveLink software. These tools enable precise adjustments and diagnostics. Additional accessories like the mounting kit and firmware download tool ensure proper setup. Refer to the instruction manual for a detailed list of required tools and their usage. Proper calibration tools are essential for accurate tuning and optimal performance, ensuring the controller operates efficiently in various industrial environments.

Diagnostics and Monitoring

The DVC6200 features FIELDVUE diagnostics for real-time monitoring and performance evaluation. It provides detailed insights into valve operation, enhancing reliability and ensuring optimal process control.

7.1 FIELDVUE Performance Diagnostics

FIELDVUE Performance Diagnostics on the DVC6200 provides real-time monitoring of valve performance, enabling early detection of potential issues. It offers detailed analytics and trend data, allowing for predictive maintenance and reduced downtime. The system tracks key metrics such as valve travel, response time, and actuator health. Advanced algorithms assess performance against benchmarks, ensuring optimal operation. This feature is accessible via Emerson’s ValveLink software, facilitating comprehensive diagnostics and troubleshooting for improved process efficiency and reliability.

7.2 Monitoring Valve Operation

The DVC6200 enables real-time monitoring of valve operation, providing critical insights into performance and status. Through its advanced interface, users can track valve position, pressure, and dynamic behavior. The controller integrates seamlessly with Emerson’s ValveLink software, allowing for remote monitoring and detailed data analysis. Historical performance data and trend analysis tools help identify trends and anomalies, ensuring proactive maintenance. This capability enhances process optimization and minimizes unplanned downtime, making it an essential tool for maintaining operational efficiency and reliability in industrial applications.

7.3 Troubleshooting Common Issues

The DVC6200 instruction manual provides detailed guidance for troubleshooting common issues, ensuring quick resolution and minimal downtime. Users can identify errors using diagnostic codes displayed on the controller or through ValveLink software. Common issues include communication faults, sensor malfunctions, and calibration errors. The manual outlines step-by-step solutions, such as resetting the controller, checking wiring connections, and recalibrating sensors. Additionally, it recommends using FIELDVUE Performance Diagnostics for in-depth analysis and proactive maintenance. This comprehensive approach ensures optimal performance and reliability in industrial applications.

Maintenance and Service

The DVC6200 requires routine maintenance, including cleaning and inspecting sensors and connections. Regularly update firmware and replace worn parts to ensure optimal performance and longevity.

8.1 Routine Maintenance Procedures

Regular maintenance ensures the DVC6200 operates efficiently. Clean the sensor and connections every three months to prevent debris buildup. Check for firmware updates quarterly and install them using ValveLink software. Inspect and replace worn or damaged parts like gaskets and seals annually. Perform diagnostic checks via FIELDVUE tools to monitor performance and address issues early. Always refer to the manual for specific procedures and safety guidelines to maintain reliability and extend the controller’s lifespan. Proper maintenance prevents downtime and ensures accurate valve control.

8.2 Replacement Parts and Upgrades

Replace worn or damaged components with genuine Emerson parts to ensure optimal performance. Common replacements include sensors, feedback units, and actuators. Upgrades, such as firmware updates, enhance functionality and compatibility. Use ValveLink software to check for available upgrades and follow manual instructions for installation. Always purchase parts from authorized distributors to maintain warranty and performance. Refer to the DVC6200 Instruction Manual for a detailed list of replacement parts and upgrade procedures to ensure compliance with safety and operational standards.

8.3 Maintenance Schedules

Regular maintenance is critical to ensure the DVC6200 operates efficiently. Schedule routine checks every 6 months, including cleaning the sensor and inspecting connections. Replace filters and lubricate moving parts annually. Follow the DVC6200 Instruction Manual for detailed procedures. Perform additional checks in harsh environments or high-cycle applications. Use genuine Emerson parts for replacements to maintain performance and warranty. Adhere to these schedules to prevent downtime and ensure optimal valve control. Always refer to the manual for specific guidelines tailored to your application and operating conditions.

Troubleshooting and Error Resolution

Identify and resolve common DVC6200 issues using diagnostic codes and error messages. Refer to the manual for solutions and reset procedures. Contact Emerson support for assistance.

9.1 Common Errors and Solutions

Common errors with the DVC6200 include communication issues, calibration discrepancies, and sensor malfunctions. Solutions involve checking connections, recalibrating the device, or replacing faulty sensors. Refer to diagnostic codes in the manual for specific error identification. Use ValveLink software for advanced troubleshooting. Resetting the controller may resolve temporary glitches. Always consult the manual or contact Emerson support for persistent issues. Regular maintenance and firmware updates can prevent recurring errors and ensure optimal performance.

9.2 Diagnostic Codes and Their Meanings

Diagnostic codes on the DVC6200 indicate specific issues. Common codes include:

  • E001: Communication error, suggesting issues with system connectivity.
  • E002: Sensor fault, indicating a malfunction in connected sensors.
  • E003: Calibration error, requiring recalibration for accurate operation.
  • E004: Hardware failure, pointing to a faulty component within the controller.
  • E005: Software glitch, possibly resolved with a reset or firmware update.

Refer to the instruction manual for a comprehensive list and detailed solutions.

9.3 Resetting the DVC6200

To reset the DVC6200, disconnect power for 30 seconds to clear temporary configurations. Reconnect power and allow the controller to reboot. For a factory reset, use the Emerson Handheld Communicator to restore default settings. Note that this will erase recent configurations. Refer to the manual for detailed reset procedures and ensure all safety precautions are followed. Resetting may resolve software-related issues but does not address hardware faults. Always verify valve operation post-reset to ensure proper functionality.

Firmware Updates and Software Tools

The DVC6200 supports firmware updates via the ValveLink software and Firmware Download Tool, ensuring optimal performance and security. Regular updates are recommended for enhanced functionality.

10.1 Updating Firmware

Regular firmware updates are essential for maintaining the DVC6200’s performance and security. Updates can be performed using the ValveLink software or the Firmware Download Tool. Ensure the controller is connected to a PC with the appropriate software installed. Download the latest firmware from Emerson’s official website and follow the on-screen instructions to initiate the update. It is crucial to avoid interrupting the power supply during the update process. Refer to the instruction manual for detailed steps to ensure a successful firmware update without errors.

10.2 ValveLink Software Integration

ValveLink software enables comprehensive configuration and monitoring of the DVC6200. It allows users to adjust settings, perform diagnostics, and update firmware seamlessly. To integrate, connect the DVC6200 to a PC via a communication cable and launch ValveLink. The software provides real-time data, advanced tuning options, and historical performance insights. Regular software updates ensure compatibility and optimal functionality. Refer to the instruction manual for detailed connection and setup procedures to maximize the benefits of ValveLink integration with the DVC6200 digital valve controller.

10.3 Using the Firmware Download Tool

The Firmware Download Tool is essential for updating the DVC6200’s firmware, ensuring optimal performance and compatibility. Download the tool from Emerson’s website and install it on your PC. Connect the DVC6200 to the PC using a compatible communication cable. Launch the tool, select the desired firmware version, and follow on-screen instructions to complete the update. Ensure the device is powered on and avoid interruptions during the process. Refer to the instruction manual for detailed steps and troubleshooting tips to ensure a successful firmware update.

Compliance and Certifications

The DVC6200 complies with global industry standards and certifications, ensuring environmental and safety adherence. It meets regulatory requirements for hazardous areas and industrial applications worldwide.

11.1 Industry Standards and Certifications

The DVC6200 Digital Valve Controller is designed to meet rigorous industry standards and certifications, ensuring reliability and safety in various industrial applications. It complies with global standards for hazardous area operations, environmental regulations, and safety protocols. The controller adheres to certifications such as IEC, ISA, and ATEX standards, making it suitable for use in explosive atmospheres and demanding industrial environments. By meeting these standards, the DVC6200 ensures operational integrity, reduces risks, and aligns with regulatory requirements worldwide.

11.2 Environmental and Safety Compliance

The DVC6200 Digital Valve Controller is engineered to meet stringent environmental and safety compliance standards. It features energy-efficient design and uses non-hazardous materials, aligning with global environmental regulations. The controller adheres to safety standards, ensuring safe operation in hazardous areas; These features minimize environmental impact while maintaining operational safety.

11.3 Regulatory Requirements

The DVC6200 Digital Valve Controller complies with international standards and regulations, ensuring safe and reliable operation in various industrial environments. It meets certifications such as ATEX and IECEx for use in hazardous areas. The controller adheres to regulatory requirements for electromagnetic compatibility (EMC) and environmental sustainability. Compliance with these standards ensures the device operates efficiently while meeting global safety and environmental regulations. Refer to the instruction manual for detailed information on specific certifications and regulatory adherence.

Appendices

The appendices provide supplementary information, including technical specifications, a glossary of terms, and references for further reading on the DVC6200 Digital Valve Controller.

12.1 Technical Specifications

The DVC6200 Digital Valve Controller is designed for compatibility with various actuators and valves, supporting integral mounting on Fisher GX Control Valves, rotary actuators, and sliding-stem applications. It operates in temperatures ranging from -40°C to 75°C and is certified for hazardous areas. The controller features HART and FOUNDATION Fieldbus communication protocols, enabling seamless integration with control systems. Its robust design ensures precise control, high reliability, and durability in demanding industrial environments; Refer to the manual for detailed specifications and certifications.

12.2 Glossary of Terms

Digital Valve Controller (DVC): A device that regulates valve operation digitally for precise control. FIELDVUE: Emerson’s technology for advanced valve diagnostics. HART: Communication protocol for process automation. Fieldbus: Digital communication system for industrial devices. Calibration: Adjusting the controller for accurate performance. Actuator: Mechanism that moves the valve. Setpoint: Desired valve position or process value. Diagnostics: Tools for monitoring and troubleshooting valve operation. These terms are essential for understanding the DVC6200’s functionality and operation.

12.3 References and Further Reading

For additional information, refer to the DVC6200 Quick Start Guide (D103556X012) and the DVC6200 HW2 Instruction Manual (D103605X012). These documents provide detailed setup, maintenance, and troubleshooting guidance. Emerson’s official website offers supplementary resources, including firmware updates and technical specifications. Visit www.emerson.com for the latest support materials. These references ensure comprehensive understanding and optimal use of the DVC6200 Digital Valve Controller in various industrial applications.