Welcome to the Hoover Clothes Dryer 5030D Manual. This guide provides essential information for optimal use, maintenance, and troubleshooting. Discover features, settings, safety tips, and care instructions to ensure peak performance and longevity.
1.1 Overview of the Hoover 5030D Dryer
The Hoover 5030D Dryer is a high-performance appliance designed to simplify your laundry routine. It features advanced drying technologies, including Sensor Dry, which adjusts drying time based on moisture levels, ensuring perfectly dry clothes without damage. With multiple drying programs tailored for different fabric types, this dryer offers versatility and efficiency. Its user-friendly control panel and energy-efficient design make it a practical choice for households seeking reliable and eco-friendly laundry solutions.
1.2 Importance of the User Manual
The user manual is essential for understanding and safely operating the Hoover 5030D Dryer. It provides detailed instructions for installation, maintenance, and troubleshooting, ensuring optimal performance. The manual also outlines safety precautions, energy-saving tips, and warranty information. By following the guidelines, users can extend the dryer’s lifespan, prevent damage, and resolve common issues efficiently. It serves as a comprehensive guide to maximize functionality and safety, making it indispensable for both new and experienced users.
1.3 What to Expect in This Guide
This guide offers a comprehensive overview of the Hoover 5030D Dryer, ensuring you make the most of its features. It covers installation, operation, maintenance, and troubleshooting, providing clear, step-by-step instructions. You’ll find detailed explanations of settings, energy-efficient modes, and safety tips. The guide also includes warranty information and support options. Designed to be user-friendly, it helps you understand and optimize your dryer’s performance, ensuring longevity and reliability. Whether you’re a new or experienced user, this manual is your go-to resource for all your drying needs.
Key Features of the Hoover 5030D Dryer
The Hoover 5030D Dryer features a 5kg capacity, advanced Sensor Dry technology, energy-efficient modes, multiple drying programs, and intuitive controls for tailored fabric care.
2.1 Capacity and Design
The Hoover 5030D Dryer offers a 5kg capacity, ideal for small to medium-sized households. Its compact design makes it suitable for limited spaces while maintaining efficiency. The dryer features a sleek, modern aesthetic with a large drum opening for easy loading and unloading. The design includes a clear window for monitoring clothes during the cycle. Built with durability and user convenience in mind, the 5030D balances functionality and style, ensuring reliable performance for everyday laundry needs.
2.2 Advanced Drying Technologies
The Hoover 5030D Dryer incorporates advanced drying technologies for optimal performance. It features Sensor Dry technology, which monitors moisture levels to prevent over-drying. Multiple drying programs cater to various fabric types, ensuring gentle care for delicate items and thorough drying for heavier loads. The dryer also includes intelligent temperature control, reducing energy consumption while maintaining efficiency. These technologies work together to provide faster drying times, better fabric protection, and enhanced energy efficiency, making the 5030D a reliable choice for modern laundry needs.
2.3 Energy Efficiency and Eco-Friendly Options
The Hoover 5030D Dryer is designed with energy efficiency in mind, featuring an Eco Mode that reduces energy consumption while maintaining performance. Intelligent sensors optimize drying times and temperature, minimizing energy use without compromising results. The dryer also includes specialized programs for eco-friendly drying, such as lower heat settings for delicate fabrics. By incorporating these technologies, the 5030D helps users reduce their carbon footprint and contribute to a more sustainable environment while ensuring efficient drying performance.
2.4 User-Friendly Controls and Settings
The Hoover 5030D Dryer features an intuitive control panel designed for ease of use. With a clear LCD display and straightforward button navigation, users can effortlessly select from various drying programs tailored to different fabric types and preferences. Customizable settings allow for precise control over temperature, drying time, and additional options like anti-crease or cooling phases. The user-friendly interface ensures a seamless experience, making it simple to achieve perfectly dried laundry every time while catering to individual needs and preferences.
Installation and Setup Guide
Ensure proper installation by following the manual’s step-by-step guide. Prepare the site, unpack, and position the dryer on a level surface. Connect electrical and ventilation systems safely.
3.1 Pre-Installation Requirements
Before installing the Hoover 5030D dryer, ensure the installation site is prepared. Choose a flat, stable surface in a well-ventilated area. Ensure the floor is level to prevent vibration. Check that the electrical supply matches the dryer’s requirements (230V, 50Hz). Verify the ventilation system is compatible and properly sized. Ensure all packaging materials are removed, and inspect for damage. Consult professionals if unsure about electrical or ventilation connections. Ensure compliance with local safety regulations and manufacturer guidelines for a safe setup.
3.2 Step-by-Step Installation Instructions
Unpack the Hoover 5030D dryer and inspect for damage. Position it on a level, stable surface in a well-ventilated area. Ensure the floor is even to prevent vibration. Connect the ventilation hose securely, following the manual’s guidelines. Install the exhaust vent according to local regulations. Plug the dryer into a grounded electrical outlet rated for 230V, 50Hz. Double-check all connections for tightness. Test the dryer by running an empty cycle to ensure proper operation. Secure the dryer to prevent movement during use.
3.3 Connecting Electrical and Ventilation Systems
Connect the Hoover 5030D dryer to a 230V, 50Hz power supply using a grounded plug. Ensure the electrical connection matches the dryer’s specifications. Attach the ventilation hose to the dryer’s outlet and secure it to an external vent. Use the supplied ventilation kit to maintain proper airflow. Avoid kinking or bending the hose to prevent restricted airflow. Ensure the vent system is clear of obstructions to reduce fire risks. Regularly inspect the ventilation system for blockages or damage to maintain efficiency and safety. Always follow local electrical and ventilation regulations during installation.
3.4 Final Check and Testing
After installation, perform a final check to ensure all connections are secure and correctly aligned. Verify that the electrical supply is stable and the ventilation system is unobstructed. Run a short test cycle to confirm proper operation, checking for heat output and even drying. Inspect for any leaks or unusual noises. Consult the manual for specific testing procedures tailored to the Hoover 5030D. Ensure all safety features function correctly before regular use. This step ensures optimal performance and safety.

Operating the Hoover 5030D Dryer
Learn to operate your Hoover 5030D with ease. This section guides you through using advanced features like Sensor Dry, multiple programs, and customizable settings effectively.
4.1 Understanding the Control Panel
The Hoover 5030D control panel is designed for intuitive operation. It features a user-friendly interface with clear buttons for selecting drying programs, adjusting settings, and monitoring progress. The LCD display provides real-time feedback on cycle status, temperature, and remaining time; Key buttons include program selection, start/stop, and options for eco mode or delayed start. Familiarize yourself with each function to customize drying cycles and ensure optimal performance. Refer to the manual for detailed explanations of advanced features and settings.
4.2 Selecting the Right Drying Program
The Hoover 5030D offers various drying programs tailored for different fabric types. Choose from options like Cotton, Synthetics, or Delicates to ensure gentle or intense drying as needed. The Sensor Dry feature automatically adjusts drying time based on moisture levels, preventing over-drying. Additional settings include Eco Mode for energy savings and Delayed Start for convenient scheduling. Always select the program that matches your load type to ensure optimal results and fabric care. Refer to the manual for guidance on specialized cycles and customization options.
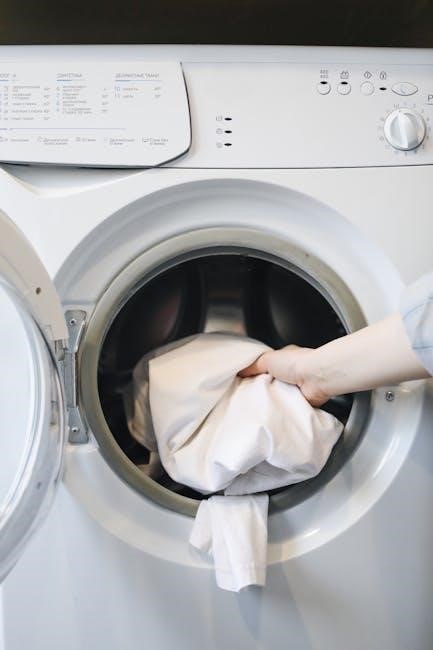
4.3 Loading and Unloading Clothes
Proper loading ensures efficient drying and fabric care. Do not overload the drum, as this can reduce airflow and performance. Use the recommended capacity of 5kg for optimal results. Separate delicate fabrics from heavier items to prevent damage. Avoid adding large, bulky items or those with metal parts. When unloading, remove clothes immediately to prevent wrinkling and musty odors. Always check for missed items like socks or small garments. Follow these guidelines to maintain fabric integrity and dryer efficiency.
4.4 Monitoring the Drying Process
Monitor the drying process using the control panel display, which shows remaining time and program status. Avoid overloading the drum, as this can extend drying time. Use the cooling phase to prevent wrinkles and creases. Ensure the filter is cleaned regularly to maintain airflow and efficiency. Check clothes periodically to avoid over-drying, especially for delicate fabrics. Proper monitoring ensures clothes are dried evenly and prevents damage. Always keep the dryer vent clear for optimal performance and safety.

Maintenance and Care Tips
Regularly clean the filter and vent to ensure optimal airflow. Check and replace worn parts promptly. Schedule professional servicing annually. Store the dryer in a dry, cool place when not in use.
5.1 Cleaning the Filter and Vent
Regular cleaning of the filter and vent is essential for optimal performance. The filter should be removed and washed after each use to prevent lint buildup. Use a soft brush or vacuum to remove debris. For the vent, ensure it is clear of obstructions to maintain proper airflow. Neglecting this can lead to reduced efficiency, longer drying times, or even fire hazards. Always clean the filter before reuse to ensure safety and energy efficiency. Never operate the dryer without the filter in place to avoid damage. Regular maintenance ensures reliable operation and extends the dryer’s lifespan.
5.2 Regular Servicing and Inspections
Regular servicing and inspections are crucial for maintaining the performance and safety of your Hoover 5030D dryer. Check the drum and exterior for damage or blockages. Inspect electrical connections and ensure the venting system is secure. Clean or replace worn-out parts promptly. Schedule professional servicing annually to address internal components and ensure proper function. Regular maintenance prevents issues like overheating or reduced efficiency. Always refer to the manual for specific servicing guidelines or contact authorized technicians for complex repairs.
5.3 Troubleshooting Common Issues
Identify and resolve common issues with your Hoover 5030D dryer by following these troubleshooting steps. If the dryer won’t heat, check the power supply, thermostat, and heating element. For noise or vibration, ensure the dryer is level and clean the drum and rollers. If clothes aren’t drying, verify venting is clear and filters are clean. Reset the dryer by unplugging it for 30 minutes. Consult the manual for detailed solutions or contact Hoover support for complex problems. Regular checks can prevent these issues.
5;4 Storing the Dryer When Not in Use
Properly store your Hoover 5030D dryer to maintain its condition. Clean the drum, filters, and vents before storage; Disconnect the power and secure loose parts. Place the dryer in a dry, cool area away from direct sunlight. Cover it to protect from dust. Ensure the storage location is well-ventilated to prevent moisture buildup. Regularly inspect stored items to avoid damage. Follow these steps to preserve the dryer’s functionality and extend its lifespan when not in use for extended periods.

Troubleshooting and Repair
Troubleshoot common issues like no heat, noise, or vibration. Check filters, vents, and power supply. Reset the dryer if necessary. Refer to the manual for detailed repair guidance.
6.1 Identifying Common Problems
Identify common issues with your Hoover 5030D dryer, such as no heat, excessive noise, or vibration. Check for clogged filters, blocked vents, or faulty sensors. Ensure the power supply is stable. Look for error codes or unusual smells. Regularly inspect belts and hinges for wear. Addressing these problems early prevents major repairs and ensures efficient operation. Always refer to the manual for specific troubleshooting steps tailored to your model.
6.2 Solutions for No Heat or Low Heat
If your Hoover 5030D dryer isn’t producing heat or is generating low heat, start by checking the filter and vents for blockages. Clean or replace the filter if necessary. Ensure the venting system is clear and properly connected. Next, inspect the heating element for damage or malfunction and replace it if needed. Verify that the dryer is set to a heat-enabled program, as some modes may use eco settings. Finally, check the power supply and ensure it’s functioning correctly. Always refer to the manual for specific repair instructions.
6.3 Addressing Noise or Vibration Issues
If your Hoover 5030D dryer is noisy or vibrating excessively, check for uneven installation or loose parts. Ensure the dryer is placed on a level surface and secured firmly. Inspect the drum bearings and belt for wear or damage, replacing them if necessary. Clean the lint filter and vents to prevent airflow blockages, which can cause strain. If noise persists, check for foreign objects in the drum or worn-out rollers. Refer to the manual for diagrams or contact a professional for complex repairs to restore smooth operation.
6.4 Resetting the Dryer
To reset your Hoover 5030D dryer, unplug it from the power source and wait for 30 seconds. This allows the internal systems to reset. Plug it back in and ensure all settings are restored to default. If issues persist, check for error codes in the manual and address them accordingly. Resetting can resolve minor glitches, but if problems continue, contact Hoover support for further assistance. Regular resets can help maintain optimal performance and prevent operational disruptions.
Safety Precautions and Guidelines
Always follow safety guidelines to ensure safe operation. Keep the dryer away from flammable materials, never leave it unattended, and supervise children during use. Regularly clean the filter to prevent fires and ensure proper ventilation. Avoid overloading the drum and follow the recommended drying times. Never touch the dryer with wet hands or while standing on a damp surface. For detailed safety measures, refer to the manual.
7.1 General Safety Tips
Ensure safe operation by following essential guidelines. Keep flammable materials away from the dryer and maintain proper ventilation. Never leave the dryer unattended while in operation; Supervise children and pets around the appliance. Avoid touching electrical parts with wet hands. Do not overload the drum, as this can cause imbalance and reduce efficiency. Regularly clean the filter to prevent lint buildup and fire risks. Always follow the manufacturer’s instructions for installation, use, and maintenance. Refer to the manual for detailed safety measures to ensure optimal performance and longevity.
7.2 Avoiding Fire Hazards
To minimize fire risks, ensure proper ventilation around the dryer and regularly clean the lint filter. Remove flammable materials from the vicinity and avoid drying fabrics with volatile chemicals. Never leave the dryer unattended during operation. Check for blockages in the venting system, as restricted airflow can overheat the appliance. Keep the surrounding area clear of clutter and ensure the dryer is installed on a stable, heat-resistant surface. Always follow the manufacturer’s guidelines for safe operation and maintenance.
7.3 Child Safety Measures
Ensure child safety by installing a safety lock on the dryer’s controls to prevent accidental operation. Keep children away from the dryer while it is running, as the moving parts and heat can pose risks. Teach children not to play near or inside the dryer. Always supervise children when the dryer is in use. Store laundry detergent out of reach to avoid accidental ingestion. Regularly inspect the dryer’s exterior for any damage that could attract a child’s curiosity. Secure the area around the dryer to prevent access when not in use.
7.4 Electrical Safety Considerations
Always follow electrical safety guidelines to prevent hazards. Ensure the dryer is connected to a grounded power outlet with the correct voltage rating. Avoid using extension cords or damaged power cables. Keep the area around the dryer dry to prevent electrical shocks. Never modify the dryer’s plug or electrical components. If you notice any electrical issues, disconnect the dryer immediately. Have a qualified technician inspect and repair any electrical problems. Refer to the user manual for specific electrical safety recommendations to ensure safe operation.

Warranty and Support Information
Understand your warranty terms and how to access support. Register your Hoover 5030D dryer for warranty coverage. Contact Hoover customer support for inquiries or repairs. Visit their official website for detailed warranty information and authorized service centers. Keep your manual and purchase receipt safe for warranty claims. Ensure all repairs are done by certified technicians to maintain warranty validity.
8.1 Understanding the Warranty Terms
Your Hoover 5030D dryer is backed by a warranty that covers manufacturing defects for a specified period, typically 12 to 24 months. This warranty ensures repairs or replacements are provided free of charge for eligible issues. To validate your warranty, ensure your product is registered on Hoover’s official website. Keep your purchase receipt and warranty documents safe, as they are required for any warranty claims. The warranty does not cover damage caused by misuse or improper installation. Always use authorized service centers for repairs to maintain warranty validity.
8.2 Contacting Hoover Customer Support
For assistance with your Hoover 5030D dryer, visit the official Hoover website and navigate to the “Support” or “Contact Us” section. You can reach customer support via phone, email, or live chat. Call Hoover’s customer service hotline for immediate help. Be prepared to provide your dryer’s model number and a detailed description of your issue. Representatives are available Monday to Friday, 9 AM to 5 PM local time. Ensure you have your warranty information handy for faster resolution.
8.3 Finding Authorized Service Centers
To locate authorized service centers for your Hoover 5030D dryer, visit the official Hoover website and use the “Where to Buy” or “Service Locator” tool. Enter your location to find nearby centers. You can also contact Hoover customer support directly via phone or email for recommendations. Ensure the center is officially authorized to maintain your warranty and provide genuine parts. Additionally, platforms like Manua.ls offer resources for finding authorized service centers and downloading repair manuals. Always verify the center’s credentials before scheduling a service.
8.4 Registering Your Product
Register your Hoover 5030D dryer to ensure warranty validity and personalized support. Visit the official Hoover website and navigate to the product registration section. Enter your personal details, product serial number, and purchase information. Registration helps Hoover provide tailored service and notifications about updates or recalls. You can also register through the Hoover customer support portal or via the provided warranty card. Keep your registration confirmation for future reference to ensure seamless support experiences.
Environmental and Energy Considerations
Hoover dryers are designed with energy efficiency and eco-friendliness in mind. The 5030D model offers energy-saving modes and responsible recycling options, aligning with environmental sustainability goals.
9.1 Eco Mode and Energy Savings
The Hoover 5030D Dryer features an Eco Mode designed to reduce energy consumption while maintaining efficient drying performance. This mode optimizes heat and cycle duration, lowering energy use without compromising results. Additionally, the dryer’s advanced Sensor Dry technology automatically adjusts drying time based on moisture levels, preventing over-drying and further saving energy. By utilizing these eco-friendly settings, users can significantly reduce their energy bills and environmental impact. Regular maintenance, such as cleaning filters, also enhances efficiency, ensuring the dryer operates at its best while staying eco-conscious.
9.2 Proper Disposal of the Appliance
Proper disposal of the Hoover 5030D Dryer is crucial for environmental protection. Ensure the appliance is recycled responsibly by checking local regulations or partnering with certified recycling centers. Remove any hazardous materials, such as batteries or electronic components, before disposal. Contact Hoover’s customer support or authorized service centers for guidance on eco-friendly disposal methods. Proper disposal helps reduce waste and minimizes the appliance’s environmental impact, promoting sustainability and responsible consumption.
9.3 Reducing Carbon Footprint
Reducing your carbon footprint with the Hoover 5030D Dryer involves using eco-friendly settings and energy-efficient drying cycles. Opt for the Eco Mode to minimize energy consumption while ensuring effective drying. Regularly cleaning the filter and vent improves efficiency, reducing the dryer’s energy use. Additionally, avoiding overloading the drum and using shorter drying programs can lower your overall energy consumption. By adopting these practices, you contribute to a more sustainable environment while maintaining optimal dryer performance.
9.4 Recycling Options for Parts
Recycling parts from your Hoover 5030D Dryer is an eco-friendly way to dispose of unused components. Check with local recycling centers or electronic waste facilities that accept appliance parts. Many communities offer specialized programs for large appliances. Additionally, Hoover may provide guidance on authorized recycling partners through their official website. Properly recycling your dryer’s parts helps reduce landfill waste and supports sustainable practices. Consider donating working components to repair shops or charities if applicable.
This comprehensive guide has equipped you with essential knowledge to optimize your Hoover 5030D Dryer’s performance, efficiency, and longevity. By following the outlined tips and guidelines, you’ll ensure reliable operation and extend the life of your appliance. Stay informed about updates and maintain regular maintenance for consistent results. Happy drying!
10.1 Summary of Key Points
This manual provides comprehensive guidance for the Hoover 5030D Dryer, covering installation, operation, maintenance, and troubleshooting. It highlights the dryer’s advanced features, energy efficiency, and user-friendly controls. Regular maintenance, such as cleaning filters and proper ventilation, ensures optimal performance and longevity. Safety precautions and warranty details are also emphasized. By following this guide, users can maximize their dryer’s efficiency, reduce energy consumption, and extend its lifespan. Refer to the manual for specific instructions and support resources.
10.2 Maximizing the Lifespan of Your Dryer
To extend the life of your Hoover 5030D Dryer, regular maintenance is crucial. Clean the filter after each use to ensure proper airflow and efficiency. Check and clean the venting system periodically to prevent blockages. Avoid overloading the drum to reduce wear on the motor and belts. Schedule annual professional inspections to address any potential issues early. Proper storage when not in use, in a dry and cool environment, also helps preserve the appliance. Following these steps ensures your dryer operates effectively for years to come.
10.3 Staying Informed About Updates
Stay informed about the latest updates for your Hoover 5030D Dryer by regularly checking the official Hoover website or subscribing to their newsletter. Updates may include firmware improvements, new features, or safety enhancements. Register your product on the Hoover website to receive notifications about software updates or maintenance tips. Additionally, follow Hoover’s social media channels or join community forums for user discussions and updates. Keeping your dryer updated ensures optimal performance, efficiency, and safety. Regularly reviewing the user manual for new instructions or guidelines is also recommended to maximize functionality and longevity.
10.4 Providing Feedback to Hoover
Your feedback is invaluable to Hoover for improving products and services. Share your experiences with the 5030D dryer via Hoover’s official website, email, or customer support channels. Whether it’s praise, suggestions, or concerns, your input helps enhance future designs and user experiences. Regularly check for feedback opportunities or surveys from Hoover. By contributing, you play a role in shaping better appliances and ensuring customer needs are met. Your voice matters in helping Hoover deliver exceptional quality and innovation.