The Elite Gourmet Egg Cooker is a versatile kitchen appliance designed to simplify egg preparation. It offers consistent results for hard-boiled, soft-boiled, poached, and scrambled eggs. Perfect for breakfast, snacks, or meal prep, this cooker ensures eggs are cooked to your desired doneness effortlessly. Its compact design and user-friendly interface make it a convenient addition to any kitchen, providing a healthy and efficient way to enjoy eggs every day.

Unboxing and Components
The Elite Gourmet Egg Cooker comes with a main unit, lid, egg tray, and power cord. Additional accessories include a measuring cup and instruction manual for easy setup and use.
Main Unit
The main unit of the Elite Gourmet Egg Cooker is its core component, designed for efficient and even cooking. It features a durable, compact design with a stainless steel or plastic exterior, depending on the model. The unit includes a heating element, a water reservoir, and an egg tray that can hold up to 7 eggs. The clear lid allows for easy monitoring of the cooking process. The main unit is equipped with a simple control panel, typically featuring a power button and a cooking indicator light. It operates on electricity, making it easy to use in any kitchen setting. The unit’s compact size saves counter space while delivering consistent results for various egg cooking methods. Regular cleaning of the main unit is essential to maintain its performance and longevity.
Accessories
The Elite Gourmet Egg Cooker comes with essential accessories to enhance your cooking experience. The main unit includes a durable egg tray that can hold up to 7 eggs, ensuring even cooking. A measuring cup is provided for accurate water levels, which is crucial for achieving perfectly cooked eggs. Additionally, a power cord is included for easy operation. These accessories are designed to work seamlessly together, making the cooking process straightforward and efficient. While no extra accessories are included, optional items like a cleaning brush or egg slicer can be purchased separately for added convenience. The included components are sufficient for most users, ensuring a hassle-free experience.
Setting Up Your Egg Cooker
Start by plugging in the Elite Gourmet Egg Cooker and placing it on a stable, heat-resistant surface. Familiarize yourself with the control panel, featuring buttons for power, timer, and egg preferences. Allow the cooker to preheat before adding eggs for optimal results. Always refer to the manual for specific setup instructions to ensure proper function and safety.
Plugging In
Before using your Elite Gourmet Egg Cooker, ensure it is properly plugged into a nearby electrical outlet. Use a standard 120V outlet and avoid extension cords or overloaded circuits to maintain safety. Place the cooker on a heat-resistant surface to prevent damage. Always check the power cord for any signs of damage or fraying before plugging it in. Once connected, the cooker will be ready for preheating. Never submerge the cord or unit in water, as this could cause electrical hazards. Proper plugging ensures safe and efficient operation, allowing you to enjoy perfectly cooked eggs every time. Follow these steps to ensure a safe and seamless cooking experience with your Elite Gourmet Egg Cooker.
Understanding the Controls
The Elite Gourmet Egg Cooker features an intuitive control panel designed for easy operation. The power button turns the device on and off, while the timer allows you to set precise cooking times. An LED indicator lights up to show when the cooker is in use. Adjust the temperature dial to customize cooking settings for hard-boiled, soft-boiled, or poached eggs. The water level indicator ensures you add the correct amount of water for optimal results. Simply press the start button to begin cooking. The controls are user-friendly, making it easy to achieve perfectly cooked eggs every time. Familiarize yourself with these features to master your egg-cooking experience.
Preheating the Cooker
Preheating the Elite Gourmet Egg Cooker is a straightforward process that ensures even cooking. Start by plugging in the cooker and pressing the power button; The cooker will begin to preheat automatically. A preheat light or indicator will illuminate, signaling that the process has started. Depending on the model, preheating typically takes 5-10 minutes. You’ll know it’s ready when the light turns off or a tone sounds. Ensure the cooker is fully preheated before adding eggs for optimal results. This step is crucial for achieving consistent cooking temperatures, whether you’re making hard-boiled, soft-boiled, or poached eggs. Always follow the manufacturer’s guidelines for preheating to ensure safety and performance.
Cooking Eggs
The Elite Gourmet Egg Cooker offers versatile egg preparation with settings for hard-boiled, soft-boiled, poached, and scrambled eggs. Easy to use, it ensures perfect results every time with minimal effort.
Hard-Boiled Eggs
Cooking hard-boiled eggs with the Elite Gourmet Egg Cooker is straightforward and efficient. Start by adding the recommended amount of water to the cooker. Place the eggs in the cooking tray, ensuring they are evenly spaced. Set the timer according to the cooker’s instructions for hard-boiled eggs. Once the cycle completes, let the eggs cool slightly before peeling. For easier peeling, use older eggs and shock them in an ice bath after cooking. The Elite Gourmet Egg Cooker ensures perfectly cooked, hard-boiled eggs every time, with a consistent texture and no undercooked centers. This method saves time and effort compared to traditional stovetop cooking, making it ideal for meal prep or snacks.
Soft-Boiled Eggs
Achieve perfect soft-boiled eggs with the Elite Gourmet Egg Cooker. Simply place eggs in the cooker, add water to the recommended level, and set the timer. The cooker ensures a delicate texture with runny yolks and set whites. Cooking time is typically 6-8 minutes, depending on egg size and desired doneness. For larger batches, adjust the time slightly. Once cooked, immediately transfer eggs to an ice bath or run under cold water to stop cooking. This method ensures the yolks remain creamy and the whites are fully cooked. The Elite Gourmet Egg Cooker makes soft-boiled eggs effortless, perfect for breakfast, salads, or snacks. Its consistent results guarantee ideal doneness every time.
Poached Eggs
To make perfect poached eggs with the Elite Gourmet Egg Cooker, start by cracking a fresh egg into a small bowl or ramekin. Fill the cooker’s water reservoir to the recommended level, ensuring there’s enough water to cover the egg. Lightly press the egg release button to create a gentle whirlpool in the water. Carefully pour the egg into the center of the swirling water. Set the timer according to your desired doneness—3-4 minutes for a runny yolk and 5-6 minutes for a firmer texture. Once cooked, use the provided slotted spoon to remove the egg. For extra perfection, add a splash of vinegar or lemon juice to the water to help the egg hold its shape. This method ensures a delicious, restaurant-quality poached egg every time, with minimal effort and cleanup.
Scrambled Eggs
For perfectly cooked scrambled eggs, crack 1-4 eggs into a bowl, whisk, and season as desired. Pour the mixture into the egg cooker tray. Set the cooker to the scramble mode and let it work its magic. The Elite Gourmet Egg Cooker ensures a fluffy, even texture without overcooking. Perfect for breakfast or snacks, this feature is a game-changer for egg lovers. The cooker’s precise temperature control guarantees consistent results every time. Simply wait for the cycle to complete, and enjoy your delicious scrambled eggs with minimal effort. This function is ideal for those who prefer a soft, creamy texture or a firmer scramble, catering to all preferences. Cleaning up is also a breeze, making it a convenient option for daily use.
Tips for Perfect Eggs
For optimal results with your Elite Gourmet Egg Cooker, ensure eggs are at room temperature before cooking to minimize cracking. Pierce the large end of each egg with a pin to prevent bursting. Avoid overcrowding the cooker, as this can affect even cooking. For hard-boiled eggs, cook for 12-15 minutes, while soft-boiled eggs require 6-8 minutes. Poached eggs are best cooked for 5-7 minutes, and scrambled eggs need 8-10 minutes. Always use the recommended water level and let eggs rest for 2-3 minutes after cooking. Run eggs under cold water to stop cooking and make peeling easier. Experiment with timings to suit your preference for yolk doneness. Regularly cleaning the cooker ensures consistent performance and longevity.
Cooking Times and Settings
Cooking eggs to perfection requires precise timing and settings. For hard-boiled eggs, set the timer to 12-15 minutes, while soft-boiled eggs need 6-8 minutes. Poached eggs typically take 5-7 minutes, and scrambled eggs require 3-5 minutes. The Elite Gourmet Egg Cooker features adjustable settings to accommodate different egg sizes and desired doneness. Use the provided measuring cup to add the correct water level, ensuring even cooking. The cooker automatically shuts off when eggs are done, preventing overcooking. Experiment with settings to find your ideal texture. For larger eggs or high-altitude cooking, slightly increase the time. This versatility makes the Elite Gourmet Egg Cooker a reliable tool for achieving perfectly cooked eggs every time.
Cleaning and Maintenance
Regular cleaning ensures optimal performance and hygiene. Wipe the exterior with a damp cloth and avoid abrasive cleaners. For deep cleaning, soak removable parts in warm soapy water. Avoid harsh chemicals and never submerge electrical components in water. Dry thoroughly after cleaning to prevent mineral buildup and maintain efficiency.
Daily Cleaning
Regular maintenance ensures your Elite Gourmet Egg Cooker performs optimally. After each use, unplug the device and let it cool slightly. Wipe the exterior with a damp cloth to remove splatters or fingerprints. For the cooking tray and egg holders, rinse with warm soapy water, then dry thoroughly. Avoid using abrasive cleaners or scrubbers, as they may damage the surfaces. If eggs stick to the tray, soak it in warm water for a few minutes before cleaning. Never submerge the main unit in water. Cleaning after every use prevents food residue from hardening and makes maintenance easier. This routine keeps your egg cooker hygienic and ready for the next use.
- Wipe exterior with a damp cloth.
- Soak and rinse cooking tray and egg holders.
- Avoid abrasive cleaners and submerging the main unit.
Regular cleaning ensures longevity and optimal performance.
Deep Cleaning
Deep cleaning your Elite Gourmet Egg Cooker is essential for maintaining its performance and hygiene. Start by unplugging the device and allowing it to cool completely. Use a soft, damp cloth to wipe down the exterior and interior surfaces, removing any food residue or stains. For tougher stains, mix a small amount of baking soda with water to create a gentle paste, and apply it to the affected areas. Let it sit for 10-15 minutes before scrubbing lightly with a non-abrasive sponge. Rinse thoroughly with warm water and dry with a clean cloth to prevent water spots. Avoid using harsh chemicals or abrasive cleaners, as they may damage the cooker’s finish. Regular deep cleaning ensures your egg cooker remains in optimal condition for years to come.
Safety Precautions
Always prioritize safety when using the Elite Gourmet Egg Cooker. Keep it out of children’s reach and avoid touching hot surfaces; Ensure proper electrical connections and never submerge the unit in water. Follow the manufacturer’s guidelines to prevent accidents and maintain efficiency.
General Safety Tips
Always prioritize safety when using the Elite Gourmet Egg Cooker. Keep the appliance out of reach of children and ensure it is placed on a stable, heat-resistant surface. Avoid touching hot surfaces, as they may cause burns. Never submerge the main unit in water or expose it to excessive moisture, as this can lead to electrical hazards. Use only the provided accessories to avoid damage or malfunction. Unplug the cooker when not in use or before cleaning to ensure safety. Regularly inspect the power cord and plug for damage, and avoid using the appliance if any components are worn or faulty. Follow the manufacturer’s guidelines to maintain optimal performance and safety.
Handling Hot Surfaces
When using the Elite Gourmet Egg Cooker, always exercise caution with hot surfaces to avoid burns. Never touch the cooker’s heating elements or lid during or immediately after cooking, as they can reach extremely high temperatures. Use oven mitts or tongs to handle the cooker or eggs. Keep children away from the appliance while it is in operation. Place the cooker on a heat-resistant surface to prevent damage to your countertop. Allow the unit to cool down completely before cleaning or storing. Moisture on skin can cause steam burns, so ensure your hands are dry when handling the cooker. Regular maintenance, like descaling, can prevent mineral buildup and ensure safe operation. Always prioritize safety to enjoy a hassle-free cooking experience with your Elite Gourmet Egg Cooker.
Electrical Safety
Ensuring electrical safety is crucial when using the Elite Gourmet Egg Cooker. Always plug the device into a grounded electrical outlet to prevent shocks. Avoid overloading circuits, as this can cause electrical hazards. Never submerge the main unit in water or expose it to excessive moisture, as this can lead to electrical malfunctions. Use only the original power cord provided, as replacements may not meet safety standards. Keep the cooker out of reach of children and pets to avoid accidental electrical incidents. Regularly inspect the cord and plug for damage, and discontinue use if any issues are found. Follow all safety guidelines in the user manual to ensure safe operation and maintain electrical safety at all times while cooking with your Elite Gourmet Egg Cooker.
Troubleshooting Common Issues
Common issues include the cooker not turning on or eggs undercooking. Check power connections and ensure water levels are correct. Clean sensors and descale regularly for optimal performance.
Common Issues
Users of the Elite Gourmet Egg Cooker may encounter a few common issues. Overcooking or undercooking eggs is often due to incorrect water levels or timer settings. Eggs sticking to the cooking tray can occur if not enough water is used or if the tray isn’t cleaned properly. Some users report uneven cooking, especially with soft-boiled eggs, which may require adjusting the cooking time. Additionally, the cooker may not turn off automatically if the timer is not set correctly. Ensuring proper setup and maintenance can help minimize these issues. Always refer to the instructions for troubleshooting tips to achieve the best results.
Solutions and Fixes
For common issues with the Elite Gourmet Egg Cooker, start by ensuring proper water levels and egg placement. If eggs don’t cook evenly, check the alignment of the egg tray and verify that the lid is sealed tightly. For stuck eggs, lightly grease the egg tray before cooking. If the cooker doesn’t turn on, confirm it’s plugged into a working outlet and that the power button is functioning. Descale the unit regularly to prevent mineral buildup, which can affect performance. For persistent problems, refer to the user manual or contact customer support for assistance. Regular maintenance and proper usage will extend the lifespan of your egg cooker and ensure consistent results.

Accessories and Additional Features
The Elite Gourmet Egg Cooker comes with a measuring cup, egg tray, and recipe book. Additional features include a multi-cooking function, timer, and automatic shut-off for convenience.
Available Accessories
The Elite Gourmet Egg Cooker comes with a range of accessories to enhance your cooking experience. These include a stainless steel egg tray for holding up to 7 eggs, a clear lid for easy monitoring, and a measuring cup for precise water levels. Additional accessories like a poaching tray and a scrambled egg tray are available for purchase, allowing you to explore various egg preparations. The cooker is also compatible with replacement parts, ensuring longevity. For added convenience, a recipe booklet is often included, offering creative meal ideas. These accessories are designed to be durable and easy to clean, making the Elite Gourmet Egg Cooker a versatile and practical addition to your kitchen.
Special Features

The Elite Gourmet Egg Cooker boasts several standout features that enhance its functionality. It includes an automatic shut-off mechanism, ensuring eggs are cooked to perfection without overcooking. The cooker also features a built-in timer and an LED indicator to monitor the cooking process. Its multi-functional design allows for cooking up to 7 eggs at once, catering to both small and large households. Additionally, the cooker is equipped with a cool-touch exterior for safe handling and a compact design that saves kitchen space. The easy-to-clean components and dishwasher-safe parts make maintenance hassle-free. These features combine to provide a convenient, efficient, and user-friendly egg cooking experience, making it a valuable addition to any kitchen.
Recipes and Meal Ideas
Explore delicious recipes with the Elite Gourmet Egg Cooker, from fluffy scrambled eggs to perfectly poached eggs. Try egg bites, shakshuka, or egg-based meal prep for quick, nutritious meals. Perfect for breakfast, snacks, or adding protein to your diet, this cooker inspires creativity in the kitchen with endless possibilities;
Breakfast Recipes
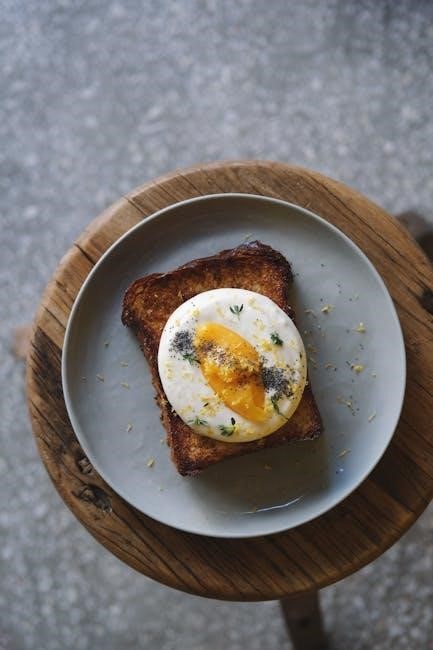
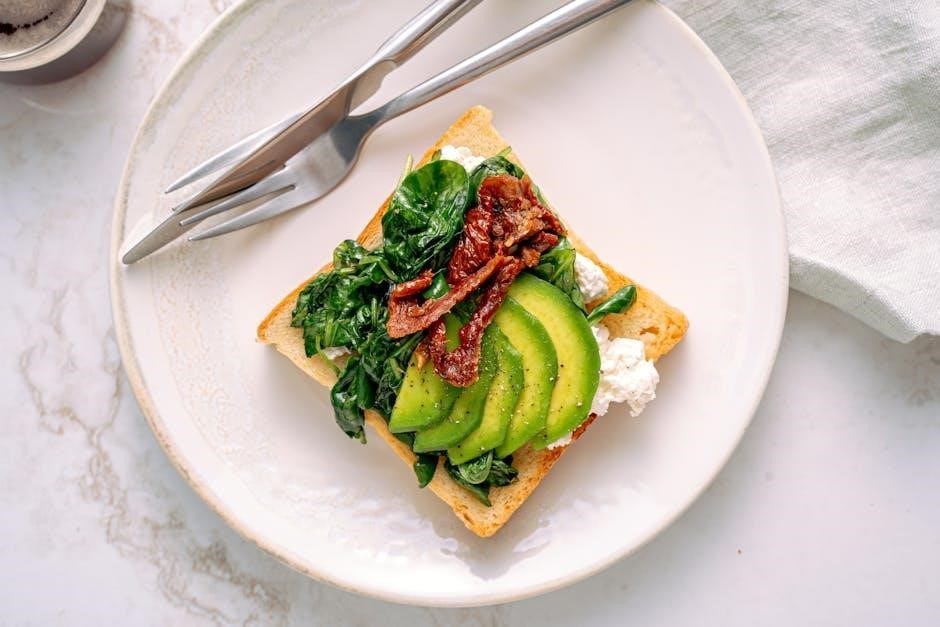
Elevate your mornings with the Elite Gourmet Egg Cooker! Try making classic Eggs Benedict by poaching eggs to perfection and pairing them with toasted English muffins and hollandaise sauce. For a quick and healthy option, whip up avocado toast topped with soft-boiled eggs and a sprinkle of red pepper flakes. Breakfast burritos are also a breeze—scramble eggs with cheese, salsa, and your favorite fillings, then wrap them in a tortilla. For a keto-friendly meal, create egg cups with spinach, mushrooms, and feta, cooked to a fluffy texture. These recipes showcase the versatility of the Elite Gourmet Egg Cooker, making breakfast preparation effortless and delicious. Experiment with different combinations to start your day right!
Snack Ideas
Elevate your snack game with the Elite Gourmet Egg Cooker! Perfect for quick bites, try egg bites seasoned with herbs and cheese for a protein-packed snack. Deviled eggs are another delicious option, made easy with uniformly cooked eggs. For a twist, create egg salad with pre-cooked eggs, mayo, and mustard, served on crackers or toast. You can also make mini egg muffins by mixing cooked eggs with veggies and cheese, then baking until set. These snacks are not only tasty but also healthy and easy to prepare, making them ideal for on-the-go meals or sharing with family and friends. The Elite Gourmet Egg Cooker ensures your eggs are perfectly cooked every time, making snack prep a breeze.
Meal Prep Options
The Elite Gourmet Egg Cooker is a fantastic tool for meal prep, allowing you to prepare eggs in advance for quick, healthy meals throughout the week. Hard-boiled eggs are ideal for snacks, salads, or protein-packed lunches, while soft-boiled eggs can be easily incorporated into breakfast burritos or meal prep containers. Poached eggs are perfect for adding to avocado toast or grain bowls, and scrambled eggs can be portioned out for grab-and-go breakfasts. The cooker’s consistency ensures your eggs are perfectly cooked every time, making meal prep efficient and stress-free. Whether you’re planning breakfast, snacks, or light meals, the Elite Gourmet Egg Cooker helps you stay organized and nourished.
Comparisons with Other Brands
The Elite Gourmet Egg Cooker stands out for its ease of use and consistent results. It rivals brands like GoWISE USA and Cuisinart in performance and design, offering superior egg-cooking versatility and user satisfaction compared to competitors like Dash.
GoWISE USA Air Fryer
The GoWISE USA Air Fryer is a popular alternative to the Elite Gourmet Egg Cooker, offering a different approach to cooking. While the Elite Gourmet specializes in eggs, the GoWISE USA Air Fryer is designed for a variety of dishes, including fried foods, vegetables, and meats. It features a digital touchscreen interface, preset settings, and a large cooking basket. Unlike the Elite Gourmet Egg Cooker, it focuses on air frying technology, which uses little to no oil for healthier meals. However, it lacks the egg-specific features of the Elite Gourmet, making it less ideal for those prioritizing egg preparation. Both appliances cater to different culinary needs, with the GoWISE USA Air Fryer offering versatility and the Elite Gourmet excelling in egg cooking precision.
Cuisinart Egg Cooker
The Cuisinart Egg Cooker is a top contender in the market, offering a user-friendly design and reliable performance. It can cook up to 10 eggs at once, with options for hard-boiled, soft-boiled, or poached eggs. Known for its durability and ease of cleaning, this cooker features an automatic shut-off function and a built-in timer for precise control. While it shares similarities with the Elite Gourmet Egg Cooker, such as a water-based cooking system, it differs in design and slightly higher price point. Users often praise its consistent results and sleek appearance, making it a great alternative for those seeking a high-quality egg cooker with a reputation for longevity and ease of use.
Dash Egg Cooker
The Dash Egg Cooker is a popular alternative to the Elite Gourmet Egg Cooker, known for its compact design and ease of use. It can cook up to 6 eggs at once and features a simple, one-button operation. Users praise its quick cooking times and consistent results, making it ideal for hard-boiled, soft-boiled, and poached eggs. While it lacks some advanced features of the Elite Gourmet, its affordability and straightforward functionality make it a great option for those seeking a no-frills egg cooker. The Dash Egg Cooker is also lightweight and easy to clean, appealing to those with limited kitchen space. Its performance and value have earned it a loyal following among home cooks and egg enthusiasts alike.

User Reviews and Feedback
Users praise the Elite Gourmet Egg Cooker for its efficiency and ease of use. Many highlight its ability to deliver perfectly cooked eggs with minimal effort. Positive reviews often mention the compact design, easy cleanup, and consistent results. Some users appreciate the versatility in cooking options, from hard-boiled to poached eggs. A few note that the non-stick surface is durable and prevents eggs from sticking. However, some users mention a slight learning curve with the settings. Overall, the cooker is well-received for its performance and value, making it a popular choice for egg lovers seeking convenience and reliability in their daily cooking routines.
The Elite Gourmet Egg Cooker is a practical and efficient addition to any kitchen, offering versatility and ease of use. Its ability to cook eggs to various doneness levels makes it ideal for breakfast, snacks, or meal prep. With its compact design and user-friendly interface, it simplifies the cooking process while ensuring consistent results. Whether you prefer hard-boiled, soft-boiled, poached, or scrambled eggs, this cooker delivers perfection every time. Its durability and easy cleaning further enhance its value, making it a worthwhile investment for egg lovers. By following the instructions and tips provided, you can unlock the full potential of this appliance and enjoy delicious, perfectly cooked eggs with minimal effort.