The Panasonic Lumix DMC-FZ300 is a versatile bridge camera offering advanced features like a 12.1MP MOS sensor, 25-600mm lens, 4K video, and fast autofocus, ideal for both photos and videos.
1.1 Overview of the Camera
The Panasonic Lumix DMC-FZ300 is a bridge-style digital camera designed for versatility and ease of use. It features a 12.1-megapixel MOS sensor, a 24x optical zoom lens (25-600mm), and 4K video recording capabilities. The camera is compact and lightweight, making it ideal for photographers who need portability without compromising on performance. With its intuitive interface and advanced autofocus system, the DMC-FZ300 is suitable for capturing both still images and videos in various lighting conditions. Its ergonomic design and weather-sealed construction add to its durability, making it a reliable choice for outdoor and indoor photography.
1.2 Key Features of the DMC-FZ300
The Panasonic Lumix DMC-FZ300 stands out with its 12.1-megapixel MOS sensor and 24x optical zoom lens, offering a 25-600mm focal range. It supports 4K video recording and 4K Photo Mode for capturing high-resolution images; The camera features a fast autofocus system, burst shooting up to 12fps, and a vari-angle touchscreen LCD. Weather-sealing ensures durability in harsh conditions, while the ergonomic design enhances comfort. Additional features include built-in Wi-Fi for easy image transfer, RAW image capture, and a high dynamic range (iHDR) mode for improved contrast. These features make the DMC-FZ300 a powerful tool for both enthusiasts and professionals.

Design and Build Quality
The DMC-FZ300 features a weather-sealed body, ensuring durability in harsh conditions, while its ergonomic design enhances portability and comfort, balancing performance and usability effectively.
2.1 Ergonomics and Portability
The DMC-FZ300 is designed for comfort and ease of use, featuring an ergonomic grip that reduces fatigue during extended shooting sessions. Its lightweight and compact body enhances portability, making it ideal for outdoor adventures. The camera’s intuitive controls, including a mode dial and easily accessible buttons, streamline operation. The weather-sealed design adds durability without compromising its portability, ensuring reliability in various shooting conditions. Additionally, the camera’s balanced weight distribution and secure grip provide stability, allowing users to capture sharp images and smooth videos on the go.
2.2 Durability and Weather Sealing
The DMC-FZ300 boasts a durable design with weather-sealed construction, protecting against dust and moisture, making it suitable for outdoor use. Its robust build ensures reliability in harsh conditions. The camera features a solid, ergonomic frame that withstands regular use, while maintaining portability. The weather sealing enhances its versatility, allowing photographers to capture images in challenging environments without compromising performance. This feature, combined with its high-quality materials, ensures long-term durability and reliability for both professional and enthusiast photographers.
Technical Specifications
The Panasonic Lumix DMC-FZ300 features a 12.1MP MOS sensor, 25-600mm lens, 4K video, vari-angle touchscreen, SD card support, and Wi-Fi connectivity for smartphone operation via the Panasonic Image App.
3.1 Sensor and Processor
The Panasonic Lumix DMC-FZ300 is equipped with a high-performance 12.1-megapixel MOS sensor, delivering crisp and detailed images. Paired with the advanced Venus Engine image processor, it ensures excellent noise reduction and color reproduction. The sensor supports a wide dynamic range, enabling features like iHDR for capturing high-contrast scenes. With an ISO range of 100-6400, the camera handles low-light conditions effectively, minimizing grain and preserving image quality. This combination of sensor and processor also facilitates 4K Photo Mode, allowing for high-speed burst shooting and precise focus stacking, making it ideal for both stills and video recording.
3.2 Lens and Optical Zoom
The Panasonic Lumix DMC-FZ300 features a 25-600mm (24x) LEICA DC VARIO-ELMARIT lens, offering a broad focal length range for versatile shooting. Its wide-angle capability captures expansive landscapes, while the telephoto end excels in wildlife and distant subjects. The lens incorporates optical image stabilization, reducing blur caused by hand movement or low light. Additionally, the lens’s fast F/2.8 aperture ensures sharp images and smooth bokeh, even in challenging lighting conditions. This lens design, combined with the camera’s ergonomic build, makes it an excellent choice for photographers seeking both portability and professional-grade optical performance in various shooting scenarios.
3.3 ISO Range and Noise Performance
The Panasonic Lumix DMC-FZ300 offers an ISO range of 100 to 6400, enabling versatile shooting in various lighting conditions. At lower ISOs (100-400), noise is minimal, delivering crisp and detailed images. As ISO increases beyond 1600, noise becomes more noticeable, particularly in low-light settings, which may soften fine details. However, the camera’s noise reduction system helps mitigate grain, though it can slightly compromise sharpness at higher ISO levels. This balance ensures decent performance for both daylight and indoor photography, making the DMC-FZ300 a reliable choice for capturing high-quality images across diverse environments.
3.4 Autofocus System
The Panasonic Lumix DMC-FZ300 features a fast and accurate autofocus system, making it ideal for capturing sharp images of moving subjects. It supports multiple AF modes, including AFS (single shot) and AFC (continuous tracking), ensuring precise focus even during action shots. The camera also includes a dedicated AF button and advanced face/eye detection, enhancing portability for photographers. With customizable focus settings, users can tailor the AF performance to their needs, delivering reliable results in various shooting scenarios.
3.5 Video Recording Capabilities
The Panasonic Lumix DMC-FZ300 excels in video recording, offering 4K resolution at 30fps and 1080p at 60fps for smooth motion. The camera supports manual controls, allowing adjustments to aperture, shutter speed, and exposure during filming. A dedicated microphone input enhances audio quality, while features like zebra patterns and focus peaking aid in precise exposure and focus. The 25-600mm lens with 24x optical zoom enables versatile framing, and 4K Photo mode allows extracting 8MP images from video. These capabilities make the DMC-FZ300 a powerful tool for both casual and professional videographers, delivering high-quality results in various scenarios.
Operation Modes
The Panasonic Lumix DMC-FZ300 offers multiple operation modes, including Intelligent Auto, Program AE, Aperture Priority, Shutter Priority, Manual, and Creative Video modes, catering to diverse shooting needs and user expertise levels.
4.1 Intelligent Auto Mode
The Panasonic Lumix DMC-FZ300 features an Intelligent Auto Mode designed for effortless photography. This mode automatically adjusts settings like exposure, focus, and ISO to optimize image quality. It detects the scene type and adjusts parameters accordingly, ensuring sharp and well-balanced photos. The camera also utilizes advanced features like face detection, autofocus tracking, and image stabilization in this mode. Users can rely on the camera to handle complex settings, making it ideal for beginners or those who prefer point-and-shoot simplicity. Additionally, Intelligent Auto Mode integrates seamlessly with other advanced features, providing a convenient yet powerful shooting experience.
4.2 Program AE Mode (P)
The Program AE Mode (P) on the Panasonic Lumix DMC-FZ300 offers a balance between automation and control, making it ideal for versatile shooting situations. In this mode, the camera automatically sets the shutter speed and aperture value to ensure optimal exposure. However, users can still adjust settings like ISO sensitivity, white balance, and exposure compensation to fine-tune their shots. This mode is perfect for photographers who want to rely on the camera’s intelligence but also desire some creative input. The DMC-FZ300 excels in Program AE Mode, delivering consistent results across various lighting conditions while maintaining user flexibility.
4.3 Aperture Priority Mode (A)
Aperture Priority Mode (A) on the Panasonic Lumix DMC-FZ300 allows users to manually set the aperture value while the camera automatically adjusts the shutter speed for proper exposure. This mode is ideal for controlling depth of field, ensuring subjects stand out against a blurred background or capturing a sharp landscape. By adjusting the aperture, photographers can achieve creative effects like bokeh or starbursts. The DMC-FZ300 supports a wide aperture range, making it versatile for various photography styles. This mode is particularly useful for those familiar with aperture control and seeking precise artistic expression in their images.
4.4 Shutter Priority Mode (S)
Shutter Priority Mode (S) on the Panasonic Lumix DMC-FZ300 enables users to manually set the shutter speed, with the camera automatically adjusting the aperture for optimal exposure. This mode is perfect for capturing motion effects, such as freezing fast-moving subjects or creating artistic motion blur. By controlling the shutter speed, photographers can emphasize dynamic action or convey a sense of movement in their images. The DMC-FZ300 offers a wide range of shutter speeds, making it suitable for various shooting scenarios, from sports to creative artistic expressions. This mode is ideal for photographers who want precise control over motion capture in their photography.
4.5 Manual Mode (M)
Manual Mode (M) on the Panasonic Lumix DMC-FZ300 provides full control over both aperture and shutter speed, allowing photographers to customize settings for precise results. This mode is ideal for experienced users who want to fine-tune their shots according to specific creative visions. By adjusting both parameters, users can achieve desired effects such as depth of field or motion blur. The camera’s intuitive controls make it easy to dial in the perfect settings, ensuring optimal image quality in various lighting conditions. Manual Mode is a powerful tool for those seeking ultimate control over their photography, offering flexibility and creativity in every shot.
4.6 Creative Video Mode
Creative Video Mode on the Panasonic Lumix DMC-FZ300 allows users to record motion pictures with manual control over aperture and shutter speed. This mode is perfect for videographers seeking precise creative control. By adjusting these settings, users can achieve professional-looking effects such as shallow depth of field or artistic motion blur. The mode also supports 4K resolution, ensuring high-quality video output. With Creative Video Mode, users can express their artistic vision more freely, making it an essential feature for those looking to elevate their video production to the next level of creativity and professionalism.
Advanced Features
The Panasonic Lumix DMC-FZ300 offers High Dynamic Range (iHDR), 4K Photo Mode, Macro Recording, and Burst Mode, enabling advanced photography and videography with precise control and high-quality results.
5.1 High Dynamic Range (iHDR)
The Panasonic Lumix DMC-FZ300 features High Dynamic Range (iHDR), which captures multiple exposures and combines them into a single image with rich gradation. Ideal for high-contrast scenes like landscapes or backlit subjects, iHDR enhances detail in both bright and dark areas. The mode can be activated in the camera’s menu, offering two options: Auto for automatic exposure adjustment and Manual for user-defined exposure compensation. This advanced feature ensures balanced lighting and vibrant colors, making it a powerful tool for photographers seeking professional-grade results. The camera processes up to six images to create the final high-dynamic-range photo, ensuring optimal quality. For best results, use a UHS Speed Class 3 memory card when recording in 4K Photo Mode.
5.2 4K Photo Mode
The Panasonic Lumix DMC-FZ300 offers 4K Photo Mode, allowing users to capture 8-megapixel still images from 4K video. This feature is ideal for freezing fast-moving subjects or selecting the perfect moment from a sequence. By recording in 4K resolution (3840×2160 pixels) at 30fps, users can extract high-quality images with reduced blur. The mode also supports advanced features like Pre-Burst and Post-Burst, capturing frames before and after the shutter is pressed. For optimal performance, a UHS Speed Class 3 memory card is recommended. This mode is perfect for capturing fleeting moments in sports, wildlife, or action photography, ensuring you never miss the decisive shot. Additionally, 4K Photo Mode enhances creativity by allowing precise framing and composition after recording, making it a versatile tool for photographers. The camera’s intuitive interface makes it easy to access and use this feature, ensuring a seamless shooting experience.
5.3 Macro Recording
The Panasonic Lumix DMC-FZ300 supports Macro Recording, enabling users to capture detailed close-up shots of small subjects. To activate this mode, set the focus mode lever to AFS/AFF or AFC and press the side button. For precise control, the Custom Menu allows assigning macro functionality to the side button. The camera’s lens excels in macro photography, delivering sharp images with rich detail. This feature is ideal for documenting textures, insects, or small objects, making it a versatile tool for photographers seeking high-quality close-up imagery. The macro mode enhances creativity, allowing users to explore intricate details in their subjects with ease and precision.
5.4 Burst Mode and Fast Shooting
The Panasonic Lumix DMC-FZ300 offers Burst Mode for capturing fast-moving subjects in rapid succession. It supports burst shooting at up to 12 frames per second (fps) in AF-S mode and 6 fps in AF-C mode, ensuring sharp images of dynamic scenes. This feature is particularly useful for sports, wildlife, and action photography. The camera’s fast autofocus system complements burst shooting, enabling quick subject tracking. Additionally, the 4K Photo Mode allows for high-speed bursts in 4K resolution, providing 8MP images at 30 fps. These modes make the DMC-FZ300 versatile for capturing fleeting moments with precision and clarity.

Camera Setup and Preparations
Unboxing and initial setup involve charging the battery, inserting a formatted memory card, and familiarizing yourself with the camera’s standard accessories for optimal preparation.
6.1 Unboxing and Initial Setup
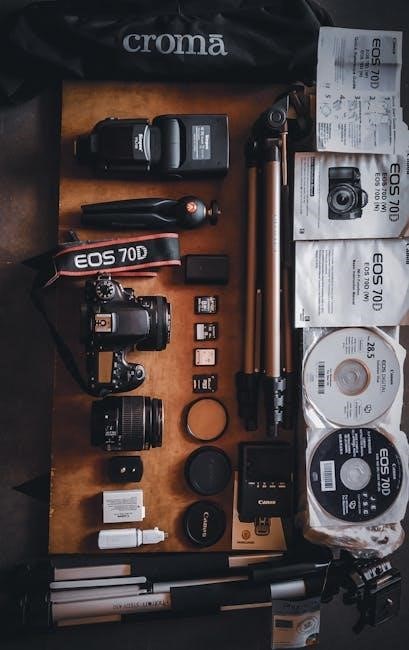
Unboxing the Panasonic Lumix DMC-FZ300 reveals the camera body, lens cap, shoulder strap, rechargeable battery, and charger. Initial setup involves charging the battery and inserting a memory card. Ensure the card is formatted in the camera to prevent data loss. Attach the lens cap and shoulder strap for protection and portability. Power on the camera and navigate through the initial menu to set language, date, and time. Familiarize yourself with the camera’s controls and modes before capturing images. This preparation ensures a smooth and ready-to-use experience for photography and videography.
6.2 Standard Accessories
The Panasonic Lumix DMC-FZ300 comes with essential accessories to enhance your photography experience. These include the rechargeable lithium-ion battery (DMW-BLC12E), battery charger, lens cap, and shoulder strap for comfortable handling. Additional items like the AC adaptor (DMW-AC10G) and DC coupler (DMW-DCC8) are optional for extended use. The lens hood and cap protect the lens from dust and scratches. Always use genuine Panasonic accessories to ensure compatibility and optimal performance. These standard accessories provide everything needed to start capturing high-quality images and videos right out of the box.
6.3 Charging the Battery
To charge the battery, use the provided charger (DMW-BLC12E). Insert the battery into the charger, ensuring it is properly aligned and seated. Plug the charger into a power outlet and wait for the charging light to turn red. Once fully charged, the light will turn green. Avoid using third-party chargers to maintain safety and battery health. Charge the battery before first use, as it is not pre-charged. Always follow the manufacturer’s guidelines to prevent overheating or damage. Store the battery in a cool, dry place when not in use.
6;4 Inserting and Formatting the Memory Card
Open the card/battery door and insert the SD card into the slot, ensuring it clicks into place. Use Panasonic-recommended SD cards for compatibility. Format the card via the menu before use to ensure proper function. Always back up data before formatting, as it will be erased. During formatting or card access, avoid turning off the camera or removing the card to prevent data loss or damage. For 4K photo mode, use UHS Speed Class 3 cards for optimal performance. Proper card handling ensures reliable camera operation and data integrity.

Navigation and Controls
The DMC-FZ300 features an intuitive control layout with a mode dial, side/rear dials for focus and exposure, and an LVF button for switching between viewfinder and monitor. The AF/AE lock button ensures precise focus and exposure control, while the quick menu provides rapid access to frequently used settings for efficient shooting.
7.1 Mode Dial and Shooting Modes
The mode dial on the DMC-FZ300 offers a range of shooting modes to suit various photography needs. Intelligent Auto Mode optimizes settings automatically, while Intelligent Auto Plus allows adjustments for brightness and color. Programme AE Mode sets shutter speed and aperture automatically, providing flexibility. Aperture Priority (A) and Shutter Priority (S) modes enable manual control over aperture or shutter speed, respectively. Manual (M) Mode offers full control for advanced users. Additional modes like Creative Video Mode allow manual adjustments for video recording. The mode dial is easily accessible, enabling quick switching between modes to capture photos and videos effectively in different scenarios.
7.2 Side Dial and Rear Dial Functions
The side and rear dials on the DMC-FZ300 provide intuitive control over key camera settings. The side dial primarily adjusts focus, allowing precise control during shooting. In manual modes, it can also be used to set aperture or shutter speed. The rear dial complements this by enabling adjustments to aperture, shutter speed, and other parameters. Both dials feature customizable functions, accessed via the Fn2 button, which displays a guide for quick setting changes. This dual-dial system streamlines operations, making it easier to capture sharp, well-exposed images without navigating complex menus, enhancing the overall shooting experience for photographers of all skill levels.
7.3 LVF (Live View Finder) Button
The LVF button on the DMC-FZ300 toggles between the monitor and the electronic viewfinder (EVF). Pressing it switches the display, allowing users to choose their preferred viewing method. The EVF features an eye sensor that automatically activates when the eye is detected, enabling seamless transitions. This function can be enabled or disabled in the custom menu for convenience. The viewfinder also includes a diopter adjustment dial for sharp focus, accommodating users with varying vision needs. The high-resolution EVF provides clear previews, making it ideal for precise composition and reducing glare in bright conditions, enhancing the overall shooting experience for photographers.
7.4 Quick Menu and Customization
The DMC-FZ300 features a customizable Quick Menu (Q.MENU) for easy access to frequently used settings. Pressing the Q.MENU button displays a shortcut menu, allowing users to adjust settings like white balance, ISO, and AF mode. The menu can be navigated using the side dial or zoom lever, with adjustments made via the rear dial. Customization options enable users to tailor the camera to their preferences, such as assigning functions to FN buttons. This enhances workflow efficiency and ensures quick access to essential controls. The Quick Menu is context-sensitive, adapting to the current shooting mode for optimal usability, and can be personalized to suit individual needs.
Customizing the Camera
The Panasonic Lumix DMC-FZ300 offers extensive customization options through its Custom Menu, allowing users to tailor settings to their preferences. Function buttons can be assigned to frequently used features, while firmware updates ensure the camera stays up-to-date with the latest enhancements. This personalization empowers photographers to streamline their workflow and enhance creativity.
8.1 Custom Menu Options
The Panasonic Lumix DMC-FZ300 features a comprehensive Custom Menu, enabling users to adjust settings to suit their preferences. This menu allows for detailed configurations such as autofocus modes, exposure compensation, and white balance adjustments. Users can also customize the camera’s operation by assigning functions to specific buttons, enhancing workflow efficiency. Additionally, options for noise reduction, image stabilization, and burst shooting settings are available, providing photographers with precise control over their camera’s performance. By exploring these options, users can optimize the camera’s functionality to match their shooting style and creative goals.
8.2 Function Button Assignments
The Panasonic Lumix DMC-FZ300 allows users to assign custom functions to its buttons, enhancing operational efficiency. Assignable buttons include the Fn1, Fn2, and Fn4 buttons, which can be set to control features like ISO sensitivity, white balance, and focus modes. This customization enables quick access to frequently used settings, streamlining the shooting process. The camera’s menu provides a list of assignable functions, allowing users to tailor button assignments to their personal preferences. This feature is particularly beneficial for advanced users seeking to optimize their workflow for specific photography scenarios and styles.
8.3 Firmware Updates
Firmware updates for the Panasonic Lumix DMC-FZ300 are essential for enhancing camera performance and adding new features. Updates are available on Panasonic’s official support website and can be installed using an SD memory card. Ensure the camera is fully charged or use an AC adapter during the update process. Follow the instructions carefully to avoid interruptions, as they may damage the camera. Regularly checking for firmware updates ensures access to the latest improvements, such as bug fixes, feature enhancements, and compatibility upgrades. This helps maintain optimal camera functionality and performance for both still photography and video recording.

Troubleshooting and Maintenance
Regularly clean the sensor and lens to maintain image quality. Update firmware for optimal performance. Reset settings if issues arise and refer to the manual for solutions.
9.1 Common Issues and Solutions
The Panasonic Lumix DMC-FZ300 may encounter issues like blurry images, battery drain, or error messages. Clean the lens and sensor regularly to avoid smudges. For battery life, ensure proper charging using the original charger. If error messages appear, check connections or reset the camera. Update firmware for optimal performance. Refer to the manual for detailed troubleshooting steps to resolve these common problems effectively.
9.2 Cleaning and Maintenance Tips
Regularly clean the lens with a microfiber cloth and lens cleaning paper to avoid smudges. Use a soft, dry cloth for the camera body and viewfinder. Avoid harsh chemicals or excessive moisture. Store the camera in a dry, cool place to prevent mold. Turn off the camera before cleaning to protect internal components. Use a protective case to shield against dust and scratches. Clean the sensor gently with a brush or blower, following the manual’s guidelines. Ensure all accessories, like the battery and memory card, are handled with care to maintain optimal performance and longevity of your Panasonic Lumix DMC-FZ300.
9.3 Error Messages and Solutions
Common errors like “Lens Error” or “Memory Card Error” can occur. For lens issues, turn off the camera, wait, then restart. Ensure the lens is clean and undamaged. If the memory card error appears, format the card in the camera or replace it. “Sensor Cleaning Required” indicates manual cleaning; use a soft brush or blower. “Battery Exhausted” means the battery needs charging. For “File Error,” reformat the card. If errors persist, reset the camera to factory settings or update the firmware. Refer to the manual for specific troubleshooting steps to resolve these issues effectively and maintain camera functionality.

Warranty and Support
The Panasonic Lumix DMC-FZ300 is backed by a limited warranty covering manufacturing defects. For support, visit Panasonic’s official website for repair services, firmware updates, and customer assistance resources.
10.1 Warranty Information
The Panasonic Lumix DMC-FZ300 is covered by a limited warranty that protects against manufacturing defects. The warranty period varies by region but typically covers parts and labor for one year. Damage caused by misuse, accidents, or normal wear and tear is not included. For detailed warranty terms, visit Panasonic’s official website or refer to the provided documentation. The warranty ensures defective products are repaired or replaced, providing peace of mind for users. Panasonic’s support page offers additional resources and assistance for warranty-related inquiries.
10.2 Customer Support and Resources
Panasonic offers comprehensive support for the Lumix DMC-FZ300, including online resources and troubleshooting guides. Users can access the official support page for detailed manuals, firmware updates, and repair information. The website provides step-by-step solutions for common issues, ensuring optimal camera performance. Additional resources like the Owners Manual for Advanced Features and Basic Owners Manual are available for download. Panasonic’s customer support team is also reachable for personalized assistance, enhancing the overall user experience and ensuring satisfaction with the DMC-FZ300.