The Chamberlain D2101 installation manual is essential for proper setup and operation. It provides detailed instructions, safety guidelines, and system requirements for a successful installation experience.
1.1 Overview of the Chamberlain D2101 Garage Door Opener
The Chamberlain D2101 is a reliable chain-drive garage door opener designed for durability and smooth operation. It features a robust motor, quiet performance, and compatibility with various Chamberlain accessories. This model is ideal for standard garage doors, offering ease of installation and maintenance. The D2101 includes advanced safety sensors and a user-friendly design, making it a popular choice for homeowners seeking a dependable garage door solution.
1.2 Purpose of the Installation Manual
The Chamberlain D2101 installation manual serves as a comprehensive guide for installing, configuring, and maintaining the garage door opener. It provides step-by-step instructions, safety precautions, and troubleshooting tips to ensure proper setup and operation. The manual is designed to assist both professionals and DIY enthusiasts in understanding system requirements and optimizing performance; By following the manual, users can ensure compliance with safety standards and achieve reliable functionality of their garage door opener.
System Requirements and Compatibility
The Chamberlain D2101 manual outlines system requirements and compatibility, ensuring proper installation and optimal performance with compatible garage doors and accessories for safe operation.
2.1 Garage Door Specifications for D2101 Compatibility
The Chamberlain D2101 is designed for standard residential garage doors. Ensure your door is properly balanced, with a maximum weight of 350 pounds. The opener works with doors measuring 7 to 8 feet in height and 8 to 18 feet in width. Compatibility includes sectional, steel, wood, and insulated doors. Verify the door’s track system aligns with the opener’s rail setup for smooth operation. Proper door alignment and balance are critical for optimal performance and safety.
2.2 Electrical Requirements for Installation
The Chamberlain D2101 requires a 120V, 60Hz power supply; Ensure a dedicated 20-amp circuit for reliable operation. Use a GFCI-protected outlet near the opener. The motor unit should be grounded, and avoid shared circuits with high-power devices. Verify all connections meet local electrical codes. Consult a licensed electrician if unsure or if modifications are needed for compatibility and safety.
2.3 Compatibility with Chamberlain Accessories
The Chamberlain D2101 is designed to work seamlessly with a range of Chamberlain accessories, including remote controls, keyless entry systems, and smart home devices. These accessories enhance functionality and convenience, ensuring a fully integrated garage door opener system. Compatibility is guaranteed with Chamberlain-branded products, offering reliable performance and easy installation. Always use Chamberlain-approved accessories to maintain optimal functionality and warranty coverage.
Safety Precautions and Warnings
Always follow warning labels and instructions to ensure safe installation. Disconnect power before starting work to avoid electrical hazards. Use proper tools to prevent injuries.
3.1 Important Safety Information
Always read and follow all safety guidelines in the Chamberlain D2101 manual. Be aware of electrical hazards and ensure proper handling of tools. Keep children away during installation. Wear protective gear, including gloves and safety glasses. Never operate the door without safety sensors installed. Familiarize yourself with emergency release mechanisms to avoid accidents. Failure to comply may result in injury or damage. Always test safety features post-installation.
3.2 Warning Labels and Their Significance
Warning labels on the Chamberlain D2101 are critical for ensuring safety during installation and operation. They highlight potential hazards, such as electrical risks or moving parts, to prevent accidents. Ignoring these labels can lead to injuries or damage. Always read and follow the instructions provided in the manual and on the labels to ensure a safe and proper setup of your garage door opener system.
Tools and Materials Needed
Essential tools include a wrench, screwdrivers, drill, and hex keys. Additional materials like lag screws, brackets, and a ladder are also required for installation.
4.1 List of Required Tools
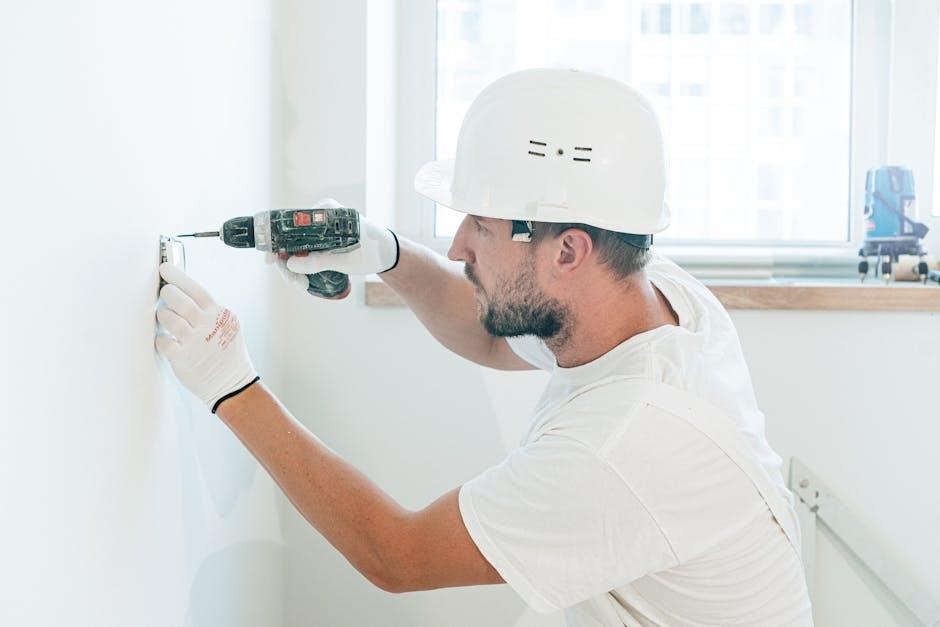
To install the Chamberlain D2101, you will need a ladder, screwdrivers (Phillip and flathead), wrenches (adjustable and socket), pliers, a level, measuring tape, and a drill. Ensure all tools are readily available to streamline the process. Refer to the manual for specific sizes and types of tools required for various components.
4.2 Additional Materials to Have on Hand
Having extra materials ensures a smooth installation process. Keep lubricants for moving parts, cleaning supplies for the garage door, and spare fasteners on hand. A ladder or step stool may be necessary for reaching high areas. Additionally, a pencil and markers can help mark installation points. It’s also wise to have a backup power source and a torque wrench for precise adjustments. These items will help you complete the installation efficiently and effectively.
Unpacking and Inventory
Carefully unpack the Chamberlain D2101 garage door opener and verify all components are included. Ensure no damage occurred during shipping and all parts are accounted for.
5.1 Unpacking the Chamberlain D2101 Opener
Carefully unpack the Chamberlain D2101 opener and inspect for damage. Ensure all components, including the motor unit, rail, trolley, and accessories, are included. Refer to the installation manual for a detailed inventory list. Verify the model number matches the packaging. If any items are missing or damaged, contact Chamberlain support immediately. Keep the original packaging for future reference and follow the manual’s guidance for proper unpacking and preparation.
5.2 Inventory of Components and Accessories
The Chamberlain D2101 package includes a motor unit, rail assembly, trolley, chain, emergency release, safety sensors, remote controls, wall control, keyless entry, mounting hardware, and the installation manual. Verify all components are present and in good condition before starting. Ensure no parts are damaged or missing to avoid delays. This step is crucial for a smooth installation process and proper functionality of the garage door opener system.
Step-by-Step Installation Guide
This section provides a detailed, sequential process for installing the Chamberlain D2101, including preparing the door, installing the rail, mounting the motor, and connecting electrical components.
6.1 Preparing the Garage Door for Installation
Before installing the Chamberlain D2101, ensure the garage door is balanced and functions smoothly. Check springs and cables for damage or wear. Remove any existing automatic opener hardware. Clean the door and frame to ensure proper alignment. Verify the door’s weight and dimensions match the opener’s specifications. Inspect for any obstructions or damage that could interfere with installation or operation. This preparation ensures a safe and efficient setup process.
6.2 Installing the Rail and Trolley System
Begin by aligning the rail sections and attaching them to the trolley using the provided hardware. Mount the rail to the garage ceiling or wall beams, ensuring proper alignment. Secure all connections tightly to maintain stability. Double-check the rail’s level and alignment before proceeding. Refer to the manual for specific torque and spacing requirements. Ensure the trolley system is evenly balanced for smooth operation.
6.3 Mounting the Motor Unit and Drive System
Mounting the motor unit and drive system is a critical step. Ensure the motor is securely fastened to the garage ceiling, following the manual’s instructions. Align the drive system properly with the rail, ensuring smooth operation. Double-check all bolts and connections for tightness. Refer to the Chamberlain D2101 manual for specific torque specifications and alignment guidelines to avoid installation errors. Always follow safety precautions when working with power tools and electrical components.
6.4 Installing the Emergency Release and Safety Sensors
Install the emergency release handle securely near the garage door. Mount safety sensors on both sides of the door, ensuring proper alignment and clearance. Test sensors to confirm they detect obstacles accurately.
6.5 Wiring and Electrical Connections
Ensure the motor unit is properly grounded and connected to a 120V AC power supply. Carefully connect the wires from the motor to the control panel, following the manual’s wiring diagram. Secure all connections tightly to avoid loose wires. Connect the safety sensors and emergency release mechanism according to the instructions. Double-check all wiring for correct polarity and ensure no wires are pinched or damaged. Use cable clips to organize and secure the wires neatly. Test the electrical system before finalizing the installation.
6.6 Final Assembly and Alignment
After installing all components, ensure proper alignment of the rail and trolley system; Tighten all bolts and screws securely. Verify the chain or belt is properly tensioned and aligned. Check the motor unit’s mounting for stability. Ensure safety sensors are correctly aligned and functioning. Test the door’s movement to confirm smooth operation. Make final adjustments as needed for optimal performance and safety. Refer to the manual for precise alignment specifications.

Configuring the Opener
Configure the Chamberlain D2101 by setting up the chain drive, adjusting motor limits, and testing door operation for smooth and precise functionality.
7.1 Setting Up the Chain Drive System
Setting up the chain drive system involves assembling the rail and trolley, then attaching the chain to the trolley and motor unit. Ensure the chain is properly seated and aligned with the sprocket for smooth operation. Adjust the chain tension as per the manual, ensuring it’s not too tight or loose. Test the system by manually pulling the chain to check for freedom of movement and proper alignment. Lubricate the chain if necessary to minimize noise and ensure longevity. Regular maintenance, such as lubrication, is recommended to keep the system running smoothly.
7.2 Adjusting the Motor and Travel Limits
Adjusting the motor and travel limits ensures smooth operation. Loosen the screws on the motor unit, then adjust the travel limits to match your door’s size. Test the door’s full cycle to ensure proper alignment. Tighten the screws once satisfied. Refer to the manual for precise measurements and troubleshooting tips. If issues persist, consult Chamberlain’s support resources or the online FAQ section for additional guidance.
7.3 Testing the Garage Door Operation
After installation, test the garage door operation to ensure smooth and proper function. Check that the door opens and closes fully, stopping correctly at set limits. Verify that safety sensors detect obstacles and reverse the door as intended. Test remote control and wall button functionality to confirm consistent response. Ensure all lights and alarms operate during testing. Address any issues promptly to guarantee safe and reliable performance of your Chamberlain D2101 system.
Programming Remotes and Keyless Entry
Program your Chamberlain D2101 remote and keyless entry by following the manual’s step-by-step guide. Syncing ensures secure and convenient access to your garage door system.
8.1 Programming the Remote Control
To program the remote control for the Chamberlain D2101, locate the “Learn” button on the motor unit, typically near the light bulb. Press and hold it until the light blinks, indicating pairing mode. Then, press the desired button on the remote. The light will stop blinking once synced. Ensure the remote is within range and uses the correct frequency. If issues arise, check batteries, reset the remote, or consult the manual for troubleshooting steps.
8.2 Setting Up the Keyless Entry System
To set up the keyless entry system for your Chamberlain D2101, begin by locating the programmer button on the motor unit. Press and hold it until the LED light flashes. Enter your desired code on the keyless entry pad, then press the “ENTER” or “#” button. The system will confirm with a flash or click. Test the code to ensure it works properly. Repeat for additional codes if needed. Always refer to the manual for specific timing and sequences. Ensure security by using unique codes and avoiding common sequences. Test the system thoroughly after setup to confirm functionality. This process ensures convenient and secure access to your garage. Proper synchronization is essential for reliable operation.
8.3 Syncing Additional Accessories
Syncing additional accessories with the Chamberlain D2101 ensures seamless integration with your garage door system. Follow the manual’s specific instructions for each accessory type. Confirm compatibility before starting the syncing process. Use the remote control or keyless entry system to initiate the syncing sequence. Ensure all devices are properly paired according to the guidelines provided. Refer to the online resources or manual for detailed steps and troubleshooting tips to ensure successful synchronization.
Testing and Final Check
Perform a full system test to ensure proper operation. Verify safety sensors, door alignment, and smooth movement. Address any issues before finalizing the installation process.
9.1 Performing a Full System Test
Performing a full system test ensures the Chamberlain D2101 operates safely and efficiently. Begin by testing the garage door’s opening and closing functionality smoothly. Verify that safety sensors detect obstacles and reverse the door as designed. Check the remote control and keyless entry for reliable operation. Ensure all components are properly aligned and functioning seamlessly. This comprehensive test confirms successful installation and readiness for daily use.
9.2 Checking Safety Features and Sensors
Ensure all safety sensors are properly aligned and functioning. Test the safety reversal system by obstructing the sensor beam during door operation. Verify the door reverses upon sensing an obstruction. Check the emergency release handle functionality and ensure it disengages the trolley. Review the manual for specific testing procedures and ensure compliance with safety standards. Proper sensor alignment and functionality are critical for safe operation and to prevent accidents.
9.3 Ensuring Proper Door Alignment and Movement
After installation, verify the garage door alignment and movement by checking all hardware for tightness. Ensure the door opens and closes smoothly without obstructions. Test the emergency release mechanism to confirm it disengages properly. Adjust the door’s level and balance if necessary. Check that safety sensors are aligned correctly to prevent accidents. Perform a full cycle test to ensure seamless operation and make any final adjustments as needed for optimal performance.
Maintenance and Troubleshooting
Regular lubrication of moving parts and checking sensor alignment ensures smooth operation. Common issues like misalignment or sensor malfunctions can be resolved by resetting the system or cleaning sensors.
10.1 Regular Maintenance Tips
Regular maintenance ensures optimal performance of your Chamberlain D2101. Lubricate moving parts annually, inspect chains for wear, and clean sensors. Tighten hardware periodically and check door balance. Keep the garage door clean and well-aligned. Replace worn-out parts promptly to avoid system strain. Schedule seasonal checks to prepare for extreme weather conditions. Refer to the manual for detailed maintenance schedules and procedures to extend the opener’s lifespan and reliability. Proper upkeep prevents unexpected malfunctions and ensures smooth operation.
10.2 Common Issues and Solutions
Common issues with the Chamberlain D2101 include noise during operation, door misalignment, and sensor malfunctions. Solutions involve lubricating moving parts, adjusting the chain drive, and ensuring sensors are properly aligned. Remote control issues can be resolved by reprogramming or replacing batteries. For persistent problems, refer to the troubleshooting guide in the manual or contact Chamberlain support for assistance.
10.3 Resetting the Opener and System Restore
To reset the Chamberlain D2101 opener, disconnect power, press and hold the learn button for 10 seconds, then reconnect power. This restores factory settings. For system restore, access the control panel, navigate to settings, and select “Reset to Factory Defaults.” Note that this will erase all programmed remotes and keyless entries, requiring reprogramming after the reset. Always test the system post-reset to ensure proper functionality and safety features are active.
Warranty Information
The Chamberlain D2101 is backed by a comprehensive warranty covering parts and labor for a specified period. Registration is required to activate and maintain warranty benefits effectively.
11.1 Understanding the Chamberlain Warranty
The Chamberlain warranty provides coverage for the D2101 garage door opener, ensuring protection against defects in materials and workmanship. The warranty period varies by component, with the motor typically covered for a longer duration. It’s essential to review the terms to understand what is included and any limitations. Proper registration and adherence to maintenance guidelines may be required to maintain warranty validity. Always refer to the official documentation for detailed conditions.
11.2 Registering Your Product
Registering your Chamberlain D2101 ensures warranty validation and access to exclusive updates. Visit the official Chamberlain website and navigate to the product registration section. Provide the required details, such as the product serial number, purchase date, and your contact information. This process helps Chamberlain maintain accurate records and provides you with enhanced support services. Registration is quick and ensures your product is covered under the manufacturer’s warranty terms.
11.3 Terms and Conditions of the Warranty
The warranty for the Chamberlain D2101 is subject to specific terms and conditions. It typically covers defects in materials and workmanship for a specified period. Registration is often required for warranty activation, and improper installation or misuse may void coverage. The warranty may not apply to normal wear and tear or damage caused by external factors. Always refer to the official documentation for detailed terms and conditions to ensure compliance and maintain warranty validity.

Customer Support and Resources
Chamberlain offers comprehensive support through their website, including FAQs, manuals, and a support forum. Contact customer service for assistance or visit their online resources for troubleshooting.
12.1 Contacting Chamberlain Customer Support
For assistance with the Chamberlain D2101, contact customer support via phone, live chat, or support tickets. Visit the official website for contact details, support hours, and resources. Additional help is available through online forums and FAQs. Ensure to have your product details ready for efficient service. Chamberlain’s customer support team is available to address installation, troubleshooting, and warranty inquiries. Visit www.chamberlain.com for more information.
12.2 Online Resources and FAQs
Chamberlain provides extensive online resources, including FAQs, to assist with the D2101 installation. Visit their official website for detailed guides, troubleshooting tips, and downloadable manuals. The support forum offers community discussions and expert advice, ensuring comprehensive assistance for any installation or operational queries.
12.3 Community Forums and User Discussions
Community forums offer a platform for users to share experiences, ask questions, and find solutions. The Chamberlain D2101 support forum is available for discussing installation, troubleshooting, and maintenance. While there are currently no messages for this device, it serves as a growing resource for users seeking advice or tips from peers. Engaging with these forums can provide valuable insights and support from experienced users and experts alike.