Curling irons are essential tools for achieving various hairstyles, with barrel size playing a key role in determining curl type and tightness. Barrel sizes, measured in millimeters, range from 3/8 inch (9.5mm) for tight curls to 2 inches (50.8mm) for loose waves, making them versatile for different hair lengths and styles.
Overview of Curling Irons
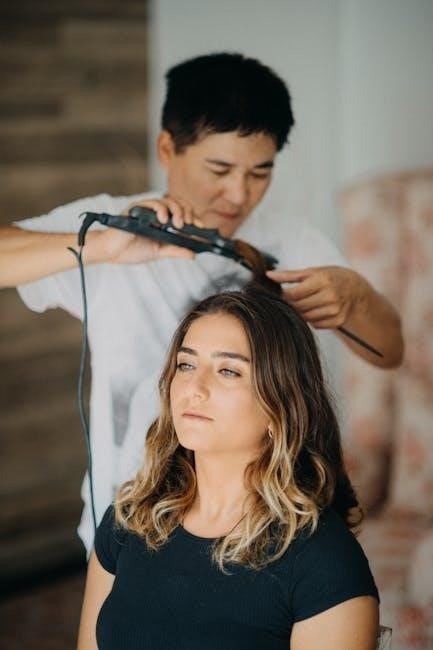
Curling irons are versatile styling tools designed to create a wide range of curls, waves, and textures. They consist of a heated barrel and a handle, allowing users to wrap hair around the barrel to achieve desired styles. Available in various barrel sizes, materials, and temperature settings, curling irons cater to different hair types and styling needs. Their popularity stems from their ability to deliver long-lasting results, making them a staple in both professional and at-home hair care routines. By choosing the right barrel size and settings, users can customize their look, from tight spirals to loose, beachy waves, with ease and precision.
Importance of Barrel Size
Barrel size is crucial in determining the type of curls or waves achieved with a curling iron. Smaller barrels create tighter, more defined curls, while larger barrels produce loose, beachy waves. The right barrel size ensures even heat distribution, minimizing damage and enhancing styling efficiency. It also impacts the versatility of the tool, as different sizes cater to various hair lengths and textures. Choosing the correct barrel size is essential for achieving the desired aesthetic, whether it’s tight spirals or soft, flowing waves. This customization makes barrel size a key factor in selecting the ideal curling iron for specific styling needs.
Understanding Barrel Sizes
Curling iron barrels range from 3/8 inch (9.5mm) to 2 inches (50.8mm), offering versatility for tight curls, loose waves, and everything in between, catering to diverse styling needs and preferences.
3/8 Inch Barrel
The 3/8 inch (9.5mm) barrel is ideal for creating tight, defined curls and ringlets. It’s best suited for short to medium-length hair, offering precise control for smaller sections. This size is perfect for achieving corkscrew curls or spiral waves, adding volume and texture. For those with finer hair, it helps create long-lasting, bouncy curls without damaging the strands. However, it may not be the best choice for longer hair, as it can be time-consuming. Regular cleaning and proper storage are essential to maintain its performance and extend its lifespan. This barrel size is a favorite for styling shorter layers or adding detail to updos.
1 Inch Barrel
The 1 inch (25.4mm) barrel is a versatile option for creating classic, medium-sized curls. It works well for most hair lengths and types, delivering smooth, polished waves. This size is particularly popular for achieving loose, beachy curls or adding volume to medium to long hair; The 1 inch barrel is also suitable for thicker hair, as it can handle larger sections without compromising style. Its moderate size makes it a great all-around choice for everyday use, offering a balance between tightness and looseness. Regular maintenance ensures optimal performance, while proper storage helps extend its durability and effectiveness over time.
1.5 Inch Barrel
The 1.5 inch (38.1mm) barrel is ideal for creating loose, flowing waves and larger curls. It is best suited for longer hair lengths, as it allows for more hair to be wrapped around the barrel, resulting in soft, voluminous styles. This size is also great for thicker hair types, as it can handle larger sections without sacrificing style quality. The 1.5 inch barrel is perfect for achieving beachy, effortless waves or adding volume to long hair. Regular cleaning and proper storage are essential to maintain its performance and extend its lifespan. This barrel size is a favorite among those seeking a relaxed, natural curls look.
2 Inch Barrel
The 2 inch (50.8mm) barrel is the largest standard size, ideal for creating loose, flowing waves and adding volume. It works best for long hair, as it can handle larger sections, resulting in soft, relaxed curls. This barrel is also great for thicker hair types, as it can handle more hair without losing shape. For fine hair, it adds volume and movement without tight curls. The 2 inch barrel is perfect for achieving beachy, effortless styles or voluminous blowouts. Its versatility makes it a popular choice among those seeking a more natural, undone look.
How to Choose the Right Barrel Size
Selecting the right barrel size depends on your hair length and desired curl type. Smaller barrels create tight curls, while larger ones produce loose waves, ensuring versatility for any style.
Hair Length Considerations
Hair length significantly influences the choice of barrel size. Short hair (above the chin) works best with smaller barrels (3/8″ or 1″) for tight, defined curls. Medium-length hair (shoulder-length) suits 1″ to 1.5″ barrels, creating bouncy, versatile curls. Long hair (below the shoulders) benefits from larger barrels (1.5″ or 2″) to achieve loose, flowing waves. Using a barrel too small for long hair can lead to tangled strands, while a barrel too large for short hair may not hold the curl. Matching barrel size to hair length ensures optimal results and minimizes damage.
Desired Curl Type
The desired curl type significantly influences barrel size selection. Smaller barrels (3/8″ or 1″) create tight, defined curls, ideal for sleek, polished looks. Medium barrels (1″ to 1.5″) produce classic, bouncy curls, suitable for everyday styling. Larger barrels (1.5″ or 2″) generate loose, beachy waves, perfect for a relaxed, effortless vibe. Tighter curls require more time and precision, while looser waves are quicker to achieve. Choosing the right barrel size ensures the desired curl texture, whether you prefer vintage ringlets, modern beach waves, or anything in between. This customization makes curling irons versatile tools for achieving personalized hairstyles.
Hair Thickness and Barrel Size
Hair thickness plays a crucial role in selecting the appropriate barrel size. Thicker hair benefits from larger barrels (1.5″ or 2″) to minimize tangles and damage, while thinner hair suits smaller barrels (3/8″ or 1″) for defined curls. Larger barrels distribute heat more evenly over thicker strands, preventing hot spots. Smaller barrels provide tighter grip and structure for finer hair. Balancing barrel size with hair thickness ensures optimal styling results without compromising hair health or definition. This tailored approach helps achieve the desired curl pattern while maintaining hair integrity and minimizing potential damage.
Measuring Barrel Diameter
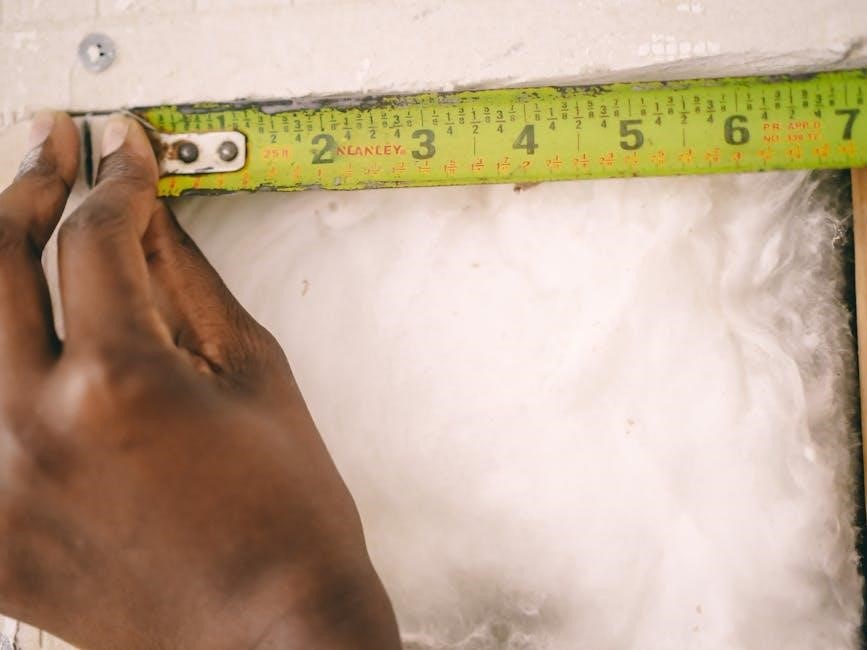
Measure the barrel’s circumference using a ruler or tape, then divide by π (3.14) to find the diameter. This method ensures accurate sizing for optimal curl results.
Step-by-Step Measurement Guide
To measure the barrel diameter, start by wrapping a flexible measuring tape or string around the barrel’s circumference. Mark the point where the tape overlaps and measure the length in millimeters. Divide this measurement by π (3.14) to obtain the diameter. For example, a circumference of 31.4mm yields a 10mm diameter. This method provides precise measurements, ensuring you select the right barrel size for your desired curl type and hair length. Accurate sizing is crucial for achieving the perfect waves or curls, whether you’re using a 3/8″ or 2″ barrel.
Importance of Accurate Measurement
Accurate measurement of the curling iron barrel is crucial for achieving the desired curl pattern and ensuring optimal styling results. Incorrect sizing can lead to tight, uneven curls or loose waves that lack definition. Proper measurement helps match the barrel size to your hair length and type, preventing damage from excessive heat or tension. It also ensures the curling iron’s effectiveness, as the wrong size can hinder performance. By measuring precisely, you can select the ideal barrel diameter for your styling needs, whether you’re aiming for tight ringlets or flowing waves. This step is foundational for mastering curling iron techniques.
Impact of Barrel Material
Barrel material significantly affects styling performance and hair health. High-quality materials like ceramic, tourmaline, and advanced coatings ensure even heat distribution, reduce frizz, and prevent damage, enhancing curl longevity and definition.
Ceramic vs. Tourmaline
Ceramic and tourmaline barrels offer distinct benefits for styling. Ceramic barrels are known for even heat distribution, minimizing frizz and damage, making them ideal for most hair types. Tourmaline, a gemstone emitting negative ions, enhances shine and smoothness, especially for damaged or color-treated hair. Both materials reduce frizz but cater to different needs: ceramic for consistent styling and tourmaline for added shine and protection. Choosing between them depends on hair type and desired results, ensuring optimal styling outcomes.
metallic materials
Metallic materials, such as stainless steel or titanium, are commonly used in curling irons for their durability and heat-conductive properties. These barrels heat up quickly and maintain consistent temperatures, making them effective for creating tight, defined curls. However, metallic surfaces can sometimes cause hair to friction, leading to potential damage if not used carefully. They are best suited for those with thicker hair or for achieving sharp, long-lasting curls. Despite their durability, metallic barrels may lack the advanced benefits of ceramic or tourmaline coatings, which offer smoother styling and reduced frizz.
Advanced Materials
Advanced materials in curling irons include nano-ceramic, tourmaline, and titanium oxides, which enhance heat distribution and reduce frizz. These materials are designed to minimize hair damage while creating smooth, sleek curls; Tourmaline, a gemstone-derived coating, emits negative ions to neutralize static and add shine. Ceramic-infused barrels ensure even heat transfer, preventing hotspots that can harm hair. Some high-end models incorporate titanium for lightweight durability and rapid heating. These advanced materials are ideal for those seeking high-performance tools that deliver professional-quality results with minimal effort, making them a worthwhile investment for frequent styling and hair health.
Temperature and Barrel Size
Curling iron temperature settings vary by barrel size. Smaller barrels (3/8 inch) require lower temperatures, while larger barrels (2 inch) need higher heat for loose curls.
Temperature Settings by Barrel Size
Temperature settings vary by barrel size to ensure optimal styling without damage. Smaller barrels (3/8 inch) typically use lower temperatures (around 300°F) to avoid overheating and create tight curls. Medium barrels (1 inch) are often set between 350°F to 400°F for classic curls. Larger barrels (1.5-2 inches) require higher temperatures (400°F to 450°F) to achieve loose waves. Adjusting heat based on barrel size and hair type ensures effective styling while protecting hair from heat damage. Proper temperature control enhances curl longevity and prevents breakage, making it crucial for achieving desired results. Always consider hair thickness and type when selecting temperature settings. This balance ensures healthy, long-lasting curls.
Popular Curling Iron Brands
Prominent brands like T3, GHD, and Dyson offer high-quality curling irons with diverse barrel sizes, catering to various hair types and styling needs. These brands are trusted for their advanced technology.
Top Brands Overview
Leading brands like T3, GHD, and Dyson dominate the curling iron market with their innovative designs and advanced features. These brands offer a wide range of barrel sizes, from 3/8 inch to 2 inches, catering to diverse hair types and styling preferences. T3 is known for its high-quality materials and precise temperature control, while GHD excels in ionic technology for frizz-free curls. Dyson, with its Airwrap technology, revolutionizes curling without extreme heat. Additionally, brands like Conair provide affordable yet efficient options with ceramic-coated barrels. These brands consistently deliver performance, durability, and versatility, making them favorites among stylists and users alike.
Brand-Specific Barrel Sizes
Curling iron brands offer diverse barrel sizes to suit various hairstyles. T3 provides barrels from 3/8 inch (9.5mm) to 1.5 inches (38mm), ideal for tight curls to loose waves. GHD offers 1 inch (25.4mm) to 2 inches (50.8mm), catering to medium to loose styles. Dyson’s Airwrap uses multiple attachments for different curl types without extreme heat. Conair and Remington provide affordable options with sizes ranging from 5/8 inch (15.9mm) to 1.75 inches (44.5mm). These brand-specific sizes help users achieve their desired look, whether it’s tight ringlets or beachy waves.
Maintenance and Care
To maintain your curling iron, clean the barrel regularly with a soft cloth and mild cleanser, avoiding harsh chemicals. Store it in a heat-resistant pouch or stand to prevent damage. Always allow the iron to cool before storage to preserve its longevity and performance.
Cleaning the Barrel
Cleaning the barrel of your curling iron is crucial for maintaining its performance and preventing residue buildup. Always unplug the iron before cleaning and allow it to cool. Use a soft, damp cloth with a mild cleanser to wipe away product residue, avoiding the handle. For tougher buildup, a gentle scrub with a non-abrasive sponge may be necessary. Never submerge the iron in water or use harsh chemicals, as this can damage the material. Regular cleaning ensures optimal heat distribution and prevents damage to your hair. For added protection, wear heat-resistant gloves during the process. Clean the barrel after every few uses for best results.
Storage Tips
Proper storage of your curling iron ensures longevity and safety. Always allow the iron to cool completely before storing to prevent heat damage. Use a heat-resistant storage bag or case to protect the barrel and handle. Store in a dry place, away from direct sunlight and moisture. For added protection, separate the barrel from the handle if possible. Avoid stacking other items on top of the iron to prevent scratching. Consider using a curling iron organizer or hanging storage to keep your tools tidy. Regularly inspect the cord for tangles or damage before storing. Proper storage maintains your curling iron’s performance and extends its lifespan.
Curling Iron Size Chart
A curling iron size chart provides a visual guide to barrel diameters, helping you choose the right size for your hair length and desired curl type effectively.
Visual Guide to Barrel Sizes
A visual guide to barrel sizes helps users quickly identify the right curling iron for their needs. Sizes range from 3/8 inch (9.5mm) for tight curls to 2 inches (50.8mm) for loose waves. Each size corresponds to specific curl patterns: 3/8″ for tight ringlets, 1″ for classic curls, 1.5″ for soft waves, and 2″ for beachy, loose styles. Use this chart to match your hair length and desired style with the appropriate barrel size. This visual tool simplifies the selection process, ensuring the best results for your hairstyle goals.
Styling Techniques
Curling iron sizes offer various styling options. Smaller barrels create tight curls, while larger ones produce loose waves. Techniques vary, ensuring versatile hairstyles for all preferences and hair types.
Techniques for Each Barrel Size
Smaller barrels (3/8″ to 1″) are ideal for tight curls and ringlets, requiring smaller hair sections and precise wrapping. Medium barrels (1.5″) create classic, bouncy curls, suitable for most hair types. Larger barrels (2″) produce loose, beachy waves, using bigger sections for a relaxed look. Adjust temperature based on hair thickness and desired curl longevity. For tighter curls, wrap hair closely around the barrel, while looser styles benefit from a more relaxed wrap. Proper sectioning and tension ensure optimal results. Each size offers unique styling potential, catering to various hair lengths and desired aesthetics.
Hair Type and Barrel Size
Hair type and barrel size are closely correlated. Smaller barrels suit short, fine hair for tight curls, while larger barrels work best for long, thick hair seeking loose waves.
Matching Barrel Size to Hair Type
Matching the barrel size to your hair type ensures optimal styling results. For fine or damaged hair, smaller barrels (3/8″ or 1″) are ideal, as they create tight, defined curls without causing excessive heat damage. Medium hair types benefit from 1″ to 1.5″ barrels, which produce classic, bouncy curls. Coarser or thicker hair works best with larger barrels (1.5″ to 2″), achieving loose, effortless waves. The right barrel size enhances curl formation and minimizes damage, making it essential to tailor your choice to your hair’s unique texture and desired style for the best outcomes.
Celebrity Stylist Recommendations
Celebrity stylists recommend choosing curling iron sizes based on hair length and desired curl type. Smaller barrels are ideal for short hair and tight curls, while larger barrels create loose waves, a must-have for versatile styling.
Expert Insights
Experts emphasize the importance of matching barrel size to hair type and desired results. For tighter curls, smaller barrels (3/8 inch or 9.5mm) are ideal, while larger barrels (1.5-2 inches or 38-50.8mm) create loose waves. Celebrity stylists often recommend using a 1-inch barrel for versatile, classic curls. To ensure accuracy, measure the barrel’s diameter with a ruler or by calculating the circumference. For fragile or damaged hair, wider barrels with lower heat settings are advised to prevent damage. By understanding these nuances, users can achieve professional-grade styling effortlessly at home.
Troubleshooting Common Issues
Common issues include uneven curls, hair damage, and lackluster results. Ensure correct barrel size for hair length, avoid excessive heat, and use heat protectants to prevent damage and achieve desired styles;
Solutions for Typical Problems
For uneven curls, ensure the barrel size matches your hair length and desired curl type. To prevent hair damage, use a heat protectant spray and avoid excessive temperatures. If curls lack longevity, try using a lower barrel size for tighter, longer-lasting results. For frizz, use a ceramic or tourmaline barrel, as they reduce frizz and enhance smoothness. To avoid hot spots, clean the barrel regularly and store it properly. Finally, for loose waves, opt for a larger barrel size and wrap hair loosely around it. These tips help achieve professional-looking curls at home with minimal effort.
Future Trends
Future curling irons may feature smart technology for personalized styling, adjustable barrel sizes, and advanced materials like nanoceramic for faster, damage-free styling experiences.
Emerging Technologies
Emerging technologies in curling irons include smart devices with AI for personalized styling recommendations. Adjustable barrel sizes and nanoceramic coatings promise faster, damage-free results. Innovations like automatic temperature adjustment and multi-functional designs are gaining traction. Eco-friendly materials and energy-efficient heating systems are also being explored. These advancements aim to enhance user experience, reduce styling time, and cater to diverse hair types and styles. The integration of smart sensors and app connectivity is expected to revolutionize the curling iron market, offering real-time feedback for optimal styling. Such technologies are reshaping the future of hair care, making curling irons more intuitive and effective than ever.
Safety Tips
Always use heat-resistant gloves and keep a safe distance from flammable materials. Avoid touching the barrel to prevent burns. Regularly inspect cords for damage. Use a heat protectant spray to minimize hair damage. Keep curling irons out of reach of children and ensure they cool down before storage. Follow the manufacturer’s temperature guidelines to avoid overheating. Never leave a curling iron unattended while in use. Proper safety precautions ensure a safe and effective styling experience.
Precautions and Best Practices
When using a curling iron, always preheat it on a heat-resistant surface and use a thermal mat to protect your countertop. Avoid excessive heat for fine or damaged hair, and opt for lower temperatures to prevent breakage. Use a heat protectant spray to shield your hair from damage. Never wrap hair around the barrel for more than 5-7 seconds to avoid burns. Allow the iron to cool completely before storing it. Regularly clean the barrel to remove residue and ensure optimal performance. Always follow the manufacturer’s guidelines for temperature settings and usage. Prioritize hair health by avoiding frequent styling with high heat.
Q&A
Q: What is the ideal barrel size for my hair type?
A: Barrel sizes range from 3/8 inch (9.5mm) to 2 inches (50.8mm). Choose smaller sizes for tight curls and larger sizes for loose waves, based on your hair length and desired style.
Frequently Asked Questions
Q: What are the standard barrel sizes for curling irons?
A: Barrel sizes range from 3/8 inch (9.5mm) to 2 inches (50.8mm), catering to different hair lengths and desired curl types.
Q: How do I choose the right barrel size for my hair?
A: Smaller barrels (3/8 inch) create tight curls, while larger barrels (1.5-2 inches) produce loose waves. Match the size to your hair length and desired style.
Q: Can I measure my curling iron barrel at home?
A: Yes, measure the barrel’s circumference or diameter using a ruler or caliper for accurate sizing.
Q: Does barrel size affect heat distribution?
A: Yes, smaller barrels focus heat for tighter curls, while larger barrels distribute heat for broader waves.